Hedging care & growing guide

Privet Hedging Care Guide: Planting, Spacing and Pruning

Privet hedging establishes best in moist but well-drained soil when it is planted at the same depth it was growing before, watered through dry weather and trimmed regularly during the growing season. Common Privet, Golden Privet and native Wild Privet are all vigorous and adaptable, but they differ in foliage colour, winter leaf retention, growth rate, wildlife value and the root types currently available. This guide explains how to choose, plant, space, water, feed, prune and troubleshoot plants from our Privet hedging range.

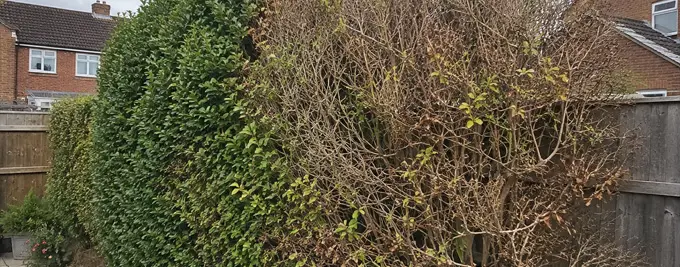
Privet is usually described as semi-evergreen in the UK. In a mild, sheltered garden, Common and Golden Privet may hold most of their foliage through winter. In a colder or exposed position, they can lose considerably more leaves and regrow in spring. Wild Privet is naturally more prone to leaf loss. No variety should therefore be sold as a guaranteed year-round evergreen screen in every UK garden.

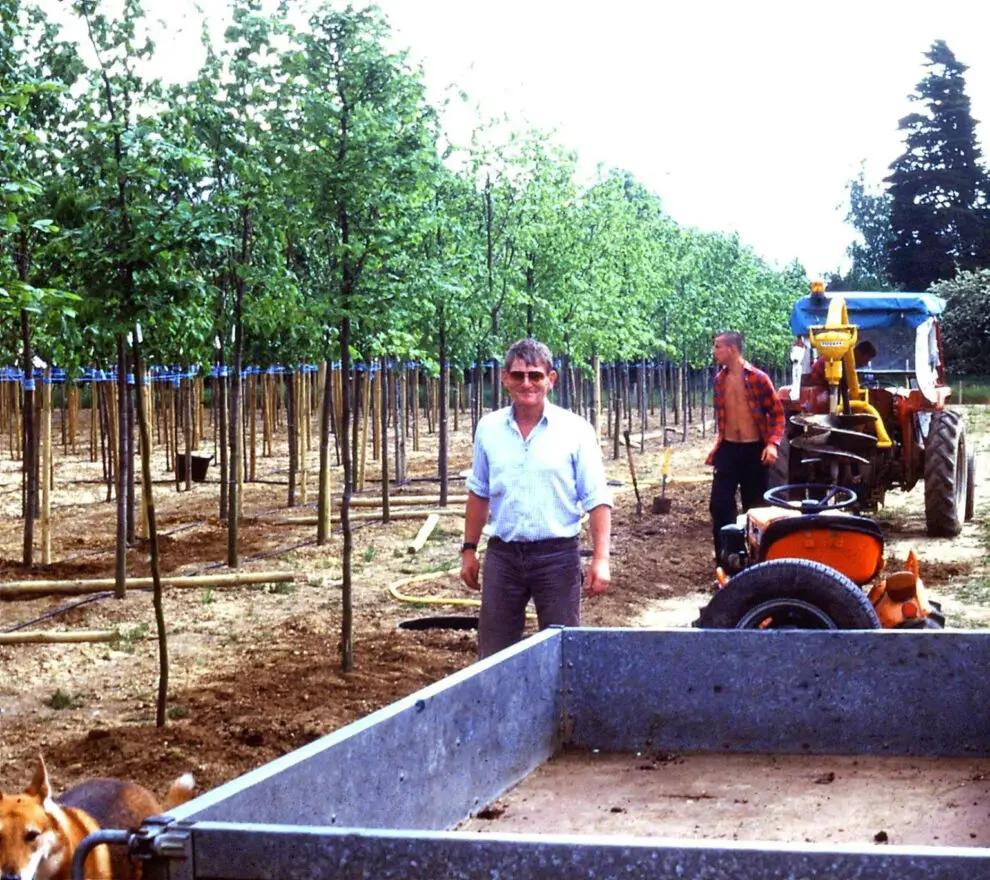
Reviewed by Gwynne Bodsworth, Founder and GrowerLast reviewed 14 August 2026
Gwynne Bodsworth

Expert nursery advice

Gwynne's Grower's Tip

“Privet is one of those hedging plants that ticks many boxes. It grows quickly, clips well, produces lightly scented flowers and can provide berries for birds when it is not trimmed too tightly. Common Privet is also available bare root, making it an economical and straightforward choice for longer hedge lines.”

From our nursery

Visit our Privet hedges

Privet Hedging Plants (Ligustrum ovalifolium)
PrivetHedging plant

Common Privet Hedge

“Common Privet is one of the most reliable choices for creating a dense, traditional hedge. It establishes quickly, responds very well to regular trimming and can retain much of its foliage through milder winters. I recommend trimming the sides and top regularly while the plants are young, as this encourages strong, bushy growth from close to the base.”

View our Common Privet Hedge plants

Golden Privet hedging plants
PrivetHedging plant

Golden Privet Hedge

“Golden Privet is a useful choice when you want the dense growth and easy maintenance of Privet with brighter foliage. Its green leaves have attractive golden margins, and the colour is usually strongest in a sunny position. It responds well to regular trimming, which helps create a neat, bushy hedge, although it may lose some foliage during particularly cold winters.”

View our Golden Privet Hedge plants

Wild Privet hedging plants
PrivetHedging plant

Wild Privet Hedge (Ligustrum vulgare)

“Wild Privet is a good choice for a more natural-looking hedge, particularly in rural gardens, wildlife-friendly boundaries and mixed native planting. Its dark green foliage creates useful cover, while the fragrant white summer flowers and black autumn berries provide seasonal interest. It responds well to trimming, but allowing some sections to flower will make the hedge more valuable to wildlife.”

View our Wild Privet Hedge plants

Not sure which Privet hedge to choose?

Compare the available plants, formats and starting sizes in the complete range.

Explore our complete Privet hedging range

Privet hedge quick-care summary

Plant typeFast-growing flowering hedge shrub in the olive family, Oleaceae
Evergreen or deciduousSemi-evergreen depending on species, winter temperature, shelter and pruning
Typical growth rateCommon Privet about 30-60cm a year; Golden and Wild Privet are often nearer 20-40cm, although conditions vary
Preferred positionFull sun or partial shade; Golden Privet colours best with good light
SoilMost acid, neutral or alkaline soils if moist but well drained
WateringWater thoroughly at planting and during dry periods for the first two growing seasons
Pruning periodTrim two or three times during the growing season and stop by late summer; renovate in late winter or early spring
FeedingUsually one spring feed where soil is poor or growth is weak; avoid routine late high-nitrogen feeding
HardinessGenerally hardy in UK gardens, although exposed hedges may lose more winter foliage
Typical hedge heightAbout 90cm-2.5m, depending on variety, site and trimming
Planting seasonPot grown year-round in suitable weather; bare root and root ball mainly from late autumn to early spring
Root types commonly availableCommon Privet: bare root, pot grown, root ball and instant; Golden Privet: bare root and pot grown; Wild Privet: currently pot grown

About Privet hedging

Privet belongs to the genus Ligustrum in the Oleaceae family, which also includes olives, ash and lilac. Ligustrum species are semi-evergreen shrubs and small trees with simple leaves and clusters of small white flowers, often followed by black or dark purple berries. Regular clipping changes their appearance and ecology: a tightly managed formal hedge produces dense foliage but fewer flowers and berries than an informal or lightly pruned plant.

Common Privet, Ligustrum ovalifolium

Common Privet hedge plants, sometimes called Garden Privet or Oval-leaved Privet, are the main choice for a fast, dense and easily shaped boundary. The oval dark green foliage forms a traditional formal hedge and tolerates urban pollution, regular clipping and a wide range of soils. It is usually semi-evergreen rather than reliably evergreen, particularly in cold or exposed gardens.

Golden Privet, Ligustrum ovalifolium 'Aureum'

Golden Privet hedging has green leaves edged and splashed with yellow. It provides a brighter formal hedge but is normally less vigorous than the green form and colours best in sun or bright partial shade. Vigorous shoots that return to plain green should be removed at their point of origin so they do not overtake the variegated growth.

Wild Privet, Ligustrum vulgare

Wild Privet hedging is native to Britain and has narrower leaves, creamy-white summer flowers and black berries. It is naturally more informal and more likely to lose leaves in winter than Garden Privet. It is useful in native, mixed and wildlife-focused hedges, especially where flowering and fruiting are valued more highly than a tightly clipped year-round screen.

Choosing the right Privet hedge

Choose the plant according to the required winter screening, hedge style, foliage colour, wildlife value, site exposure and available maintenance time. All three can be clipped, but they do not create identical hedges.
Comparison of the three Privet hedging plants currently sold in the category.
PrivetMain featuresBest usesImportant difference
Common PrivetDark green, dense and vigorous; normally semi-evergreenPrivacy, formal hedges, urban boundaries, tall screens and instant hedgingFastest and available in the widest range of sizes and root types
Golden PrivetGreen-and-gold variegated foliage; semi-evergreenColourful formal hedges, front gardens, mixed boundaries and bright screensUsually slower than green Privet and needs good light for the strongest colour
Wild PrivetNative, narrower foliage, flowers and berries; semi-evergreenWildlife, native and informal hedges, rural boundaries and mixed plantingLess reliable winter screening and better ecological value when not clipped too tightly

Best Privet for privacy

Common Privet is normally the strongest choice for a dense, fast-establishing privacy hedge. Its rapid growth and tolerance of repeated trimming allow it to form a solid face relatively quickly. It may still shed foliage in a hard winter, so customers requiring guaranteed evergreen cover should understand the difference between semi-evergreen Privet and a reliably evergreen species.

Best Privet for a formal hedge

Common and Golden Privet both clip into smooth formal surfaces. Common Privet is the easier option where speed and solid green coverage are the priorities. Golden Privet is better where seasonal colour and a brighter boundary matter more than maximum growth rate.

Best Privet for wildlife and informal planting

Wild Privet is the most appropriate of these three for a native or wildlife-oriented hedge. Its flowers can support insects and its black berries are eaten by birds. Frequent clipping removes flowering shoots, so retain some less-managed sections or prune after flowering if wildlife value is a priority.

Privet for shade, urban and difficult sites

Privet tolerates partial shade and urban pollution, making it useful beside roads and in built-up gardens. Deep shade can produce thinner growth, and Golden Privet may become greener and less brightly variegated. Privet also tolerates a range of soil textures, but no variety thrives in permanently waterlogged ground or heavily compacted planting pits.

Privet for coastal and exposed gardens

Common and Wild Privet can cope with many exposed and coastal sites once established, but young leaves and newly planted roots may still suffer in severe salt-laden wind. Establish carefully, use a permeable temporary windbreak where necessary and avoid promising that any hedge is unaffected by every coastal position. Golden Privet may lose more foliage or show scorch in a harsh site.
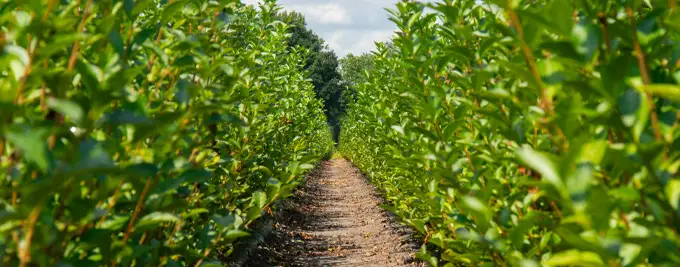
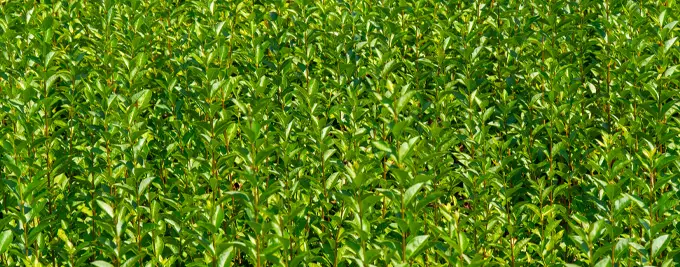
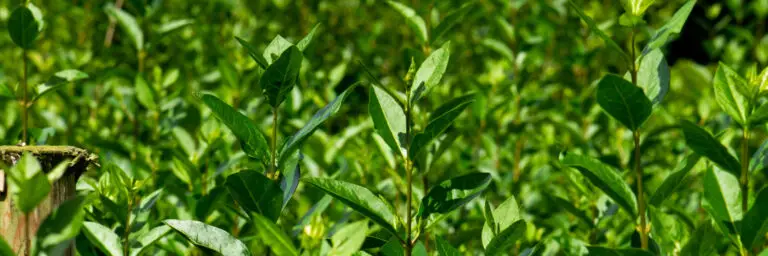
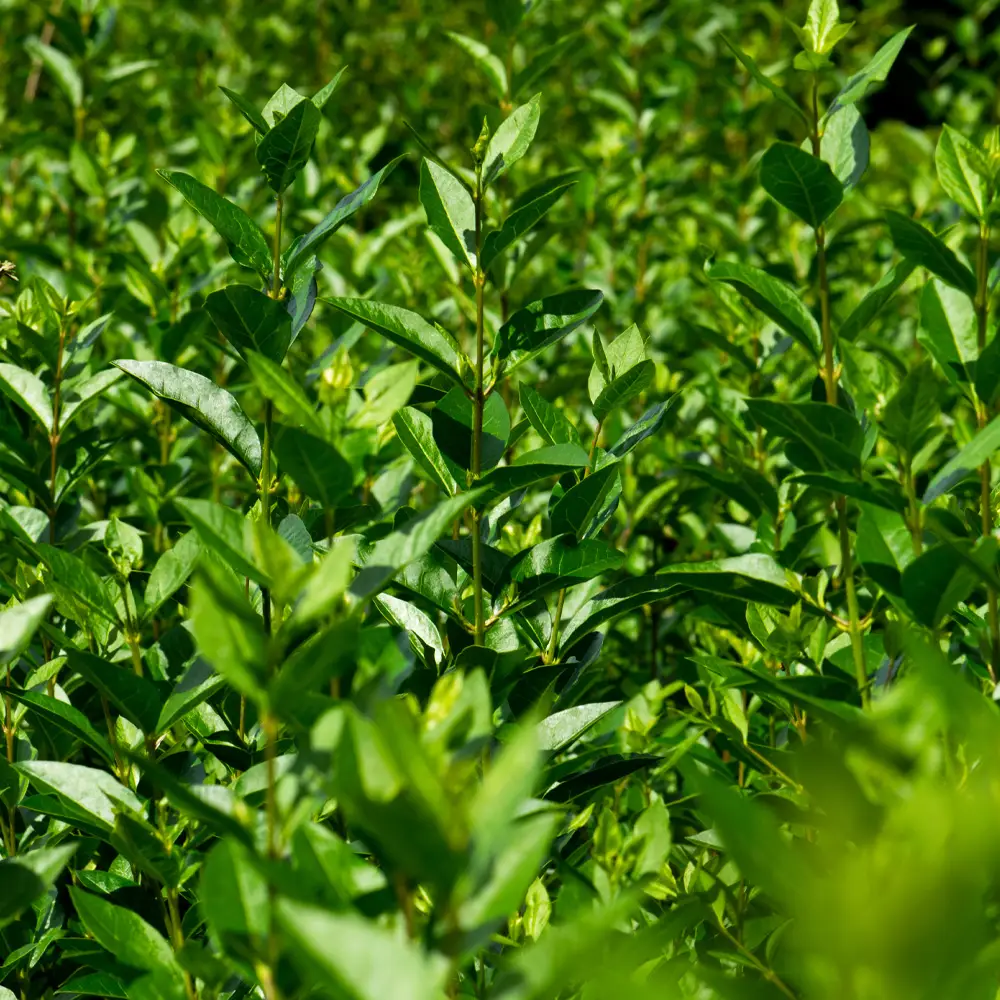
Common Privet growing in the nursery fields

When to plant Privet hedging

Autumn and spring are usually the easiest periods because the soil is moist and temperatures are moderate. Pot-grown plants can be planted throughout the year when the soil is workable and reliable watering is available. Bare-root and root-balled Privet are seasonal and should be planted promptly during the cooler dormant period.

Pot-grown Privet

Pot-grown Privet can be planted year-round, but avoid frozen, waterlogged or baked-dry soil. Summer planting is possible, although the root ball may need frequent checking because potting compost can dry more quickly than the surrounding soil. Water the plant thoroughly before removing its pot.

Bare-root Privet

Bare-root Common and Golden Privet are normally supplied from November into early spring. Plant as soon as possible after delivery. Keep the roots covered, cool and moist and never leave them exposed to sun or drying wind. If the site is temporarily unsuitable, heel the roots into loose soil rather than storing them dry.

Root-balled Privet

Root-balled Common Privet is usually available from autumn to early spring. Handle plants by the root ball rather than lifting them by the stem. Keep the ball moist, plant it intact and follow the product instructions regarding natural hessian or wire. Larger root balls require slower, deeper watering than small pot-grown plants.

Instant Privet hedging

Instant Common Privet is supplied in established metre-long units. It can give immediate structure, but the larger root mass creates a significant establishment requirement. Prepare the full trench accurately, join the units closely and check that irrigation reaches every section rather than assuming one wet area proves that the whole line is watered.

Weather conditions that delay planting

Do not plant into frozen ground, standing water or soil that smears into a compacted paste. Postpone planting during extreme heat or drought unless the site has reliable irrigation and the plants can be protected. A cool overcast day is often preferable to a sunny windy one, especially for bare-root stock.

Where to plant Privet hedging

Sun and shade

Privet grows in full sun or partial shade. Common and Wild Privet will tolerate moderate shade, although growth becomes looser as light decreases. Golden Privet needs more light to maintain strong yellow margins. In deep shade, consider whether a different hedge is more suitable rather than compensating with extra fertiliser.

Soil type and pH

Privet grows in chalk, clay, loam and sandy soil and tolerates acid, neutral and alkaline conditions. Moist but well-drained soil is ideal. On heavy clay, loosen a broad strip and improve its structure rather than filling one narrow hole with compost. On sandy soil, organic matter and mulch help retain water and nutrients.

Drainage

Persistent waterlogging reduces oxygen around the roots and can cause yellowing, poor growth, root decay and susceptibility to Phytophthora or honey fungus. If water remains in the trench after rain, improve site drainage or choose a better planting position before installing the hedge. Do not use a thin layer of gravel beneath a planting hole as a substitute for addressing the wider drainage problem.

Walls, fences, paths and boundaries

Leave enough room to reach the back of the hedge and trim both sides. A plant centred tight against a fence may look acceptable when young but becomes difficult to maintain. Keep soil and mulch below damp-proof courses, avoid blocking vents or drainage outlets and check for underground services before digging. Allow for foliage overhang beside public paths, driveways and road visibility areas.

High hedges and neighbours

Choose a realistic maintained height and discuss shared boundaries before planting. Privet responds to pruning but can grow several metres high when neglected. The rules applying to a particular boundary, highway or planning condition vary, so seek local advice when a tall hedge could affect access, visibility, light or neighbouring property

How to prepare the planting area

  1. Measure and mark the hedge line. Subtract gates, paths and other openings before calculating plant numbers.
  2. Remove weeds and turf. Clear a strip wide enough to prevent grass and perennial weeds competing with the new roots.
  3. Check soil structure and drainage. Break up compaction and investigate standing water before digging the final trench.
  4. Use a continuous trench where practical. A trench makes spacing easier and avoids isolated holes in compacted ground.
  5. Improve poor soil over a broad area. Blend existing soil with suitable organic matter. Peat-free Hedge Planting Compost can improve structure and water retention but should not replace all the site soil.
  6. Water pot-grown and root-balled stock before planting. The root system should be moist throughout, not only wet on the surface.
  7. Protect bare roots. Keep them wrapped until each plant is placed in the trench.
  8. Apply mycorrhizal fungi where chosen. Use Rootgrow according to the label so it contacts the roots. It is an optional aid, not a substitute for correct planting and watering.
  9. Avoid concentrated fertiliser in the planting hole. Strong feed in direct contact with roots can cause damage and does not correct poor drainage or dry soil.

How to plant a Privet hedge

  1. Set out the plants. Use the density shown for the selected product size and distribute the plants evenly along the line.
  2. Dig the trench. Make it wider than the root systems but generally no deeper than the roots or root ball.
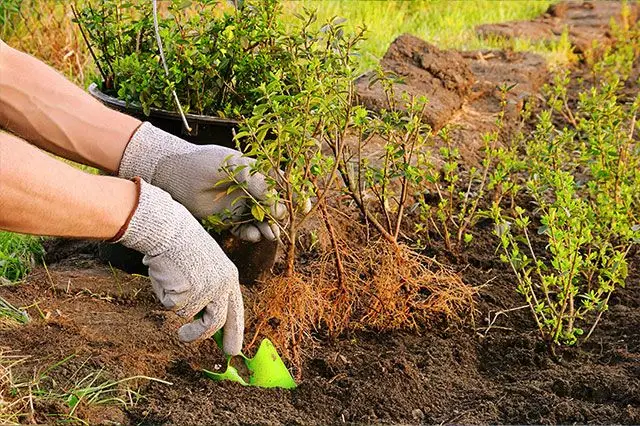
  3. Check planting depth. The top of a pot-grown or root-balled root system should finish level with the surrounding soil. Use the original soil mark on bare-root stems as a guide.
  4. Prepare the roots. Remove pots, loosen tightly circling outer roots and spread bare roots naturally without forcing them into a small hole.
  5. Position each plant upright. Use a string line for a straight formal hedge and turn the best-developed side towards the main viewpoint.
  6. Backfill gradually. Work the improved excavated soil around the roots so no large air pockets remain.
  7. Firm gently. Use your heel to stabilise the plant without compacting the soil into a hard surface.
  8. Water thoroughly. Wet the complete root system and surrounding soil. Correct any plants that sink or lean afterwards.
  9. Mulch the strip. Apply Hedge Bio Mulch or another suitable organic mulch, leaving a clear space around the stems.
  10. Prune according to stock type and hedge goal. Small bare-root Privet often benefits from formative shortening, while large root-balled or instant stock should not automatically be cut hard. Follow the supplied specification.
  11. Record the planting. For longer trade or commercial projects, record the date, weather, irrigation checks and any damaged plants.

Planting bare-root Privet

Spread the roots naturally across loosened soil and backfill in stages, gently shaking the plant so fine soil settles between roots. Firm and water well. Formative pruning can encourage low branching, but the amount removed should reflect the plant's size, existing framework and contract specification.

Planting root-balled Privet

Keep the root ball intact and lift it from beneath. Set the top level with the finished soil. Natural hessian is usually left around the ball, although tight ties around the stem should be loosened where necessary. Water through the ball slowly because wet backfill does not guarantee that its dense centre is moist.

Planting instant Privet

Prepare one level trench for the full run. Position the units closely enough to avoid visible gaps but do not overlap the root systems. Backfill beneath and between units, firm carefully and install a tested hedge irrigation system along the root zone. Inspect the far end of the run and several units after watering.

Privet hedge spacing and plants per metre

Privet spacing changes with plant height, root type and the density already present at delivery. The figures below are current Hedging Plants Direct examples checked against live product variations. The selected product calculator should remain the final source of truth if sizes or stock specifications change.
Current spacing examples for Hedging Plants Direct Privet products.
Plant and formatPlants per metreApproximate centre spacingNotes
Common Privet bare root 40-60cm6About 17cmSmall young plants used for an economical dense hedge
Common Privet bare root 60-90cm or 90-120cm520cmCurrent calculator density for these taller bare-root options
Common Privet pot grown 60-80cm425cmLarger pot-grown root systems need more room
Common Privet pot grown 80-125cm3About 33cmCheck the chosen live size before ordering
Common Privet root ball 100-150cm3About 33cmCurrent density for 100-125cm and 125-150cm stock
Common Privet root ball 150-225cm250cmApplies to current larger root-balled options
Common Privet instant hedging1 unit1m unitJoin metre-long established units into a continuous line
Golden Privet bare root 40-60cm520cmCurrent live product calculator
Golden Privet pot grown 40-60cm425cmCurrent live product calculator
Wild Privet pot grown 80-100cm, 5 litre3About 33cmCurrent pot-grown Wild Privet option

How to calculate how many Privet plants you need

Multiply the measured hedge length by the plants per metre shown for the chosen product. A 10m hedge using 40-60cm bare-root Common Privet at six plants per metre needs 60 plants. The same length using 80-100cm pot-grown Common Privet at three per metre needs 30 plants. Exclude gates and openings before calculating.

Single row or double row?

A single row is normally sufficient for a formal Privet hedge because the plants branch freely and respond to clipping. A staggered double row can be used where a broad landscape specification requires greater depth, but it uses more plants, occupies more space and may be harder to maintain. Do not simply double a single-row density without a site-specific plan.

Watering and establishment

Water new Privet thoroughly at planting and whenever the root zone begins to dry during the first two growing seasons. Frequency should respond to soil, weather, exposure and plant size rather than a fixed daily schedule. Deep watering that reaches the entire root system is more useful than repeatedly wetting only the surface.

Immediately after planting

Apply water slowly until it has penetrated the original root ball or bare-root zone and the adjacent soil. This settles soil around the roots and helps eliminate large air pockets. Recheck the line after watering and lift any plant that has sunk too deeply.

The first growing season

Check moisture beneath the mulch at least weekly in dry weather and more often during heat, strong wind or on sandy soil. Push a finger, trowel or probe into the original root ball itself. Pot compost, field soil and imported planting compost can dry at different rates.

The second growing season

Roots should be extending into the surrounding soil, but the hedge remains vulnerable during prolonged drought. Continue deep watering where needed, especially beside paving, walls, roof overhangs and competing mature trees. Reduce frequency as the root system establishes rather than stopping on an arbitrary date.

Sandy soil and clay soil

Sandy ground may require smaller, more frequent applications supported by organic matter and mulch. Clay holds water longer, so check before irrigating and avoid turning a poorly drained trench into a sump. Yellow leaves on wet clay are not a reason to add more water.

Hot, windy and dry weather

Wind increases water loss from semi-evergreen foliage. Water in the morning or evening, direct the water to the soil and use temporary permeable shelter if a newly planted hedge is suffering in an exposed position. Do not rely on light rainfall if dense foliage or mulch prevents it reaching the root zone.

Winter watering

Common and Golden Privet may retain foliage in mild weather and can still lose moisture during a dry, windy winter. Newly planted root-balled or pot-grown plants may need water when the soil is dry and unfrozen. Do not water saturated or frozen ground.

Signs of drought stress

  • Leaves droop, curl or become crisp at the edges.
  • New shoots wilt or stop extending.
  • Foliage yellows and drops after a prolonged dry period.
  • The centre of the original root ball feels dry below the surface.
  • Damage is worst beside paving, walls or at the exposed end of the hedge.

Signs of waterlogging or overwatering

  • Soil remains saturated for long periods or smells stagnant.
  • Leaves yellow while the root area is wet.
  • Growth is weak and roots are dark, soft or poorly developed.
  • Plants decline in low points along the trench.
  • Water stands after rainfall or irrigation.

Using irrigation

For long retail, trade and commercial plantings, a correctly positioned hedge irrigation line improves consistency. Secure the pipe close to the root zone beneath the mulch and test delivery at the far end. Irrigation still requires inspection: blocked emitters, uneven pressure and dry root balls can go unnoticed.

How and when to feed Privet hedging

Privet normally needs little fertiliser in reasonable garden soil. Correct planting, water, light and weed control are more important than routine heavy feeding. Apply a balanced or general hedge fertiliser in spring if growth is pale or weak, the soil is poor, or a hard-pruned hedge needs support while it regrows.

Hedge Feed can be used as a spring top dressing in accordance with its label. Spread it across moist soil over the active root zone, keep concentrated granules away from stems and water afterwards if rain is not expected. Do not put a strong dose in direct contact with roots at planting.

Avoid routine high-nitrogen feeding late in summer or autumn. It can encourage soft growth that has insufficient time to mature before cold weather. If foliage is yellow, diagnose drought, waterlogging, root damage, normal winter leaf loss and pests before assuming that the plant is deficient.

Renewing a 5-7cm organic mulch in late winter or spring improves soil structure, conserves moisture and suppresses competing weeds. Keep it clear of the stems. Mulch is a long-term soil-management tool, not a replacement for watering dry roots.

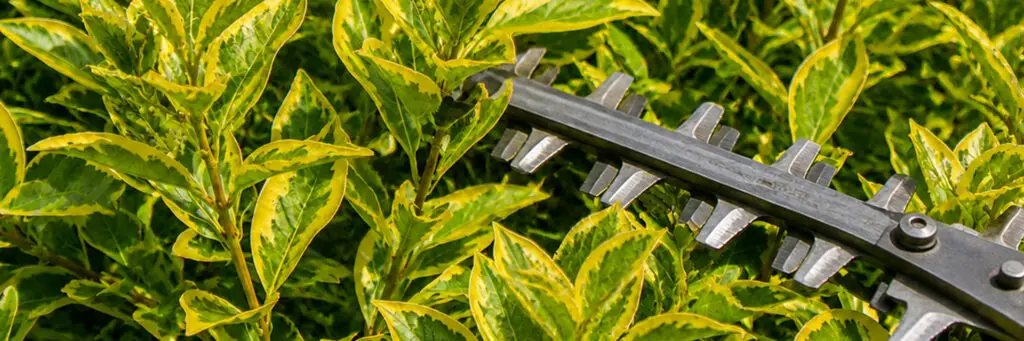
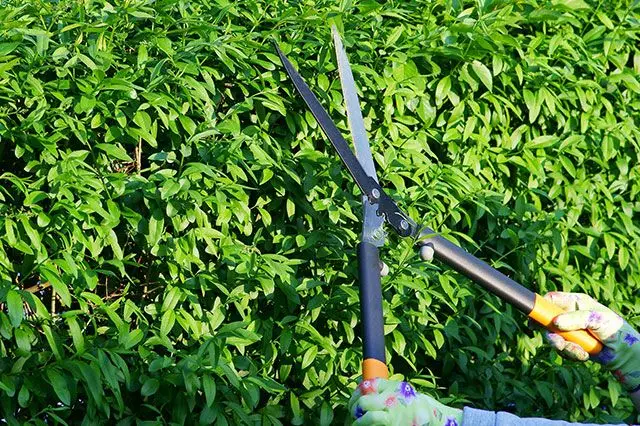
Golden Privet with hedge trimmer

How and when to prune a Privet hedge

Trim an established formal Privet hedge two or three times during the growing season, commonly from late spring to late summer, and stop by late summer so new growth can mature before frost. Informal Wild Privet can be pruned less frequently if flowers and berries are wanted. Always inspect carefully for active bird nests before cutting.

Formative pruning for a new hedge

Start building density while the plants are young. Lightly shorten new shoots to encourage side branching rather than allowing all energy to run into tall unbranched stems. Build height gradually and keep the base at least as wide as the top. Bare-root plants may receive a stronger initial cut where the nursery specification recommends it.

Maintaining a formal hedge

Cut the sides first, working from the bottom upwards. Low hedges can be nearly vertical, while taller Privet should taper slightly so the top is narrower than the base. Use a string line for an even top. Remove only enough new growth to maintain the chosen dimensions and repeat before long shoots shade the lower foliage.

Golden Privet pruning

Golden Privet is generally slower than green Common Privet, so it may require fewer cuts. Remove any vigorous all-green reverted shoots at their point of origin. If only the tip is shortened, the green shoot is likely to return and may outgrow the variegated parts.

Wild Privet pruning

For a wildlife or native hedge, use selective pruning rather than repeatedly shearing every surface. Flowers develop on shoots that may be removed by close clipping, so allow some sections to flower and fruit. Where Wild Privet is used as a conventional boundary, it can still be trimmed, but expect less blossom and fewer berries.

Renovating an overgrown Privet hedge

Privet is one of the more forgiving hedges and often regrows from old wood, but staged renovation reduces risk. In late winter or early spring, reduce the height by no more than about one-third, thin selected old stems and renovate one side at a time where the hedge is severely overgrown. Mulch, water in dry weather and assess regrowth before cutting the remaining side.

When to stop trimming

Cease routine trimming by late summer so that fresh growth has time to mature before colder weather. Dead, damaged or dangerous branches can be removed when necessary, provided there are no active bird nests.

Bird nesting law

All wild birds, their eggs and active nests are protected by law. There is no single date that makes hedge cutting automatically lawful or unlawful. Check carefully before every cut and postpone work whenever an active nest is present. Commercial or development work should include an appropriate ecological check where the risk is significant.

Privet hedge growth rate and eventual size

Growth rates describe reasonable potential, not a guarantee. Starting size, root establishment, soil temperature, water, light, competition and pruning all affect annual extension. A newly planted hedge may make little visible growth in its first season while roots establish.
Indicative growth and size differences between Privet varieties.
VarietyIndicative annual growthUseful maintained heightUnclipped potential
Common PrivetAbout 30-60cm in good conditionsAbout 1-2.5mCan exceed 3-4m and is listed by HPD up to 5m
Golden PrivetUsually about 20-40cm; sometimes more in ideal conditionsAbout 90cm-2mRHS lists a natural height around 2.5-4m
Wild PrivetOften about 20-40cm, with stronger growth possibleAbout 1-3mCan become a large shrub around 2.5-4m or more
A Privet hedge can begin to knit together within two or three growing seasons when planted at the product-specific density and given good establishment care. Larger plants provide more immediate height, but they do not necessarily establish faster. A dry large root ball can fail while a smaller well-watered plant succeeds.

Seasonal Privet hedge care calendar

Seasonal tasks for new and established Privet hedges in the UK.
SeasonMain jobsWhat to watch for
WinterPlant bare-root and root-balled Privet when ground is workable; protect roots before planting; plan renovation workFrozen ground, waterlogging, wind-rock, normal leaf loss being mistaken for death
Early springPlant pot-grown stock; mulch; apply spring feed only if needed; renovate overgrown hedges before strong growthHoney fungus symptoms, root damage, poor drainage and late frost
Late springBegin formative and maintenance trimming; test irrigation; remove reverted shoots from Golden PrivetActive bird nests, aphids, leaf miners, thrips and dry root balls
SummerWater new hedges deeply during dry periods; trim formal hedges as needed; keep the base weed freeDrought scorch, powdery mildew, leaf spots, pests and uneven irrigation
Late summerMake the final light trim and stop feeding with high-nitrogen productsCutting too late and producing frost-sensitive soft growth
AutumnPlant into warm moist soil; renew mulch where required; enjoy Wild Privet berries where untrimmedWaterlogging, storm damage and seasonal leaf fall
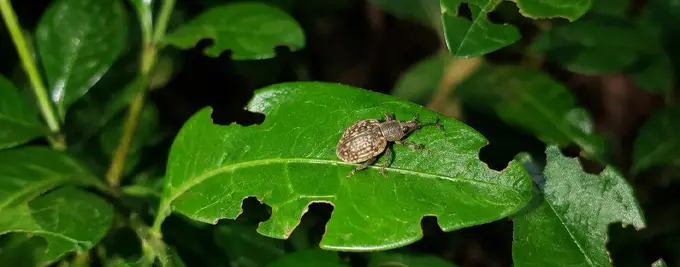
Vine weevil on Privet hedging

Privet hedge pests, diseases and common problems

Start with growing conditions before assuming that a pest or disease is responsible. Drought, waterlogging, planting too deeply, root-ball desiccation, weed competition, cold and shade can all cause yellow leaves, leaf fall and poor growth. Compare several plants along the hedge and investigate the roots as well as the foliage.
Privet symptom checker and first actions.
SymptomLikely causesHow to checkFirst action
Yellow leavesWaterlogging, drought, transplant stress, natural shedding, chlorosis or sap-feeding pestsCheck root moisture, drainage, season and the undersides of leavesCorrect the growing condition before feeding
Brown or crisp edgesDrought, wind, frost, salt scorch or root damageInspect the original root ball and compare exposed and sheltered sidesWater if dry and protect young plants from extreme exposure
Leaves dropping in winterNormal semi-evergreen behaviour, cold or wind exposureScratch a small stem to look for green living tissueWait for spring unless stems are dead or roots have failed
Sticky leaves and distorted shootsAphids or other sap feedersLook for insects, cast skins, honeydew and sooty mouldTolerate light populations and encourage natural predators
Mined or blotched leavesLeaf-mining moth larvae or leaf spotHold leaves to the light and look for trails, mines or fungal spottingRemove badly affected fallen leaves and improve plant vigour
Silvery or scarred leavesThrips, wind abrasion or droughtTap foliage over white paper and inspect new growth closelyImprove watering and monitor before considering treatment
White powdery coatingPowdery mildewCheck for surface fungal growth and crowded dry-root conditionsImprove airflow and watering consistency
Progressive diebackHoney fungus, root rot, severe drought, waterlogging or physical root damageInspect roots, collar bark and nearby woody plantsSeek reliable diagnosis before replanting the site
Sparse baseTop-heavy hedge shape, shade, wide spacing or delayed formative pruningAssess hedge profile and light at ground levelTaper the hedge and renovate in stages

Aphids

Aphids cluster on soft new shoots and can cause curling, distortion, sticky honeydew and sooty mould. Light infestations rarely threaten an established hedge and often support ladybirds, hoverflies and other natural predators. Remove badly distorted tips where practical and avoid excessive nitrogen feeding that produces soft pest-prone growth.

Leaf-mining moths and thrips

Leaf miners create trails, blotches or translucent areas within leaves. Thrips can cause pale speckling, scarring or distorted young growth. Damage is often cosmetic. Improve plant health, clear badly affected fallen material and confirm the pest before using any control. Product approvals and effective timings change, so follow current UK labels.

Powdery mildew and leaf spots

Powdery mildew is encouraged by dry roots combined with humid, crowded foliage. Improve deep watering and airflow instead of repeatedly wetting the leaves. Leaf spots have several possible fungal or bacterial causes and cannot be diagnosed reliably from colour alone. Remove affected fallen leaves, avoid unnecessary overhead watering and seek a specialist diagnosis if dieback develops.

Honey fungus

Privet is one of the woody plants most susceptible to honey fungus. Symptoms include progressive thinning, branch death and failure of part or all of the hedge. White fungal sheets may be found beneath bark near ground level, black bootlace-like rhizomorphs can occur around roots and honey-coloured mushrooms may appear in autumn. Similar symptoms can be caused by drought or waterlogging, so confirm the diagnosis before removing a long hedge or replanting.

Phytophthora and other root rots

Root rots are associated with poorly functioning roots and often produce wilting, yellow sparse foliage and progressive dieback. Permanently wet soil and damaged roots increase risk. Improve drainage and avoid automatic irrigation until the cause is understood. Professional laboratory or horticultural diagnosis may be justified on a valuable commercial planting.

Wildlife and environmental value

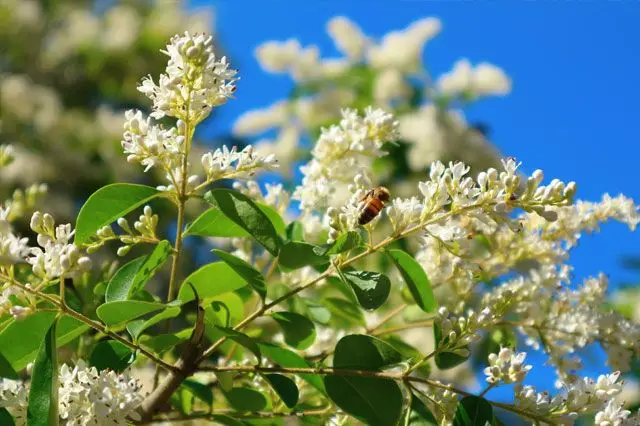
Unclipped Privet produces clusters of small white flowers that can be visited by insects and black berries eaten by birds. Dense foliage provides cover and potential nesting habitat. A formal hedge trimmed two or three times during the growing season produces fewer flowers and berries because the flowering shoots are repeatedly removed.

Wild Privet has the strongest claim as a native wildlife hedge. Use it in mixed or informal planting and leave some sections less tightly managed so flowers and fruit can form. Common and Golden Privet still provide shelter, but they should not be described as equally native or equally valuable in every ecological context.

Privet leaves and berries are harmful if eaten by people and may also be unsuitable for pets and livestock. Position hedges sensibly, supervise children and seek appropriate medical or veterinary advice after suspected ingestion. Wear gloves during extensive handling if you have sensitive skin.

Check for active bird nests before pruning. Maintain mulch and soil cover to support root-zone organisms, avoid unnecessary pesticides and retain a range of flowering species elsewhere in a highly clipped formal garden.

Privet care by root type

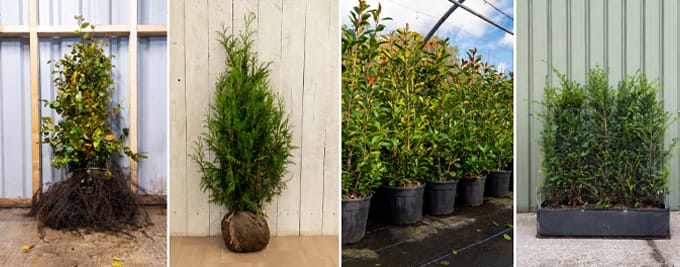
Bare-root Privet

Plant while dormant and protect the exposed roots from drying at every stage. Bare-root plants are economical for long hedges and respond well to formative pruning. They need careful weed control and watering as the new root system develops. The shoots can look sparse at planting, but density should be built gradually through trimming.

Pot-grown Privet

Pot-grown plants can be installed year-round in suitable conditions. Saturate the compost before planting, loosen circling roots and continue checking the original root ball after planting. Taller pot-grown stock gives more immediate height but can dry quickly and may need temporary support in an exposed site.

Root-balled Privet

Keep the field-grown ball intact and consistently moist. Root-balled stock offers substantial height and bulk but needs deep watering through the dense original soil. Avoid planting too deeply and do not move the plant by pulling on its stem.

Instant Privet

Instant units provide a mature visual result but require precise trench preparation and irrigation. Water the whole metre-long unit, monitor joints between sections and check for wind movement. Use appropriate temporary plant protection where machinery, construction activity or severe exposure creates a genuine risk.

Frequently asked questions about Privet hedging

Is Privet evergreen?

Privet is usually semi-evergreen in the UK. Common and Golden Privet can retain much of their foliage in mild sheltered gardens but may lose leaves in a hard winter. Wild Privet is prone to losing more of its leaves. Customers needing guaranteed winter screening should not assume every Privet hedge will remain fully leafed.

What is the best Privet for privacy?

Common Privet is generally the best choice for fast, dense privacy because it grows vigorously, clips well and is available in large sizes, root balls and instant units. It is semi-evergreen rather than reliably evergreen, so severe winter conditions may temporarily reduce leaf cover.

How far apart should Privet be planted?

Spacing depends on the product size and root type. Current Common Privet options range from six per metre for 40-60cm bare-root plants to two per metre for large root balls. Golden Privet currently uses five per metre bare root and four per metre pot grown, while pot-grown Wild Privet uses three per metre.

How many Privet plants do I need per metre?

Use the live product calculator. Small bare-root Common Privet currently needs five or six plants per metre, medium pot-grown plants three or four, larger root balls two or three, and instant hedging one metre-long unit per metre. Multiply the measured planting length by the stated density.

How quickly does a Privet hedge grow?

Common Privet can grow about 30-60cm a year in favourable conditions. Golden and Wild Privet are often closer to 20-40cm, although stronger growth is possible. New hedges may grow more slowly in the first season while roots establish, and drought, shade and repeated clipping reduce extension.

When is the best time to plant Privet?

Autumn and spring normally give the easiest establishment conditions. Pot-grown Privet can be planted year-round if the ground is workable and watering is available. Bare-root and root-balled Privet should be planted in the cooler dormant season, avoiding frozen, saturated or extremely dry soil.

Can Privet grow in shade?

Yes, Privet tolerates partial shade. Common and Wild Privet usually cope better than Golden Privet, whose foliage becomes less brightly coloured in low light. Deep shade can make any hedge thinner and more open, so good plant choice and realistic expectations are important.

Can Privet grow in clay soil?

Yes, Privet grows in clay if the soil is not permanently waterlogged. Loosen a broad planting strip, relieve compaction and blend organic matter through the excavated soil. Do not plant into a deep narrow hole that collects water after rain.

How often should a new Privet hedge be watered?

Water thoroughly at planting, then check the root zone regularly during dry weather for the first two growing seasons. Sandy and exposed sites dry faster than clay or sheltered ground. Water deeply when the original root ball begins to dry rather than applying a token amount every day.

When should Privet be pruned?

Trim a formal Privet hedge two or three times from late spring to late summer, stopping by late summer so fresh growth can mature before frost. Renovate an overgrown hedge in late winter or early spring. Inspect carefully for active bird nests before every cut.

How do I make a Privet hedge thicker?

Start formative pruning while plants are young, shorten new shoots to encourage branching and keep the base as wide as or wider than the top. Maintain a weed-free mulched strip and water through establishment. Do not let tall shoots race upwards while lower stems remain unbranched.

Can Privet be cut back hard?

Yes, established Privet often regrows from old wood, but staged renovation is safer than removing the entire hedge face at once. In late winter or early spring, reduce height by about one-third and renovate one side at a time. Water during dry regrowth and assess recovery before completing the work.

Why is my Privet hedge turning yellow?

Yellowing commonly results from waterlogging, drought, transplant shock, natural leaf ageing, shade or sap-feeding pests. Check moisture at root depth and inspect leaves before applying feed. A row of yellow plants in a low area often indicates drainage trouble rather than a nutrient shortage.

Why is my Privet hedge going brown?

Brown foliage is commonly caused by dry roots, cold wind, frost, salt scorch or recent root disturbance. Check the original root ball and compare exposed and sheltered areas. Progressive dieback with collar or root symptoms may require investigation for honey fungus or another root disease.

Why is my Privet losing leaves?

Privet naturally loses some or all of its foliage in cold conditions because it is semi-evergreen. Wild Privet is prone to losing more of its leaves. Summer leaf loss can indicate drought, waterlogging, root damage or disease and should be investigated promptly.

Does Privet get honey fungus?

Yes, Privet is particularly susceptible to honey fungus. Progressive dieback, white fungal sheets beneath bark, black root-like rhizomorphs or autumn honey-coloured mushrooms can indicate infection. Similar decline can result from drought and waterlogging, so obtain a reliable diagnosis before removing or replanting a hedge.

Is Privet poisonous?

Privet is harmful if eaten, including its berries and foliage. It should not be used as edible planting, and children, pets and livestock should not consume it. Seek appropriate medical or veterinary advice after suspected ingestion and use gloves for extensive pruning if your skin is sensitive.

Is Privet good for wildlife?

Privet provides dense shelter and, when allowed to flower and fruit, offers flowers for insects and berries for birds. Wild Privet has particular value as a native hedge. Frequent formal clipping reduces these benefits by removing flowering shoots and fruit.

Choosing and buying Privet hedge plants

Explore the complete Privet hedging range to compare fast-growing green Common Privet, colourful Golden Privet and native Wild Privet. Each product page shows the current plant sizes, root types and recommended planting density, which should take priority over general spacing figures when ordering.

Hedging Plants Direct is a family-run nursery business established in 1982 and supplies homeowners, gardeners, landscapers, developers, trade buyers and commercial customers across the UK. Pot-grown plants are generally available throughout the year, while bare-root and root-balled Privet are seasonal. Mixed-format orders may be dispatched together when all plants are available. The nursery is Plant Healthy registered and supplies practical planting and aftercare products where they add genuine value.