
Why Is My Privet Hedge Dying?
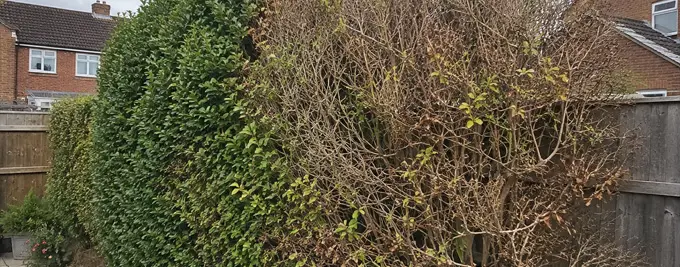
A Privet hedge can lose leaves, turn brown or die back for several different reasons. The position and pattern of the damage usually provide the first clue, so check whether the problem affects one plant, a section of the hedge or the complete row.
Quick Answer
A Privet hedge that appears to be dying is often suffering from root stress rather than a serious leaf disease. First check whether the soil or original root ball is too dry, saturated, compacted or planted at the wrong depth. Normal winter leaf loss can also make semi-evergreen Privet look bare. If one established plant or a spreading section is declining, inspect the stem base and roots for rot, white fungal growth or black bootlace-like strands that may indicate honey fungus. Do not feed or replace plants until the cause is clearer.
Quick Facts
| First thing to check | The pattern of damage and moisture around the roots |
|---|---|
| Whole hedge declining | Usually suggests a shared watering, soil or establishment problem |
| One plant dying | Often caused by a local root, planting, drainage or physical-damage issue |
| Winter leaf loss | Can be normal because Privet is semi-evergreen |
| Honey fungus warning signs | White fungal growth beneath bark, black root-like strands and progressive dieback |
| Can Privet recover? | Living stems and healthy roots may regrow after the underlying stress is corrected |
What does the pattern of Privet dieback tell you?
Begin by standing back and looking at the complete hedge. The distribution of the damage is often more useful than the colour of an individual leaf.
A newly planted hedge declining along its full length is more likely to have a shared establishment problem. This may include insufficient watering, dry original root balls, waterlogged soil, incorrect planting depth or severe competition from grass and weeds.
One plant dying among healthy neighbours normally points towards a local problem. Possible causes include a damaged or dry root system, a compacted pocket of soil, a blocked irrigation outlet, deep planting, strimmer damage or a root disease.
Several established plants dying progressively along the hedge may indicate a drainage problem or a root disease. Before assuming that a disease is present, compare the soil, roots and planting depth with a healthy section.
For a more detailed breakdown of individual symptoms, see the Privet hedge problems, pests and diseases guide.
| Visible pattern | Possible explanation | What to inspect |
| Complete new hedge wilting or yellowing | Establishment stress, drought, waterlogging or planting depth | Moisture inside the original roots, drainage and soil level |
| One plant dying | Localised root damage, dry or wet soil pocket, physical damage or root disease | Roots, stem base and surrounding soil |
| Several neighbouring plants declining | Drainage issue, root disturbance or spreading root problem | Root condition, old stumps and buried woody material |
| Damage mainly on one side | Wind scorch, frost, heat reflection or spray drift | Direction of damage and recent weather or weedkiller use |
| Curled or sticky young leaves | Privet aphid or another sap-feeding insect | Shoot tips and undersides of leaves |
| Winter leaf fall with flexible stems | Normal semi-evergreen behaviour | Healthy buds and green tissue beneath the bark |
Check the soil before treating the leaves
Move mulch aside and inspect the soil several centimetres below the surface. If the hedge was planted from pots or root balls, check the original root mass as well as the surrounding ground.
The surrounding soil can feel damp while the centre of a root ball remains dry. Water may run around a compact root system without soaking into it, particularly after planting during warm or dry weather. Apply water slowly enough to penetrate the complete root zone rather than repeatedly wetting only the surface.
The opposite problem can produce very similar symptoms. Waterlogged roots cannot function properly even though the plant is surrounded by moisture. Warning signs include standing water, a sour or stagnant smell, persistently saturated soil and dark, soft or decaying roots.
Do not continue automatic watering simply because the leaves are wilting. Check the soil first, as wilting can be caused by both drought and damaged, waterlogged roots.
Could normal leaf loss make the hedge look dead?
Common Privet and Golden Privet are generally semi-evergreen rather than reliably evergreen in every UK garden. They may retain most of their foliage during a mild winter but lose considerably more leaves during cold, exposed or windy conditions. Wild Privet naturally loses a greater proportion of its foliage.
Older leaves may turn yellow and fall while the stems remain healthy. Lightly scrape a very small area of young stem with a clean fingernail or knife. Green, moist tissue beneath the bark indicates that the stem is still alive.
Flexible branches, healthy-looking buds and new growth appearing in spring are also encouraging signs. A genuinely dead branch will normally become brittle and remain brown beneath the bark.
When should you suspect honey fungus?
Honey fungus should not be diagnosed from brown leaves alone. However, Privet is susceptible, so it should be considered where an established plant or section of hedge declines progressively without an obvious watering or physical cause.
Look around the roots and stem base for:
- White fungal sheets between the bark and wood
- Black strands resembling bootlaces on roots or beneath the bark
- Roots that are decaying rather than simply dry
- Cracking or deterioration around the base of the stems
- Small, pale foliage followed by progressive branch death
- Honey-coloured mushrooms near the hedge during late summer or autumn
The mushrooms may only appear briefly, so their absence does not prove that honey fungus is not present.
Seek a reliable diagnosis before removing neighbouring plants or replanting the gap. If honey fungus is confirmed, infected roots and buried woody material may need to be removed, and planting another susceptible Privet directly into the same untreated position may result in another failure.
What does waterlogged root damage look like?
Roots affected by prolonged saturation may become dark, soft and easily damaged. The soil may smell stagnant and remain wet long after surrounding areas have drained.
Correct the drainage problem before replacing the plant. Simply adding a new Privet to the same wet pocket is unlikely to produce a different result.
Are pests likely to kill an established Privet hedge?
Privet aphids can cause young leaves to curl, yellow or become distorted. Sticky honeydew and small insects around the shoot tips help confirm the cause. Although the damage can look unsightly, a light aphid infestation is unlikely to kill an otherwise healthy established hedge.
Scale insects, thrips, mites and leaf-mining insects can also affect foliage. These generally cause localised leaf damage rather than the sudden death of complete established plants.
Avoid treating the hedge with an insecticide unless the pest has been properly identified. Root stress, drought, waterlogging and spray damage can all be mistaken for pest damage.
Leaf spots and powdery mildew can cause discolouration or premature leaf fall. Improve root-zone moisture, airflow and general growing conditions first. If branches are dying as well as leaves becoming marked, investigate the roots and stems rather than assuming that the leaf marks are the main cause.
How can you help a dying Privet hedge recover?
Correct the underlying problem before trying to stimulate new growth.
Restore suitable root conditions
Water slowly and thoroughly when the root zone is beginning to dry. If the soil is saturated, stop unnecessary irrigation and address compaction or drainage.
Keep a strip around the hedge free from grass and weeds. A suitable organic mulch can reduce weed competition and moisture loss, but apply it over moist, freely draining soil and keep it clear of the stems.
Remove genuinely dead growth
Wait until you can distinguish living stems from dead wood. Cut dead branches back to healthy tissue using clean, sharp tools.
Avoid removing large amounts of living growth during drought, very hot weather or immediately before severe frost. Privet can produce fresh shoots from living wood, but dead roots and completely dead stems will not recover.
Do not feed automatically
Fertiliser will not correct waterlogging, damaged roots or honey fungus. Applying feed to a severely dry or saturated root system can place the plant under additional stress.
A balanced hedge feed may be useful in spring once the roots are functioning, the soil is moist and the plant is producing weak but healthy new growth. It should not be the first response to unexplained dieback.
Understand the cause before replacing a plant
If one plant has failed, carefully compare its planting depth, roots and surrounding soil with a healthy neighbour. Correct any drainage, irrigation or compaction problem before installing a replacement.
The step-by-step Privet planting guide explains how to prepare the planting strip and position the roots correctly.
When should you seek a specialist diagnosis?
Further investigation is advisable when:
- Established plants are dying one after another
- White fungal growth or black root-like strands are visible
- Roots are rotting despite improvements to watering
- Dieback continues to spread after obvious environmental problems have been corrected
- The hedge may have been exposed to weedkiller, contaminated soil or major root disturbance
- You need to decide whether it is safe to replant the same species
Clear photographs of the complete hedge, affected leaves, stem bases, roots and surrounding soil are normally more useful than a single close-up of a brown leaf.
Gwynne's Grower's Tip
When we investigate a failing Privet hedge, we start at ground level rather than with the leaves. Dig a small inspection hole beside the affected plant and another beside a healthy neighbour. Compare the planting depth, moisture and condition of the roots. The difference is often surprisingly clear, such as a dry original root ball, a compacted wet pocket or damage around one stem. Feeding first rarely solves anything while the roots are still struggling. Correct the root-zone problem and then judge recovery by looking for flexible stems, healthy buds and green tissue beneath the bark.
More Privet Advice
For more detailed growing advice or to view the plants available from our nursery, use the links below.
Useful Planting Essentials
Selected products that may help with planting, establishment and ongoing hedge care.

Rootgrow Mycorrhizal Fungi
Rootgrow can be applied at planting so the product is in direct contact with the roots, where appropriate for the plant and planting method.
View product
Hedge Feed
Hedge Feed provides balanced nutrition where established hedging would benefit from feeding as part of normal care.
View product
Hedge Irrigation
A hedge irrigation system can make it easier to water a new hedge consistently, particularly on longer runs and during dry weather.
View product
Hedge Compost & Mulch
Compost and mulch can support soil preparation, moisture retention and weed suppression when used appropriately around new hedging.
View product
How Can I Make a Privet Hedge Grow Faster?
A Privet hedge can grow quickly once its roots are established, but dry soil, weed competition, deep shade and unsuitable pruning can…
Read answer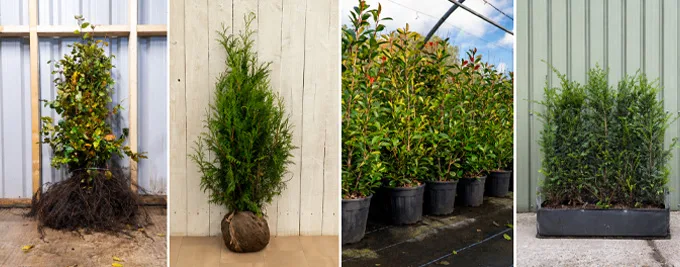
What Are the Different Hedging Root Types?
Bare root, root ball, pot-grown and instant hedging suit different budgets, planting times and levels of initial coverage. Understanding how each is…
Read answer
Is Privet Evergreen?
Privet is often chosen for privacy, but its winter appearance is less predictable than that of a fully evergreen hedge. The variety,…
Read answer
What Is Eating My Privet Hedge?
Chewed, notched or stripped Privet leaves can have several causes, and the shape of the damage is often more useful than the…
Read answer
Euonymus Green Spire Problems: Causes and Fixes
Green Spire is a tough, reliable hedge, but a few problems turn up regularly. Here is how to recognise each one quickly,…
Read answer
What Causes Notches Around Green Spire Leaves?
Neat-looking bites or irregular U-shaped notches around the edges of Green Spire leaves are a useful diagnostic clue. The visible leaf damage…
Read answer
Do Deer or Rabbits Eat Euonymus Green Spire?
Green Spire should not be regarded as reliably browse-proof. The amount of damage depends heavily on local animal pressure, alternative food and…
Read answer
Can Frost or Wind-Damaged Green Spire Recover?
Evergreen Green Spire can show brown leaf edges, scorched foliage or leaf drop after cold drying winds. The visible damage can look…
Read answer