
Hedging care & growing guide
Dogwood Hedge Care Guide: Planting, Spacing and Pruning
Dogwood hedging is generally straightforward to establish and maintain, provided the roots are kept evenly moist while young and the pruning method suits what you want from the hedge. Our Dogwood hedging plants include Common Dogwood, Red Stemmed Dogwood, Yellow Stemmed Dogwood and Midwinter Fire, each with slightly different growth rates, stem colours and planting densities.
This guide explains when and where to plant Dogwood, how far apart to space the plants, watering and feeding during establishment, and how to prune for either strong winter stem colour or a more natural hedge with flowers and berries. It also covers common establishment problems and the differences between bare-root and pot-grown Dogwood.
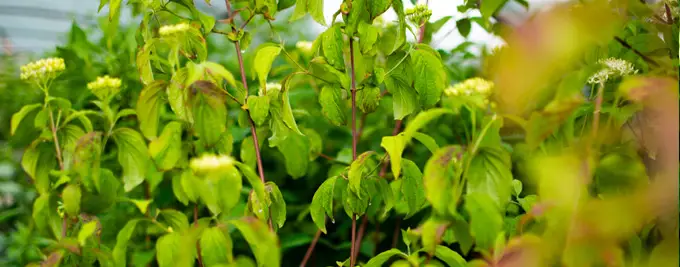
Dogwood is deciduous, so it is best chosen for seasonal colour, informal screening, wildlife value and mixed hedging rather than year-round evergreen privacy. Full sun generally produces the strongest winter stem colour, although the plants will tolerate partial shade.
Expert nursery advice
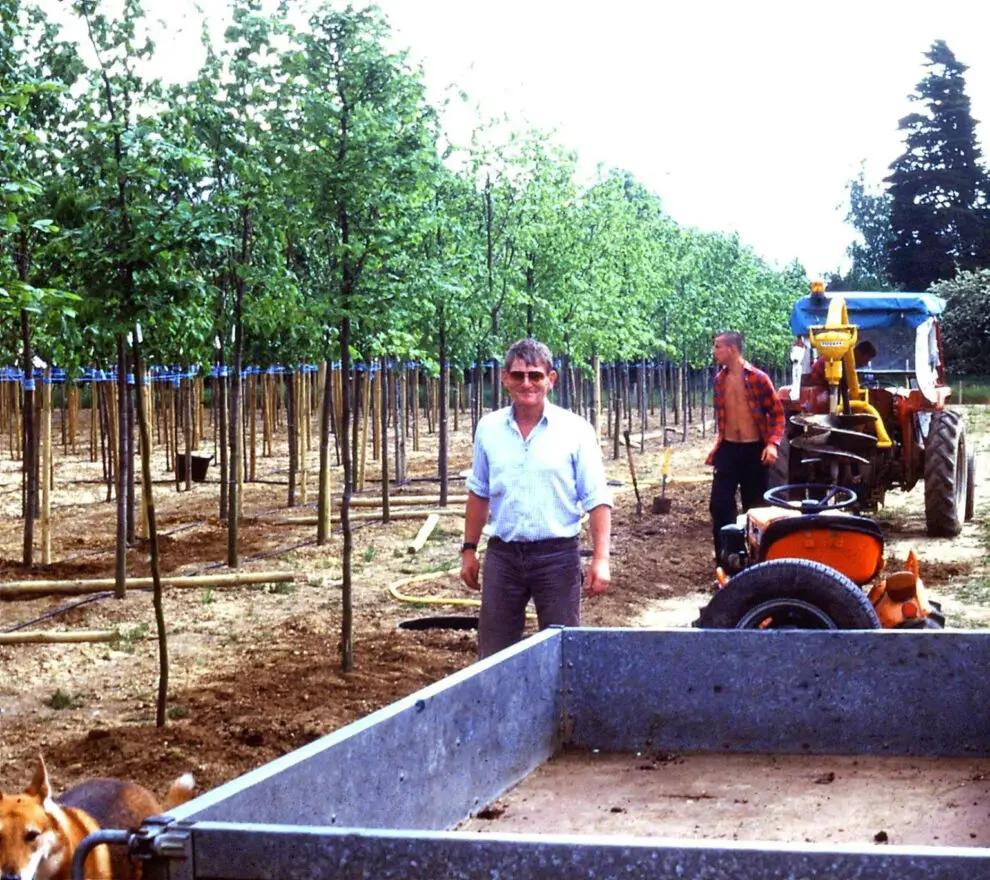
Gwynne's Grower's Tip
With Dogwood, decide what you want most from the hedge before you prune it. If winter stem colour is the priority, let young plants establish first and then renew the older growth in spring so fresh stems carry the strongest colour. If flowers, berries and a more continuous screen matter more, don't cut every stem to the ground each year. Renew older stems gradually instead. Whichever approach you take, keeping the root area weed-free and evenly moist through the first growing season makes a big difference.
From our nursery
Visit our Dogwood hedges

Common Dogwood Hedge
Common Dogwood is the one I would choose where a more natural-looking hedge and native wildlife value are important. It has colourful young stems, spring flowers and autumn berries, and its growth rate makes it useful either on its own or within a mixed native hedge. Give it enough moisture during establishment and use selective rather than annual hard pruning if flowers and berries are a priority.

Red Stemmed Dogwood Hedge
Red Stemmed Dogwood is a strong choice where the winter display is the main reason for planting. The youngest stems carry the best red colour, particularly in a bright position, so an established hedge benefits from regular renewal pruning. It works especially well where the stems can be seen against evergreen planting, but remember that the Dogwood itself loses its leaves in winter.

Yellow Stemmed Dogwood Hedge
Yellow Stemmed Dogwood gives a very different winter effect from the red forms and is particularly useful mixed with red or orange-stemmed Dogwoods. The bright young stems show best in good light. It normally makes 20–40cm of growth a year in suitable conditions, so allow it to establish properly before starting a regular programme of renewal pruning.

Midwinter Fire Dogwood Hedge
Midwinter Fire is the choice I would make when the quality of the winter stem display matters more than creating the quickest screen. Its stems develop a mixture of yellow, orange and red tones, but it is slower growing than the other Dogwoods in this range. It does not need to be cut hard every year; renewing it every couple of years can maintain colour without constantly removing all of the older framework.
Not sure which Dogwood hedge to choose?
Compare the available plants, formats and starting sizes in the complete range.
Explore our complete Dogwood hedging rangeDogwood hedge quick-care summary
| Botanical name | Cornus spp. |
|---|---|
| Plant type | Multi-stemmed woody hedging shrub |
| Evergreen or deciduous | Deciduous |
| Typical growth rate | 10–40cm per year, depending on variety |
| Preferred position | Full sun to partial shade |
| Soil | Most moisture-retentive, reasonably drained soils |
| Watering | Regularly while establishing; during dry spells thereafter |
| Pruning period | Late winter to mid-spring |
| Feeding | Balanced spring feed where required |
| Hardiness | RHS H6–H7 across the current range |
| Typical hedge height | About 1–2.5m when managed |
| Planting season | Pot grown year-round; bare root normally Nov–Apr |
| Root types commonly available | Bare root and pot grown |
About Dogwood hedging
Dogwoods are deciduous, multi-stemmed shrubs grown as hedges for their coloured young stems, seasonal foliage, flowers and fruit. The Hedging Plants Direct range contains four different forms, from native Common Dogwood to red, yellow and multi-coloured ornamental cultivars.
Dogwood belongs to the genus Cornus. The shrubby Dogwoods used for hedging are particularly valued for their young stems, which can provide red, orange or yellow colour after the leaves fall. They also produce seasonal foliage, small flowers and fruit, although the exact colours and wildlife value vary between species and cultivars.
Our current range includes Common Dogwood (Cornus sanguinea), Red Stemmed Dogwood (Cornus alba 'Sibirica'), Yellow Stemmed Dogwood and Midwinter Fire Dogwood.
Common Dogwood is native to Britain and works particularly well in informal and wildlife hedging. The coloured cultivars are usually chosen for their winter display. Because all four are deciduous, they provide useful seasonal screening but should not be treated as substitutes for an evergreen privacy hedge.
Choosing the right Dogwood hedge
Choose Dogwood primarily by the winter stem colour, wildlife value and growth rate you want. Common, Red Stemmed and Yellow Stemmed Dogwood are the quicker options in the current range, while Midwinter Fire grows more slowly but offers particularly varied orange, red and yellow winter stems.
All four Dogwoods can make attractive informal hedges, but they are not interchangeable. Your choice should depend on whether native wildlife value, winter colour or establishment speed matters most.
| Dogwood | Best suited to | Current HPD growth rate | Winter feature |
|---|---|---|---|
| Common Dogwood | Native and wildlife hedging | 20–40cm/year | Red to orange young stems |
| Red Stemmed Dogwood | Strong red winter colour | 20–40cm/year | Bright red young stems |
| Yellow Stemmed Dogwood | Contrasting winter colour | 20–40cm/year | Yellow young stems |
| Midwinter Fire | Feature planting and mixed winter colour | 10–20cm/year | Yellow, orange and red stems |
For privacy
Dogwood can form a reasonably dense leafy hedge during the growing season, but it loses its leaves in autumn. If year-round screening is essential, an evergreen hedge is usually more appropriate, or Dogwood can be used in front of evergreen planting for winter colour.
For winter colour
A bright position generally gives the strongest stem colour. The red, yellow and Midwinter Fire forms are particularly useful where their bare stems will remain visible through winter.
For wildlife
Common Dogwood is the strongest choice where native habitat value is a priority. Its flowers are visited by insects and its berries are eaten by birds and mammals. Avoid removing all of the flowering wood every spring if fruit production is important.
For difficult sites
Dogwoods cope with a useful range of soils and can tolerate moisture-retentive ground, but extremely dry soil and deep shade are poor choices if strong growth and bright stems are wanted. Do not assume that every Dogwood has identical tolerance of strongly alkaline soil or severe salt-laden coastal exposure.
When to plant Dogwood hedging
Bare-root Dogwood is normally planted during the dormant season from late autumn into early spring, while pot-grown plants can be planted throughout the year when soil and weather conditions are suitable. Autumn is particularly convenient because the soil is usually moist and plants have time to begin establishing before summer.
Bare-root Dogwood
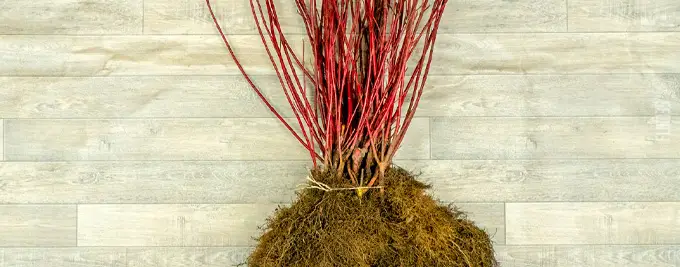
Plant bare-root Dogwood during the dormant period, normally from November into early spring. Plant promptly after delivery and keep the roots cool, shaded and moist until they are in the ground.
Pot-grown Dogwood
Pot-grown plants offer a wider planting window and can be planted at most times of year provided the soil is workable and you can supply enough water during establishment.
Conditions to avoid
- Do not plant into frozen ground.
- Delay planting if the soil is saturated and structurally damaged by working it.
- Avoid planting during extreme heat or drought unless reliable irrigation is available.
- If planting pot-grown Dogwood in warm weather, water the root ball thoroughly before planting and monitor it closely afterwards.
Where to plant Dogwood hedging
Plant Dogwood in full sun or partial shade, ideally in soil that retains moisture without remaining persistently waterlogged. The plants tolerate a useful range of soils, but strong sunlight normally produces the brightest winter stem colour and very dry ground or deep shade will reduce performance.
Sun and shade
Dogwood will grow in full sun or partial shade. For the strongest red, yellow and orange winter stems, give it as much good light as the site allows. Deep shade can produce weaker growth and less intense stem colour.
Soil and drainage
Most hedging Dogwoods are adaptable and particularly appreciate moisture-retentive soil. Aim for ground that remains reasonably moist but does not stay stagnant around the roots. On very dry, sandy soil, improving organic matter content and mulching can help retain moisture.
If the site regularly remains waterlogged for long periods, improve the underlying drainage or reconsider the planting position rather than attempting to solve the problem simply by adding fertiliser.
Walls, fences and neighbouring plants
Allow enough room between the planting line and a fence or wall for the hedge to broaden and for future pruning access. Dogwood can also sucker or layer where stems contact suitable soil, so allow more space for an informal hedge than for one that will be regularly contained.
Where a hedge sits on or close to a property boundary, consider its eventual width and how both sides will be maintained before planting.
Prepare the planting area
Remove perennial weeds before planting, loosen compacted soil and prepare either a trench or individual planting holes to suit the plants and spacing. Hydrate pot-grown root balls before planting and never allow bare roots to dry out while the planting line is being prepared.
- Clear the planting line: remove perennial weeds and competing grass from the area where the roots will establish.
- Check the soil: loosen compaction and correct serious drainage problems before planting rather than relying on the planting hole itself.
- Prepare the ground: a trench can be convenient for a closely spaced bare-root hedge, while individual holes are normally practical for larger pot-grown plants.
- Improve poor soil selectively: organic matter can improve very light or impoverished soil, but avoid creating an enriched pocket that differs drastically from the surrounding ground.
- Hydrate the plants: thoroughly water pot-grown root balls. Keep bare roots wrapped and moist until each plant is ready to go into the ground.
If using Rootgrow Mycorrhizal Fungi with Gel, apply it at planting so it comes into direct contact with the roots. It is an aid to establishment rather than a substitute for correct planting depth, soil preparation or watering.
Where additional organic material is useful, our Hedge Planting Compost can be incorporated appropriately. Avoid putting a concentrated dose of high-nitrogen fertiliser directly against newly planted roots.
How to plant a Dogwood hedge
Plant Dogwood at the same depth it was growing previously, spread bare roots naturally or keep the pot-grown root ball intact, firm the soil carefully and water thoroughly. Use the density shown for the exact product and size rather than relying on one universal Dogwood spacing.
- Mark a straight planting line. Use a string line for a formal hedge and mark the centres according to the density for the exact Dogwood product and size.
- Prepare the roots. Keep bare roots moist and spread them naturally without forcing them into a small hole. Thoroughly water pot-grown plants before removing the container.
- Dig wide enough for the roots. The hole or trench should allow roots to sit naturally rather than being bent sharply upwards or back on themselves.
- Set the planting depth. Position the plant so the previous soil mark or top of the established root system sits approximately level with the surrounding finished soil. Avoid burying stems unnecessarily deeply.
- Backfill carefully. Return the excavated soil around the roots in stages, working it in gently to remove large air pockets.
- Firm without compacting. The plant should be stable, but excessive stamping can damage wet soil structure.
- Water thoroughly. Give the complete root zone a good initial soaking, even when planting during cool weather.
- Mulch the surface. Apply an organic mulch over the root area, leaving a small clear gap immediately around the stems.
- Protect where necessary. On exposed sites or where rabbits, deer or other animals are a genuine risk, add appropriate support or plant protection without constricting the stems.
Dogwood hedge spacing and plants per metre
Dogwood spacing varies substantially by variety, plant height and root type. Current Hedging Plants Direct planting densities range from three to seven plants per metre, so the correct figure is the one attached to the exact product variation being planted, not a generic Dogwood recommendation.
The table below uses the current planting densities shown on the live Hedging Plants Direct product variations. Approximate centre-to-centre spacing is calculated from those plants-per-metre figures.
| Dogwood | Size / root type | Plants per metre | Approx. centres |
|---|---|---|---|
| Common Dogwood | 40–60cm bare root | 7 | 14cm |
| Common Dogwood | 60–90cm bare root | 7 | 14cm |
| Common Dogwood | 90–120cm bare root | 6 | 17cm |
| Common Dogwood | 40–60cm pot grown | 5 | 20cm |
| Common Dogwood | 80–100cm, 5L pot grown | 5 | 20cm |
| Red Stemmed Dogwood | 40–60cm bare root | 7 | 14cm |
| Red Stemmed Dogwood | 60–90cm bare root | 7 | 14cm |
| Red Stemmed Dogwood | 90–120cm bare root | 5 | 20cm |
| Yellow Stemmed Dogwood | 40–60cm bare root | 7 | 14cm |
| Yellow Stemmed Dogwood | 60–90cm bare root | 7 | 14cm |
| Yellow Stemmed Dogwood | 90–120cm bare root | 5 | 20cm |
| Yellow Stemmed Dogwood | 80–100cm, 5L pot grown | 5 | 20cm |
| Midwinter Fire | 40–50cm bare root | 5 | 20cm |
| Midwinter Fire | 60–90cm bare root | 4 | 25cm |
| Midwinter Fire | 40–50cm pot grown | 3 | 33cm |
These figures are intended for a conventional single hedge row. A broader staggered wildlife hedge is a different design and should be planned around the desired finished width rather than simply doubling the single-row density.
Always check the live product variation before ordering or marking the planting line, as available sizes and recommended densities can change.
Watering and establishment
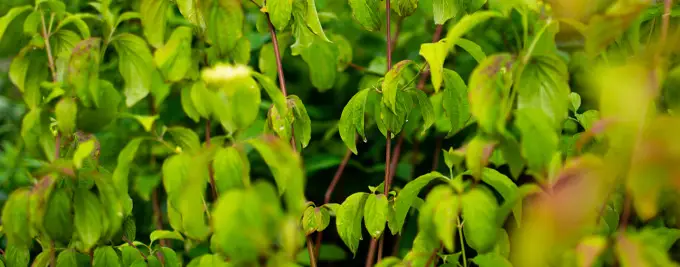
Water Dogwood thoroughly after planting and keep the whole root zone evenly moist during the first growing season. Rather than watering to a fixed timetable, check the soil and adjust for rainfall, temperature, soil type and plant size, giving a deeper watering when the root zone begins to dry.
Immediately after planting
Water the complete root zone thoroughly to settle the soil around the roots. Newly planted bare-root and pot-grown Dogwoods both need dependable moisture while new roots move into the surrounding soil.
During the first growing season
Check the soil below the surface rather than judging by appearance alone. Sandy and exposed sites can dry quickly, while heavier soils may remain wet for much longer. Aim for even moisture rather than repeated shallow watering.
During prolonged hot or dry weather, water deeply enough to wet the developing root zone. A surface that looks damp does not necessarily mean the original root ball or deeper roots have received enough water.
Signs of drought stress
- wilting that persists beyond the hottest part of the day
- dry soil around the root ball
- brown or scorched leaf edges
- weak or shortened new growth
- premature leaf drop during dry weather
Signs of excessive wetness
- persistently saturated soil
- yellowing foliage combined with wet ground
- weak growth or stem dieback
- roots failing to extend beyond the original planting area
A layer of organic mulch helps reduce evaporation and weed competition. For longer hedge runs, Hedge and Garden Irrigation can make controlled watering easier, but the soil should still be checked so the system is adjusted to actual conditions.
How and when to feed Dogwood
Established Dogwood usually needs only moderate feeding. On poor ground, apply a balanced general fertiliser in spring as growth begins and maintain the soil with organic mulch. Correct drought, waterlogging or poor planting depth before assuming a struggling hedge needs more fertiliser.
Dogwood is not a particularly demanding hedge where the soil is reasonably fertile. On poorer ground, a balanced feed in spring can support the flush of new growth that produces the following winter's coloured stems.
Our Hedge Feed can be used where additional nutrition is appropriate. Follow the current product application instructions rather than increasing the rate for a plant that appears stressed.
When not to feed
Do not use fertiliser as the first response to a hedge that is dry, waterlogged, recently badly damaged or planted too deeply. Resolve the underlying problem first. Avoid pushing large amounts of soft, nitrogen-rich growth late in the season, when new shoots need time to mature before winter.
Mulching
Organic mulch improves the root environment by conserving moisture and reducing weed competition. Keep mulch clear of direct contact with the stems rather than piling it against the base of the hedge.
How and when to prune Dogwood
Prune coloured-stem Dogwood from late winter into mid-spring. Once plants have had one or two seasons to establish, hard spring pruning encourages vigorous young shoots with the brightest winter colour. For a fuller hedge with more flowers and fruit, renew older stems gradually instead of cutting everything to the base each year.
There are two useful ways to prune a Dogwood hedge, and the correct method depends on what you want the plant to do.
Method 1: maximum winter stem colour
Young shoots carry the strongest red, yellow and orange colour. Let newly planted Dogwood establish for at least one or two growing seasons before beginning hard renewal pruning.
Once well established, coloured-stem Dogwoods can be cut back in late winter to mid-spring. For a coppiced display, established stems can be reduced to a short framework around 5–7.5cm above the ground. Fresh shoots then grow during spring and summer and provide the following winter's display.
Late March into mid-April is often a useful compromise because the colourful stems remain in place through most of winter. Midwinter Fire does not necessarily need this treatment annually and can be renewed every couple of years.
Method 2: a fuller hedge with flowers, berries and wildlife value
If you want a more continuous hedge, do not coppice every stem each spring. Instead, remove a proportion of the oldest stems close to the base and leave younger and intermediate growth in place. This continually introduces fresh coloured stems while retaining enough older wood for greater structure, flowering and fruiting.
| Priority | Pruning approach | Main trade-off |
|---|---|---|
| Strongest winter stems | Hard renewal pruning once established | Fewer flowers and berries on removed wood |
| Wildlife and natural hedge | Remove older stems selectively | Less uniformly bright young growth |
| Balanced approach | Rotate sections or stems over several years | Mixed-age appearance |
Young hedges
Avoid repeatedly cutting a newly planted Dogwood hedge to ground level before it has built a reliable root system. Remove damaged stems and lightly shape where necessary, then start stronger renewal pruning when establishment is secure.
Overgrown Dogwood
Healthy established shrubby Dogwoods usually respond well to renovation because they naturally produce vigorous growth from low down. Carry out very severe work while dormant or at the start of spring growth and provide water and mulch afterwards if conditions are dry.
Before cutting
Always check the hedge carefully for active bird nests before pruning. If a nest is being built or used, delay the work until it is no longer active.
Dogwood growth rate and eventual size
Most of the current Dogwood range is listed by Hedging Plants Direct at 20–40cm of growth per year, while Midwinter Fire is slower at around 10–20cm. Actual growth varies with establishment, soil moisture, light, pruning and competition, so these figures should be treated as useful guides rather than guarantees.
| Dogwood | Current HPD growth rate | Current HPD overall height |
|---|---|---|
| Common Dogwood | 20–40cm/year | Up to 3m |
| Red Stemmed Dogwood | 20–40cm/year | Up to 3m |
| Yellow Stemmed Dogwood | 20–40cm/year | Up to 3m |
| Midwinter Fire | 10–20cm/year | Up to 3m |
The finished height of a Dogwood hedge is strongly influenced by pruning. A regularly renewed coloured-stem hedge is often maintained around 1–2m, while an informal hedge allowed to mature can become considerably broader and taller.
Do not judge a new hedge solely by the amount of top growth it makes during its first season. Newly planted Dogwood first needs to establish roots into the surrounding soil. Growth normally becomes stronger once that root system has developed.
What affects growth?
- soil moisture and drainage
- sunlight
- weed and grass competition
- root establishment
- soil fertility
- how hard and how often the hedge is pruned
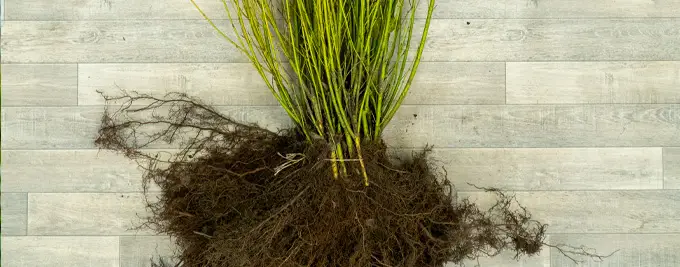
Seasonal Dogwood hedge care
Dogwood needs the most attention during establishment and around spring pruning. Winter is the main bare-root planting period, spring is the usual time for renewal pruning and feeding, summer care centres on moisture and weeds, and autumn is useful for pot-grown planting, mulching and enjoying foliage colour.
| Season | Main Dogwood care |
|---|---|
| Winter | Plant bare-root Dogwood when the ground is workable. Check newly planted hedges after severe weather and enjoy the coloured bare stems. |
| Early spring | Carry out renewal pruning on established coloured-stem Dogwood, checking first for active nests. Apply a balanced feed on poor soil and refresh mulch where necessary. |
| Late spring | Watch new growth and check moisture around recently planted hedges. Keep the root zone free from competing weeds and grass. |
| Summer | Water young plants during prolonged dry weather. Avoid unnecessary hard pruning and check carefully for nesting birds before any trimming. |
| Autumn | A good time for pot-grown planting and soil preparation. Maintain mulch, plan bare-root planting and enjoy the developing autumn foliage. |
Pests, diseases and common Dogwood problems
Most problems with newly planted Dogwood are caused by establishment conditions rather than a serious pest or disease. Check moisture, planting depth, drainage and competition first. Dogwood can occasionally suffer root diseases or scale insects, but symptoms should be identified properly before treatment.
Dogwood leaves turning yellow
Yellow leaves are not a diagnosis on their own. First check whether the root zone is staying saturated, whether the hedge has recently been planted, and whether roots are establishing beyond the original hole. Correct drainage or watering problems before adding extra fertiliser.
Dogwood leaves turning brown or scorched
Dry soil and a root ball that has not received enough water are common causes during hot weather, particularly in the first season. Check moisture below the surface. A plant can be surrounded by apparently damp ground while the original root ball remains dry.
Leaves dropping
Remember that Dogwood is deciduous. Autumn leaf fall is normal. Leaf loss well before autumn should be considered alongside soil moisture, heat, root disturbance, stem condition and any visible spotting or dieback.
My Dogwood hedge is not growing
Slow top growth in the first season can simply reflect establishment. Check for grass competition, drought, deep planting, poor drainage and heavy shade. Midwinter Fire is also naturally slower growing than the other Dogwoods in our current range.
Sparse growth at the base
Old, unrenewed stems can leave an ageing hedge with less vigorous low growth. Once the plants are healthy and established, removing some older stems close to the base encourages replacement shoots. Avoid severe renovation while the hedge is already suffering from drought or root problems.
Horse chestnut scale
Dogwoods can host horse chestnut scale. White, rounded egg masses may be visible on larger stems from late spring into summer. The pest is often more conspicuous than damaging, so identification and observation are usually more useful than immediately reaching for a pesticide.
Root diseases
Dogwoods can be affected by honey fungus or Phytophthora root rot. Persistent dieback combined with unhealthy roots, collar damage or chronically wet soil deserves closer investigation. Improving drainage and avoiding repeated root stress are more useful preventive measures than routine chemical treatment.
What about Cornus anthracnose?
The serious Cornus anthracnose disease often associated with the name Dogwood primarily affects flowering Dogwood species such as Cornus florida, Cornus nuttallii and Cornus kousa. It should not be assumed to be the cause of ordinary spotting or leaf stress on the shrubby Dogwoods in this hedge range.
Is my Dogwood dead or dormant?
A leafless Dogwood in winter is normally dormant. If you are concerned after spring growth has begun, inspect buds and flexible young stems and make a small scratch on a suspect twig to check for living green tissue beneath the bark. Test only a small area rather than damaging several stems.
Wildlife and environmental value
Common Dogwood is a native hedging species with genuine wildlife value: insects visit its flowers, several moth caterpillars feed on its foliage and birds and mammals eat the autumn berries. A less intensive pruning regime preserves more flowers, fruit and shelter than annual whole-plant coppicing.
Common Dogwood is native to Britain and is naturally found in hedgerows and woodland-edge habitats. Its small flowers are visited by insects, its foliage is used by some moth caterpillars, and its black berries are eaten by birds and mammals.
The ornamental Dogwoods also provide structure, flowers and seasonal fruit, although their exact wildlife value differs from Common Dogwood and they should not be described as native simply because they belong to the same genus.
Pruning for wildlife
Cutting every stem almost to ground level each spring maximises fresh winter stem colour but removes much of the wood that would otherwise flower and fruit. Where wildlife value matters, renew part of the hedge at a time or remove only a proportion of the oldest stems each year.
A denser, mixed-age hedge also provides more physical cover. Before carrying out any pruning, check thoroughly for nests that are currently being built or used and postpone the work where necessary.
Dogwood care by root type
The current Dogwood range is supplied as bare-root and pot-grown plants. Bare-root Dogwood is planted while dormant and must never be allowed to dry out before planting, while pot-grown Dogwood offers more planting flexibility but may need closer watering attention when planted during warm weather.
| Bare-root Dogwood | Pot-grown Dogwood | |
|---|---|---|
| Planting period | Dormant season, normally November to early spring | Most of the year when conditions allow |
| Before planting | Keep roots cool, covered and moist | Water the root ball thoroughly |
| At planting | Spread roots naturally without bending them into a small hole | Remove the pot and plant at the original depth |
| Main establishment risk | Roots drying before or immediately after planting | Original root ball drying during warm weather |
| Aftercare | Water in and monitor as spring growth begins | Water in and monitor until roots have moved into surrounding soil |
Root-balled and instant Dogwood are not part of the current Dogwood range, so there is no need to pad this guide with handling instructions for formats customers are not currently buying from us.
Frequently asked questions about Dogwood hedging
When should I prune a Dogwood hedge?
Prune coloured-stem Dogwood from late winter into mid-spring, with late March to mid-April often useful if you want to enjoy the stems through winter first. Let newly planted Dogwood establish for one or two seasons before hard coppicing. Always check for active bird nests before cutting.
How hard can I cut back Dogwood?
Healthy, established coloured-stem Dogwood can be cut back very hard. For maximum young-stem colour, established plants can be reduced to a short framework around 5–7.5cm high in spring. Do not use this treatment automatically on newly planted or badly stressed plants.
Do I need to prune Dogwood every year?
No. Annual hard pruning produces plenty of young, brightly coloured stems, but it is not essential. You can renew older stems selectively or coppice sections in rotation. Midwinter Fire in particular can be cut back every couple of years rather than every spring.
How far apart should Dogwood hedge plants be?
Use the planting density for the exact Dogwood product and size because current recommendations range from three to seven plants per metre. That equates to approximately 33cm centres at three per metre, 25cm at four, 20cm at five, 17cm at six and 14cm at seven plants per metre.
When is the best time to plant Dogwood?
Autumn is an excellent time to plant Dogwood because the soil is normally moist and still workable. Bare-root plants are normally planted during the dormant season from around November into early spring. Pot-grown Dogwood can be planted more widely through the year if the ground is workable and reliable watering is available.
How fast does Dogwood hedging grow?
Current Hedging Plants Direct product data lists Common, Red Stemmed and Yellow Stemmed Dogwood at approximately 20–40cm of growth per year, while Midwinter Fire is slower at around 10–20cm. Growth depends on moisture, establishment, soil, light and pruning, so these figures are guides rather than guarantees.
Does Dogwood grow in shade?
Dogwood tolerates partial shade, but full sun normally gives the strongest winter stem colour. Deep shade can reduce both growth and stem intensity. If coloured winter stems are one of your main reasons for planting Dogwood, give the hedge as much useful light as the site allows.
Does Dogwood like wet soil?
Dogwood generally likes moisture-retentive soil and tolerates damp conditions better than many hedging shrubs, but that does not mean permanently stagnant, oxygen-starved soil is ideal. Consistently waterlogged ground can still cause root decline, so distinguish moisture-retentive soil from a site with a serious drainage problem.
Why are my Dogwood leaves turning yellow?
Check soil moisture first. Yellowing on a young hedge can follow waterlogging, poor root establishment or other root stress and does not automatically mean the plant needs fertiliser. Look at drainage, planting depth, weed competition and the condition of new growth before deciding on treatment.
Why are my Dogwood leaves turning brown?
Brown edges or scorched foliage during warm weather often point to drought stress, particularly on recently planted Dogwood. Check moisture around and within the original root ball rather than just the soil surface. Persistent stem dieback despite suitable moisture needs closer investigation.
Why has my Dogwood lost all its leaves?
Dogwood hedging is deciduous, so losing its leaves in autumn is normal. A bare hedge during winter is not dead. Leaf loss during spring or summer is different and should prompt checks for drought, waterlogging, root damage, severe stress or visible pest and disease symptoms.
How do I get brighter red or yellow Dogwood stems?
Give the hedge good light and encourage healthy young growth. The youngest stems normally carry the brightest colour, so once the plant is established, renewal pruning in spring promotes fresh shoots for the following winter. Consistently dry soil can reduce the quality and vigour of that growth.
Is Common Dogwood native to the UK?
Yes. Common Dogwood, Cornus sanguinea, is native to Britain and occurs naturally in hedgerows and woodland-edge habitats. It is the most appropriate Dogwood in our current range where a native-species planting scheme is the priority.
Does hard pruning reduce Dogwood flowers and berries?
Yes. Cutting all stems close to the ground in spring promotes brightly coloured young shoots but removes much of the older wood that would otherwise flower and fruit. If flowers, berries and wildlife value matter, renew only part of the hedge each year or remove selected older stems.
Are Dogwood berries edible?
Do not treat berries from a Dogwood hedge as food simply because another plant in the large Cornus genus may have edible fruit. The species differ. Common Dogwood berries are valuable wildlife food but should not be harvested as an edible crop.
Related hedge advice
Useful planting, pruning and hedge-care advice from our nursery.
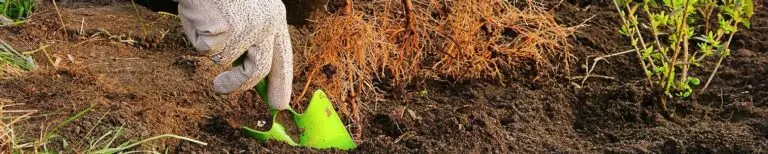
How to Plant a Hedge – Growing and Caring for Hedging Plants
Learn how you can easily plant a hedge with our comprehensive step-by-step guide. From picking the right species to planting techniques and after care.
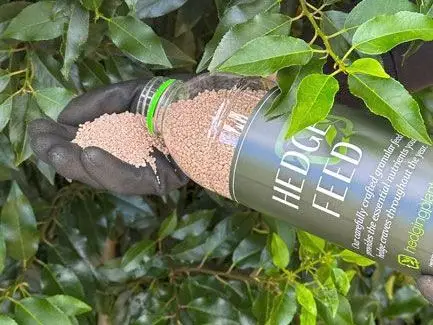
How to Fertilise a Hedge – Essential Tips for Healthy Growth
Enjoy healthy, lush hedges with our comprehensive guide on how to fertilise your hedge. Discover the importance of using the right types of hedge fertiliser
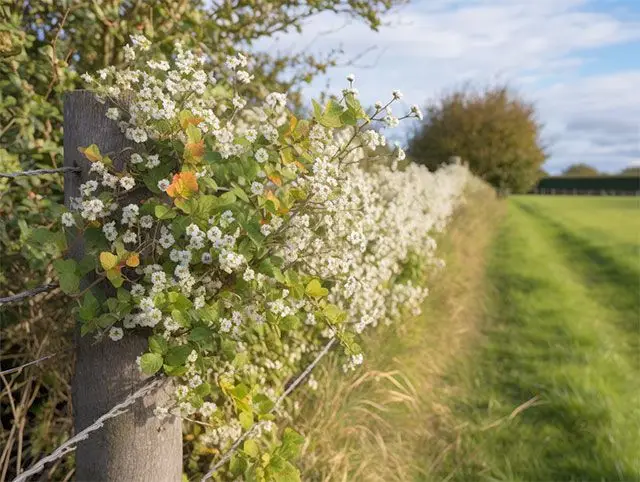
Native Hedge Plants UK: What to Choose for Your Garden
Compare native hedge plants for UK gardens and find the right species or prepared mixture for wildlife, screening, clay soil, shade and rural boundaries.