
Hedging care & growing guide
Lonicera Hedge Care Guide: Planting, Spacing & Pruning
Lonicera nitida hedging is fast-growing, evergreen and straightforward to maintain when it is planted in well-drained soil, watered carefully while establishing and clipped regularly. If you are still choosing plants or root types, browse our Lonicera hedging range; this guide covers the planting, spacing, watering, feeding, pruning and ongoing care that follows.
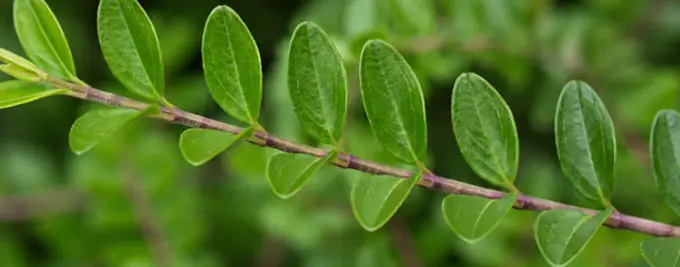
Also known as Box Leaf Honeysuckle or shrubby honeysuckle, Lonicera nitida has small glossy leaves and responds well to clipping, making it particularly useful for low formal hedges, topiary and as a faster-growing alternative to traditional Box.
Below you will find spacing for the actual Lonicera sizes we supply, advice for bare-root and pot-grown plants, seasonal maintenance guidance and practical help with problems such as yellow leaves, browning, poor growth and sparse hedges.
Expert nursery advice
Gwynne's Grower's Tip
Lonicera responds very quickly to good preparation and regular clipping. The two things I would not compromise on are getting the spacing right for the exact size you have bought and keeping the roots evenly moist while the plants establish. Once it is growing strongly, trim little and often rather than waiting for long shoots to become untidy. Keep the base weed free, avoid planting into waterlogged ground and do not try to force a stressed young hedge with lots of fertiliser.
From our nursery
Visit our Lonicera hedges

Box Leaf Honeysuckle Hedge
This is the Lonicera I would choose when you want a small-leaved evergreen hedge that establishes quickly and responds well to clipping. Bare-root plants are particularly economical for planting a longer hedge in the dormant season, while pot-grown plants give more flexibility over planting time. Whichever size you choose, follow the planting density shown for that exact variation rather than using one generic spacing.
Not sure which Lonicera hedge to choose?
Compare the available plants, formats and starting sizes in the complete range.
Explore our complete Lonicera hedging rangeLonicera hedge quick-care summary
| Botanical name | Lonicera nitida |
|---|---|
| Plant type | Evergreen hedging shrub |
| Evergreen or deciduous | Evergreen |
| Typical growth rate | Around 30–60cm per year in good conditions |
| Preferred position | Full sun to partial shade |
| Soil | Most well-drained soils; avoid waterlogging |
| Watering | Regularly while establishing; then during dry spells |
| Pruning period | Spring to autumn; usually 2–3 clips as required |
| Feeding | Spring feed if growth is weak or foliage pale |
| Hardiness | RHS H6 |
| Typical hedge height | Commonly maintained around 0.6–1.5m; can be taller |
| Planting season | Pot grown year-round; bare root normally Nov–Apr |
| Root types commonly available | Bare root, pot grown and instant hedging |
About Lonicera hedging
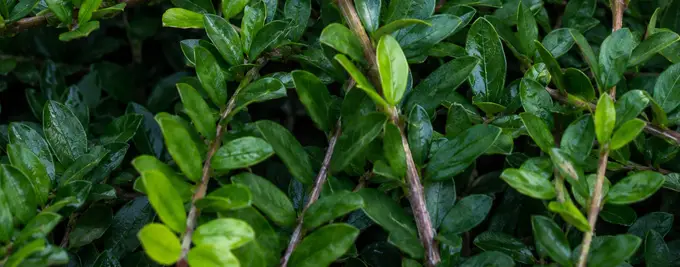
Lonicera nitida is a dense, small-leaved evergreen shrub that can be clipped into a neat formal hedge or allowed to develop a softer shape. Its rapid growth and tolerance of regular trimming make it particularly useful for low and medium-height boundaries and as an alternative to Box.
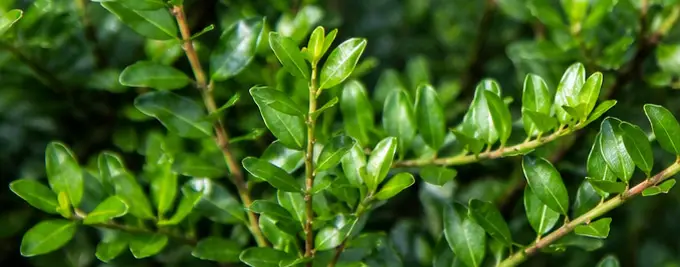
Lonicera nitida is commonly known as Box Leaf Honeysuckle, shrubby honeysuckle or Wilson's honeysuckle. Unlike the familiar climbing honeysuckles, it forms a dense, bushy evergreen shrub with many fine branches and small glossy green leaves.
Small cream flowers appear in spring and may be followed by sparse blue-purple berries in autumn. The flowers and fruit are secondary to the foliage when the plant is grown as a regularly clipped hedge, but they add extra seasonal interest where plants are trimmed less tightly.
Why is Lonicera used for hedging?
- It has small evergreen leaves that suit neat, formal clipping.
- It grows considerably faster than traditional Box.
- It responds well to repeated trimming.
- It can be kept as a low edging hedge or allowed to form a taller boundary.
- It tolerates a broad range of well-drained garden soils.
- It is suitable for topiary as well as hedging.
Our current Box Leaf Honeysuckle Hedge range consists of Lonicera nitida supplied in different sizes and root formats.
Choosing the right Lonicera hedge
Lonicera nitida is best suited to gardeners wanting a fast-establishing, evergreen hedge that can be clipped closely. It is particularly good for formal low hedges and Box-style shapes, but its rapid growth means it needs more frequent trimming than slower-growing Box or Yew.
Lonicera is versatile, but its fast growth and fine branching make it better suited to some situations than others.
| Requirement | How suitable is Lonicera? | What to know |
|---|---|---|
| Low formal hedge | Excellent | Small leaves and fine shoots respond well to close clipping. |
| Box alternative | Excellent | Similar small-leaved appearance, but noticeably faster growing. |
| Fast establishment | Very good | Annual extension growth can be substantial once established. |
| Medium privacy hedge | Good | Can form a dense screen, although taller hedges require regular maintenance. |
| Partial shade | Good | It grows in partial or dappled shade, although flowering may reduce as shade increases. |
| Heavy clay | Good if drained | Clay itself is not a problem, but persistently waterlogged ground is. |
| Coastal garden | Generally suitable | Young plants still benefit from careful establishment in severe drying winds. |
| Very low-maintenance hedge | Less suitable | Its fast growth means regular clipping is needed to keep a precise shape. |
For buyers choosing between root formats rather than species, bare-root plants normally provide the most economical option for longer winter planting projects, while pot-grown plants are easier to plant outside the bare-root season. Instant hedging provides greater immediate density when available.
When to plant Lonicera hedging
Pot-grown Lonicera can be planted whenever the soil is workable and adequate watering is possible, although autumn and spring are usually easiest. Bare-root Lonicera is seasonal and currently supplied during the cooler dormant period, normally from November to April.
Pot-grown Lonicera
Pot-grown plants can be planted throughout the year if the ground is neither frozen nor waterlogged and you can provide sufficient aftercare. Autumn and spring are generally the easiest periods because temperatures are milder and the soil is less likely to dry rapidly.
Avoid planting during very hot, dry weather where possible. If summer planting cannot be avoided, prepare the ground thoroughly and pay particular attention to watering throughout establishment.
Bare-root Lonicera
Bare-root Lonicera is a seasonal product. Our current range lists bare-root plants as normally available between November and April. Plant them promptly after delivery while the plants are dormant and the roots are still fresh.
Instant Lonicera hedging
Instant hedging should also be planted into workable soil and requires particularly careful watering because a larger established plant carries more foliage from the day it is planted. Current availability should be checked on the live product before ordering.
Whatever the root type, postpone planting if the soil is frozen, saturated or so dry that it cannot be prepared properly.
Where to plant Lonicera hedging
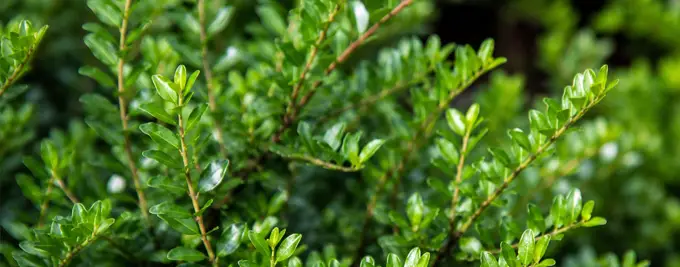
Plant Lonicera nitida in well-drained soil in full sun or partial shade. It tolerates clay, loam, sand and chalk and is not particularly demanding about soil pH, but prolonged waterlogging and extremely dry soil make establishment and long-term health more difficult.
Sun and shade
Lonicera nitida grows well in full sun and partial or dappled shade. A hedge grown in good light will usually produce its densest growth and is more likely to flower. Very deep shade is less suitable and may result in weaker growth and fewer flowers.
Soil and drainage
The species tolerates chalk, clay, loam and sandy soils and a wide pH range. Drainage is more important than the exact soil type. On compacted clay or ground that remains wet for long periods, improve the drainage or consider raising the planting line rather than placing the roots into a permanently wet trench.
Wind and coastal conditions
Lonicera nitida is a hardy shrub and is used in coastal gardens, but newly planted evergreen hedges can still lose moisture quickly in strong drying winds. Give exposed new planting particularly careful watering while the root system develops.
Walls, fences and competing plants
Leave enough room between the hedge and a fence or wall to allow the plants to develop and for you to reach the back of the hedge for clipping and maintenance. Avoid planting directly into the root zone of large established trees or shrubs where the young hedge will face intense competition for water.
For more detail on boundary positioning, see our guide to how far to plant a hedge from a fence.
How to prepare the planting area
Prepare the full hedge line rather than only the individual planting holes where possible. Remove perennial weeds and grass, loosen compacted ground and correct obvious drainage problems before the plants arrive. Good preparation is more important than adding large amounts of fertiliser to the planting hole.
- Mark the hedge line. Use a string line where a straight formal hedge is required.
- Clear competing vegetation. Remove turf, perennial weeds and their roots from the planting strip. Grass growing directly around a new hedge can compete strongly for moisture.
- Break up compacted soil. Loosen the ground across the planting strip so new roots can move beyond the original hole or pot.
- Deal with drainage first. If water remains in the trench after rain, correct the underlying problem before planting rather than trying to compensate with compost or fertiliser.
- Improve poor soil where necessary. On very sandy, compacted or low-organic-matter ground, mix a suitable soil improver into the excavated soil. Our Hedge Planting Compost can be used as a soil conditioner rather than as a complete replacement for the existing soil.
- Prepare the plants. Water pot-grown root balls thoroughly before planting and keep bare roots protected from drying wind and sun.
Using mycorrhizal fungi
If using Rootgrow Mycorrhizal Fungi with Gel, apply it according to the product instructions so that it makes direct contact with the roots. It should complement, not replace, proper soil preparation, planting depth and watering.
Do not overfeed the planting hole
A newly planted hedge needs good soil contact, moisture and new root growth more than a strong dose of fertiliser. Avoid concentrating large quantities of fertiliser immediately against young roots.
How to plant a Lonicera hedge
Plant Lonicera at the same depth it was previously growing, firm soil carefully around the roots and water thoroughly after planting. Bare roots must never be allowed to dry, while pot-grown plants should be well watered before their containers are removed.
- Set out the plants at the correct spacing. Use the plants-per-metre figure for the exact size and root type you purchased rather than a generic Lonicera spacing.
- Prepare the roots. Water pot-grown plants thoroughly before removing the pot. Keep bare roots damp and protected until each plant is ready to go into the ground.
- Dig the hole or trench. Make it wide enough for the roots or root ball to sit naturally without being forced into a tight space.
- Check the planting depth. Position the plant at approximately the same soil level at which it was previously growing. Do not bury the stem deeply.
- Spread or position the roots carefully. Bare roots should be spread naturally. Keep the root ball of pot-grown plants intact unless roots are strongly circling around the outside.
- Backfill and firm. Return the excavated soil around the roots in stages, firming gently so there are no large air pockets while avoiding excessive compaction.
- Water thoroughly. Give the newly planted hedge a thorough initial watering so the soil settles around the roots.
- Mulch the hedge line. Apply an organic mulch over the root area but leave a small gap around the stems.
Small bare-root and pot-grown Lonicera plants do not normally require staking. Larger or instant plants in an exposed position may need temporary support if the root system cannot hold the plant securely while it establishes.
Lonicera hedge spacing and plants per metre
Lonicera spacing depends on the size and root type purchased. Our current 20–30cm bare-root plants are specified at 6 per metre, 15–20cm pot-grown plants at 4 per metre and 30–40cm pot-grown plants at 3 per metre.
Do not use one universal spacing for every Lonicera hedge. Larger plants need fewer plants per metre, while smaller bare-root stock is planted more closely to produce an even hedge.
| Current Lonicera size | Root type | Plants per metre | Approx. centre-to-centre spacing |
|---|---|---|---|
| 20–30cm | Bare root | 6 per metre | About 17cm |
| 15–20cm | Pot grown | 4 per metre | 25cm |
| 30–40cm | Pot grown | 3 per metre | About 33cm |
Single or double row?
For an ordinary formal Lonicera garden hedge, a single row at the recommended density is normally sufficient. Do not simply double the number of plants if you want a broad staggered hedge. For a landscape specification requiring a double row, calculate the density for that project rather than treating the figures above as a double-row specification.
Why does the spacing change?
Smaller plants have less initial width, so more are used per metre to create an even hedge line. Larger plants already occupy more space and can fill the gaps from a wider starting distance.
Watering and establishing Lonicera hedging
Water Lonicera thoroughly when it is planted and monitor the root zone closely during the first spring and summer. The aim is to keep the developing roots evenly supplied with moisture without leaving them in saturated soil.
Immediately after planting
Water the complete root area thoroughly, even if rain is forecast. This helps settle the soil around the roots and removes large air pockets.
During the first growing season
Check the soil at root depth rather than judging only from the surface. Newly planted hedging has a limited root system, so it can dry out much faster than an established hedge. Water deeply when the soil is beginning to dry rather than giving frequent small splashes that wet only the surface.
There is no useful fixed rule such as watering every day or every seven days. Temperature, rainfall, wind, plant size and soil type all affect how quickly a hedge dries.
Hot and windy weather
Increase checks during dry spells and strong winds. Evergreen foliage continues to lose moisture while the roots are establishing, so newly planted Lonicera can become stressed quickly in drying conditions.
Clay and heavy soils
Heavy ground usually needs less frequent watering but requires closer attention to drainage. Do not keep adding water simply because a routine says the hedge is due to be watered. If the soil is already wet below the surface, wait.
Signs of too little water
- drooping or dull foliage
- brown leaf margins or shoot tips
- premature leaf drop
- weak or stalled new growth
Signs of excessive moisture or poor drainage
- persistent yellowing
- weak growth despite wet soil
- root or stem-base deterioration
- soil remaining saturated long after rainfall
For longer hedge lines, a properly installed hedge irrigation system can make even watering easier.
A layer of Hedge Bio Mulch also helps conserve moisture and reduce weed competition. Keep mulch clear of the stems themselves.
How and when to feed Lonicera hedging
Healthy Lonicera growing strongly in reasonable soil does not need heavy feeding. A balanced general fertiliser in spring can help where foliage is pale or growth is poor, but first rule out drought, waterlogging and other root problems.
Lonicera is naturally vigorous, so fertiliser should support healthy growth rather than be used simply to make the hedge grow as fast as possible.
When feeding is useful
Consider a spring application where established plants are growing weakly, foliage is generally pale or the soil is known to be poor. Our Hedge Feed is a balanced granular fertiliser and can be used according to the product instructions.
When not to feed
Do not assume yellow leaves automatically mean a nutrient deficiency. A newly planted hedge sitting in saturated soil, suffering drought or planted too deeply will not be corrected by adding fertiliser. Resolve the underlying root problem first.
Avoid pushing soft new growth with excessive high-nitrogen feeding late in the growing season. Strong late growth has less time to mature before colder weather.
Mulching
An annual organic mulch can improve soil conditions, reduce competition from weeds and help stabilise moisture levels. Keep the material away from direct contact with the stems.
How and when to prune Lonicera hedging
Clip an established Lonicera hedge between spring and autumn whenever it needs reshaping, usually two or three times during the growing season for a formal finish. Renovation of a badly overgrown or bare-bottomed hedge is better carried out in late winter or early spring.
Routine clipping
Lonicera nitida tolerates regular clipping extremely well. For a neat formal hedge, trim two or three times between spring and autumn as growth requires. A looser informal hedge can be cut less frequently.
Little-and-often trimming is usually better than allowing long shoots to become untidy and then removing a large amount in one operation.
Training a young hedge
During establishment, concentrate on encouraging side growth and density rather than allowing a few shoots to race upwards. Light trimming of strong lateral shoots encourages branching and helps the hedge fill from the base.
Shaping the hedge
Keep the base of the hedge at least as wide as the upper section rather than creating a top-heavy shape. This improves light reaching the lower foliage and reduces the risk of the base becoming sparse.
Renovating an overgrown Lonicera hedge
Lonicera responds well to hard renovation. An old hedge that has become bare or excessively large can be cut back hard in late winter or early spring. Shrubby honeysuckle can regenerate strongly from older growth; after renovation, select and train the strongest new shoots to rebuild a dense hedge.
Check for nesting birds
Always inspect the hedge carefully for active bird nests before cutting. If a nest is in use or being built, postpone work around it until it is no longer active.
Lonicera growth rate and eventual size
Lonicera nitida is fast growing. Hedging Plants Direct currently quotes approximately 30–60cm of growth per year under good conditions, although newly planted hedges may grow more slowly while establishing and actual growth depends on soil, moisture, light and maintenance.
Once established, Lonicera nitida can produce around 30–60cm of extension growth in a good year. This makes it useful when you want a hedge to fill relatively quickly, but it also explains why a formal Lonicera hedge needs regular clipping.
What affects the growth rate?
- how well the roots establish after planting
- availability of water during spring and summer
- soil structure and drainage
- sunlight
- weed and grass competition
- planting depth
- pruning frequency
Do not expect a newly planted hedge to achieve its maximum growth rate immediately. The first priority is establishing a strong root system.
How tall can Lonicera nitida grow?
Unclipped plants can develop into substantial shrubs. As a clipped hedge, Lonicera is commonly maintained much lower, particularly at around 60cm to 1.5m where its small foliage and dense branching are especially effective. Taller hedges are possible but require correspondingly more trimming.
Seasonal care for Lonicera hedging
Lonicera needs relatively little specialist seasonal treatment. Concentrate on planting and renovation during cooler weather, feeding in spring when required, watering during dry periods and clipping between spring and autumn.
| Season | Main Lonicera hedge jobs |
|---|---|
| Winter | Plant bare-root Lonicera when the ground is workable. Check newly planted evergreens during unusually dry weather. Renovate badly overgrown hedges in late winter if required. Avoid planting into frozen or saturated soil. |
| Spring | Plant pot-grown hedging, check moisture around all new plants, top up mulch and apply a balanced feed if established plants genuinely need it. Begin clipping once active growth requires it, after checking carefully for nests. |
| Summer | Monitor watering closely during hot or windy weather. Clip formal hedges as required and check young shoots for aphids and foliage for powdery mildew. |
| Autumn | Plant pot-grown hedging in favourable conditions, give formal hedges their final tidy-up if needed, continue watering newly planted hedges during dry spells and mulch the root area as conditions cool. |
Lonicera pests, diseases and common problems
Lonicera nitida is generally dependable, but problems can arise from drought, waterlogging, poor establishment, aphids, powdery mildew and several less-common fungal diseases. Start diagnosis with the roots and growing conditions before assuming that a pesticide or fertiliser is required.
| Problem | What it looks like | Likely cause and action |
|---|---|---|
| Yellow leaves | General paling or yellow foliage, sometimes with weak growth | Check soil moisture first. Both waterlogging and prolonged drought can cause yellowing. If drainage and moisture are satisfactory and an established hedge remains pale and weak, a spring feed may be appropriate. |
| Brown or scorched foliage | Brown edges, shoot tips or whole patches | Common after drought, drying wind, frost exposure or root disturbance. Check moisture at root depth and whether the affected roots are establishing properly. |
| Hedge not growing | Little extension growth after planting | Check planting depth, drainage, weed competition, soil compaction and moisture. Newly planted plants may also spend time establishing roots before strong top growth begins. |
| Sparse at the base | Foliage concentrated near the top and outside | Can follow inadequate early side trimming or a hedge allowed to become too top-heavy. Reshape gradually, improve light to the lower hedge and renovate hard if necessary. |
| Powdery mildew | White powdery coating over leaves or shoots | More likely during hot, dry conditions. Reduce drought stress, mulch the root zone and maintain reasonable airflow. |
| Aphids | Clusters on young shoots, distorted leaves and sometimes sticky honeydew | Small infestations can often be removed by hand or with water. Encourage natural predators and avoid unnecessary insecticide use. |
| Fungal leaf spot | Distinct spots or lesions rather than uniform yellowing | Remove badly affected fallen material, avoid keeping foliage unnecessarily wet and improve air circulation. Confirm the diagnosis before treating. |
Can a damaged Lonicera hedge recover?
Often, yes. Lonicera can produce vigorous new shoots after pruning, so a hedge that still has a healthy root system and living stems has considerable recovery potential. Correct the underlying problem before encouraging new growth.
Do not treat symptoms blindly
Uniform yellowing over a newly planted hedge is more likely to indicate a root-zone or establishment problem than a sudden infectious disease. Similarly, adding feed to waterlogged or drought-stressed roots can make matters worse rather than better.
Wildlife and environmental value
A dense Lonicera hedge can provide useful year-round structure and shelter for garden wildlife. Spring flowers add an insect resource and less-frequently clipped plants can produce autumn berries, although Lonicera nitida is not native to Britain or Ireland.
The fine branching and evergreen foliage of a mature Lonicera hedge create dense cover that can provide shelter and potential nesting habitat for garden birds. A less tightly clipped hedge generally offers more wildlife value than one repeatedly cut into a very close formal shape.
Small cream flowers appear in spring and may be visited by insects. If flowers are allowed to develop rather than being removed by clipping, sparse blue-purple berries may follow in autumn.
Lonicera nitida originates from China and is not a native British or Irish species, so it should not be described as a native wildlife hedge.
Bird nests and hedge cutting
Check the hedge thoroughly before every significant trim. Do not damage or destroy an active bird nest or disturb nesting birds.
Are the berries edible?
No. The fruit should be treated as ornamental rather than edible. Keep children and pets from eating the berries and follow appropriate precautions when handling the plant.
Lonicera care by root type
Bare-root, pot-grown and instant Lonicera are the same species, but handling and establishment differ. Bare roots must be protected from drying and planted during their seasonal availability, while pot-grown and instant plants carry an existing root ball that must be thoroughly watered before and after planting.
| Root type | Before planting | Aftercare |
|---|---|---|
| Bare root | Plant during the dormant supply season. Keep exposed roots moist and protected from wind and sun until they are in the ground. | Firm soil carefully around all roots and water thoroughly. Check frequently through the first spring as new leaves develop. |
| Pot grown | Water the root ball thoroughly before removing the container. Plant at the existing compost level. | Do not assume the surrounding soil is wet because the surface looks damp. Check the root ball and adjacent soil while roots establish. |
| Instant hedging | Keep the larger root system moist and handle it carefully. Prepare the complete planting line before delivery where possible. | Water particularly carefully because the plant starts with a much larger volume of evergreen foliage. Secure temporarily if exposed and unstable. |
The current product densities also differ by format and size. Always follow the live plants-per-metre figure supplied with the variation you purchase.
Frequently asked questions about Lonicera hedging
How far apart should I plant Lonicera nitida?
Spacing depends on the size you buy. Our current 20–30cm bare-root Lonicera is planted at 6 per metre, approximately 17cm apart. The 15–20cm pot-grown size is 4 per metre, or 25cm apart, while the 30–40cm pot-grown size is 3 per metre, approximately 33cm apart. Always use the density for the exact live variation.
How fast does Lonicera nitida grow?
Lonicera nitida can grow by around 30–60cm per year once established and growing in favourable conditions. Water availability, soil, light, weed competition and pruning all affect the actual rate. Newly planted hedges may make less top growth initially while their root systems establish.
When should I prune Lonicera nitida?
Routine Lonicera hedge trimming can be carried out between spring and autumn. A neat formal hedge may need two or three clips during the growing season. Save major renovation of an old or badly overgrown hedge for late winter or early spring, and always check carefully for active bird nests before cutting.
Can Lonicera nitida be hard pruned?
Yes. Lonicera nitida responds well to hard renovation and can regenerate from older growth. A badly overgrown or bare-bottomed hedge can be cut back hard in late winter or early spring, then the strongest new shoots can be selected and trained to rebuild a dense hedge.
Is Lonicera nitida evergreen?
Yes. Lonicera nitida is an evergreen shrub and normally keeps its small green leaves throughout the year. Severe drought, root problems or harsh exposure can still cause browning or leaf loss, particularly on newly planted hedging, so unexpected foliage loss should prompt a check of the growing conditions.
Can Lonicera nitida grow in shade?
Lonicera nitida grows well in partial or dappled shade as well as full sun. Very deep shade is less suitable and can produce weaker growth and fewer flowers. If you need the hedge to stay particularly dense and formal, a position with reasonable natural light is preferable.
Can I plant Lonicera in clay soil?
Yes, provided the clay drains adequately. Lonicera nitida tolerates clay as well as loam, chalk and sandy soils, but it does not thrive in persistently waterlogged ground. On heavy compacted clay, improve the soil structure and deal with drainage before planting rather than simply filling the planting hole with compost.
When can I plant bare-root Lonicera?
Our current bare-root Lonicera is normally supplied between November and April. Plant it promptly after delivery while the plants are dormant, protecting the exposed roots from drying wind and sun. Do not plant while the ground is frozen or waterlogged.
How often should I water a new Lonicera hedge?
Water according to the soil and weather rather than following a rigid timetable. Check moisture at root depth regularly throughout the first spring and summer and water deeply whenever the root zone begins to dry. Hot, dry and windy weather increases demand, while heavy clay may need less frequent watering.
Why are my Lonicera leaves turning yellow?
Yellow Lonicera leaves can result from waterlogging, drought, poor establishment or nutrient shortage. Check moisture and drainage first, particularly on a newly planted hedge. If an established hedge has healthy roots but remains generally pale with weak growth, a balanced spring fertiliser may then be useful.
Why is my Lonicera hedge turning brown?
Browning is commonly linked to drought, drying winds, frost damage or roots that have not established properly. Check moisture several centimetres below the surface and inspect whether the browning affects the whole hedge or isolated shoots. Correct the environmental cause before reaching for fertiliser or a plant treatment.
Is Lonicera nitida a good alternative to Box?
Yes. Its small evergreen leaves, dense branching and tolerance of close clipping make Lonicera nitida a useful Box alternative for low formal hedges and topiary. The main difference is speed: Lonicera grows considerably faster than Box, so it usually needs more frequent trimming to retain a precise shape.
How tall does Lonicera nitida grow?
Untrimmed Lonicera nitida can eventually become a shrub around 3m or more in height and spread. As hedging it is normally kept considerably smaller, often around 60cm to 1.5m for formal boundaries. Taller hedges are possible where there is enough room for regular maintenance.
Are Lonicera nitida berries edible?
No. Lonicera nitida berries should be regarded as ornamental rather than edible. Keep children and pets from consuming the berries and use sensible precautions when handling the plant.
Can Lonicera nitida grow in an exposed or coastal garden?
Lonicera nitida is hardy and suitable for many exposed and coastal gardens. Newly planted evergreen hedges are still vulnerable to moisture loss in severe drying winds, so careful watering and establishment are particularly important on exposed sites.