
How and When to Prune a Privet Hedge
Pruning privet is an essential part of its maintenance and will help keep your hedge looking neat and attractive. Our helpful step by step guide on pruning your privet hedge will help you quickly get to grips with cutting, trimming and pruning privet hedges.
Privet semi evergreen shrubs make an excellent choice when creating a formal hedge, or they can be used for informal hedges, making privet a very versatile hedging plant.
The way you prune will depend on whether the hedge is newly planted, established, overgrown or being managed for wildlife. This guide explains when to cut Privet, how to shape the sides and top, how to make a sparse hedge thicker and how to renovate an overgrown hedge safely.
For complete advice covering varieties, planting, spacing, watering, feeding and common problems, read our complete Privet Hedge Care Guide .
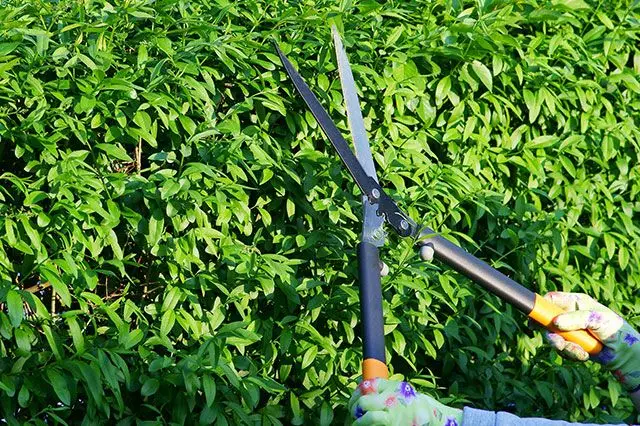
Pruning guide contents
When should a Privet hedge be pruned?
A formal Privet hedge can usually be trimmed two or three times between late spring and late summer. The exact frequency depends on the variety, growing conditions and how neat you want the hedge to remain. Common Privet is particularly vigorous and may need more frequent trimming than Golden or Wild Privet.
Make the final routine trim by late summer. Cutting later can stimulate soft new growth that has insufficient time to mature before frost. Dead, damaged or dangerous branches can be removed when necessary, provided there are no active bird nests.
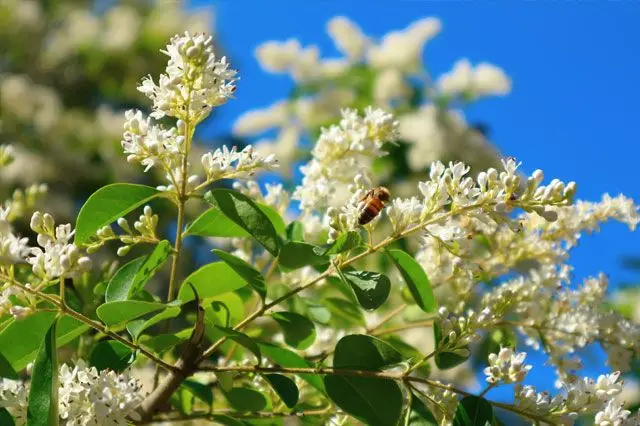
| Pruning job | Recommended timing | Practical guidance |
|---|---|---|
| Formative pruning | Spring and during early establishment | Shorten straggly shoots and encourage branching while the hedge is young. |
| Routine formal trimming | Late spring to late summer | Trim two or three times where a neat formal finish is required. |
| Final annual trim | By late summer | Stop routine trimming so fresh growth can mature before colder weather. |
| Informal or wildlife hedge | After flowering or less frequently | Use selective or rotational pruning to retain more flowers, berries and shelter. |
| Major renovation | Late winter to early spring | Choose mild conditions and stage severe reductions over more than one growing season. |
| Dead or dangerous branches | When necessary | Remove back to healthy growth after checking carefully for active nests. |
Check for active bird nests before cutting
Inspect the complete hedge carefully before every pruning job. Wild birds, their eggs and nests are protected while a nest is in use or being built. Although nesting activity is most common during spring and summer, there is no date on which hedge cutting automatically becomes safe.
If an active nest is found, postpone work on that part of the hedge until the young birds have fledged and the nest is no longer in use. A quick glance at the outside of a dense Privet hedge may not be sufficient, so look and listen carefully before using hand shears or powered equipment.
Larger commercial, landscaping or development work may require an appropriate ecological check where there is a significant risk of disturbing nesting birds.
How to prune an established Privet hedge
Regular trimming maintains the chosen height and width, encourages dense side branching and prevents vigorous shoots from shading the lower part of the hedge. The aim is normally to remove recent soft growth while preserving the main framework.
1. Inspect the hedge and surrounding area
Check for active bird nests, damaged branches, obstacles, wires and uneven ground. Identify any sections that are thinner or slower-growing, as these may need less removed than vigorous areas.
Clear toys, pots, stones and other objects from around the hedge. A sheet or tarpaulin placed beneath the work area can make collecting the trimmings easier.
2. Set guide lines where required
For a straight formal hedge, use canes and string to mark the required sides and finished height. Do not rely entirely on the previous outer surface if the hedge has gradually become wider each year.
Stand back and consider the complete line before cutting. On sloping ground, decide whether the top should follow the slope or be maintained in level steps.
3. Trim the sides from the bottom upwards
Start at the bottom and work upwards, keeping the blades parallel with the intended face. When using a powered hedge trimmer, smooth upward sweeping movements normally produce a more even surface than pressing the machine directly into the hedge.
Do not assume that every shoot needs to be shortened by the same amount. Where one section is sparse, leave more green growth so that it can continue developing.
4. Keep the base at least as wide as the top
Low Privet hedges can have nearly vertical sides. Taller hedges should normally taper slightly, with the top narrower than the base. This allows more light to reach the lower branches and reduces the risk of the hedge becoming bare underneath.
A hedge that is allowed to become wider at the top can shade its own base. Repeatedly trimming only the outermost upper growth can make this problem worse.
5. Cut the top last
Once both sides are complete, use the string line to guide the top. Trim lightly at first, stand back and check the level before removing more.
Where individual thick stems extend above the main surface, use secateurs or loppers rather than forcing a light-duty hedge trimmer through woody branches.
6. Remove dead and damaged growth
Remove broken, dead or badly damaged stems back to healthy wood. Make clean cuts with sharp secateurs, loppers or a pruning saw. A selective branch cut should be made just above a suitable bud or branch junction, but this does not mean every shoot on the face of a formal hedge must be cut individually at a 45-degree angle.
7. Clear the hedge and inspect the result
Remove piles of cut material from the top and interior of the hedge. Thick accumulations can block light and trap damp material around the branches.
Look along the sides from both ends and check the top from a distance. Small uneven areas are easier to correct immediately than after the hedge has started growing again.
Formative pruning for a new Privet hedge
Formative pruning during the first few growing seasons helps a young Privet hedge develop a dense framework. Without it, vigorous upright shoots can gain height while the lower part remains thin and poorly branched.
After planting, remove any broken or damaged growth. During establishment, shorten long or straggly side shoots to encourage branching. Where individual upright shoots are racing far ahead of the rest of the hedge, they can be lightly shortened rather than being allowed to dominate.
Build the hedge to its final size gradually. Do not concentrate only on achieving height. A slightly shorter hedge with strong branching near the base will normally provide better long-term screening than tall, unbranched plants.
Keep the base at least as wide as the top from the beginning. Correcting an inverted or top-heavy shape later can require substantial renovation.
Bare-root plants may receive a stronger initial cut where the supplied nursery instructions recommend it. Follow product-specific guidance because plant size and branching at delivery can vary.
Pruning Common, Golden and Wild Privet
Common Privet
Common Privet is vigorous and responds well to regular clipping. It is usually the variety most likely to need two or three trims during the growing season when maintained as a formal hedge.
Start formative pruning while the plants are young and maintain a broad, well-branched base. Once the required height has been reached, remove most of the soft new extension growth during each routine trim.
Golden Privet
Golden Privet is generally slower-growing than green Common Privet, so it may require fewer cuts. Regular light trimming will still help maintain a dense, even outline.
Check for vigorous shoots with completely green foliage. These are reverted shoots and can grow more strongly than the golden-variegated parts. Remove them back to their point of origin rather than simply cutting off the green tip.
Wild Privet
Wild Privet can be clipped as a formal boundary, but close and frequent pruning removes many of the shoots that would otherwise produce flowers and berries.
For a wildlife-focused hedge, consider selective or rotational pruning. Different sections can be cut in different years, helping retain a mixture of dense cover, flowering growth and fruiting stems. Do not carry out this work where active nests are present.
How to make a Privet hedge thicker
A thin Privet hedge is not always improved by fertiliser. The cause may be a lack of formative pruning, an excessively narrow base, poor light, dry roots, waterlogging, weed competition or plants that were allowed to grow upwards without developing side branches.
To encourage a denser hedge:
- Lightly shorten young shoots to encourage side branching.
- Build the final height gradually rather than allowing a few stems to race upwards.
- Keep the base at least as wide as the top.
- Prevent weeds and grass from competing around newly planted hedges.
- Water thoroughly during dry periods while the plants establish.
- Avoid repeatedly cutting a weak section back harder than the rest of the hedge.
- Remove dead stems and investigate any underlying drainage or root problems.
Where an older hedge is bare at the bottom because the top has become too wide, gradually reducing the upper width may allow more light to reach the lower branches. A severely bare or overgrown hedge may require staged renovation.
How to renovate an overgrown Privet hedge
Established Privet often produces new shoots from older wood, making it more forgiving than many conifer hedges. However, removing the height and both sides severely in a single operation can leave a stressed, exposed framework and may result in uneven recovery.
For major renovation, choose a mild period in late winter or early spring before vigorous new growth begins. In cold or exposed locations, wait until the risk of severe frost has reduced. Avoid major work during hot, dry weather.
Moderately overgrown Privet
Where the hedge only needs a moderate reduction, remove no more than is necessary to restore a maintainable outline. Cut below the final intended surface so there is room for new shoots to develop and be shaped.
Do not leave the top wider than the base. Remove selected old or crossing stems where this will improve light and airflow without stripping the complete hedge.
Severely overgrown Privet
Where more than half of the hedge width or height must be removed, stage the work over two or three growing seasons.
- First stage: renovate one side of the hedge, cutting back towards the main framework while leaving the other side and the height largely intact.
- Recovery period: mulch the root zone, water during prolonged dry weather and allow a full growing season for new shoots to develop.
- Second stage: renovate the opposite side after the first side has produced satisfactory regrowth.
- Final stage: reduce the height after the side growth has recovered, cutting below the intended finished height so new growth can be shaped.
Recovery depends on the age and health of the hedge, available light, soil condition, moisture and the amount removed. A hedge affected by severe root disease or long-term waterlogging may not respond normally to renovation.
What tools are needed to prune a Privet hedge?
The most useful tools include:
- Secateurs for individual shoots, damaged stems and reverted Golden Privet growth.
- Hand shears for smaller formal hedges and soft surface growth.
- Powered hedge trimmer for long, established hedge lines.
- Loppers for thicker woody branches.
- Pruning saw for mature stems that are too large for loppers.
- Canes and string for marking straight sides and tops.
- Tarpaulin or sheet for collecting cut material.
- Sturdy gloves, footwear and eye protection when cutting and clearing debris.
Keep cutting blades clean, sharp and in good working order. Blunt equipment can crush stems, produce an uneven finish and require more force to operate.
Use a residual current device with a corded electric hedge trimmer and keep the cable behind the cutting direction. Use a stable platform designed for the ground conditions rather than overreaching from an unsuitable ladder.
Very tall, wide or roadside hedges may be safer for an experienced tree surgeon to manage.
Privet aftercare following pruning
A healthy established hedge normally needs little special treatment after a routine light trim. Remove the clippings and inspect the hedge for damaged stems or sections that need further attention.
After major renovation, apply a 5–7cm layer of organic mulch over the root zone while keeping it clear of the main stems. Water during prolonged dry periods, particularly while the hedge is producing replacement growth.
Feed only where the soil is poor or regrowth is weak. A suitable hedge fertiliser can be applied in spring according to its label. Avoid routine high-nitrogen feeding late in summer or autumn.
For detailed watering, feeding and troubleshooting advice, return to our Privet Hedge Care Guide .
Frequently asked questions about Privet pruning
What is the best month to cut a Privet hedge?
There is no single month suitable for every job. Routine formal trimming normally begins in late spring and can be repeated during summer. Make the final routine trim by late summer. Major renovation is better carried out in suitable conditions during late winter or early spring.
How often should a Privet hedge be trimmed?
A formal Privet hedge may need two or three trims during the growing season. Common Privet is vigorous and may need more frequent attention than Golden Privet. Informal and wildlife hedges can be cut less often.
Can Privet be cut back hard?
Established Privet often regrows from older wood, but severe reductions should be approached carefully. Where more than half of the height or width needs removing, renovate the hedge in stages over two or three growing seasons.
Will Privet regrow from old wood?
Healthy established Privet will often produce new shoots from older stems. Regrowth is less certain where the hedge is weak, severely shaded, affected by root disease, waterlogged or suffering from prolonged drought.
How do I make a Privet hedge grow thicker?
Begin formative pruning while the plants are young, lightly shorten new shoots to encourage branching and build the height gradually. Keep the base at least as wide as the top, control weeds and water new hedges during dry weather.
Why is my Privet hedge bare at the bottom?
A Privet hedge can become bare underneath when its top is wider than its base and shades the lower branches. Other causes include deep shade, drought, repeated cutting of weak sections, root problems and a lack of formative pruning. Correct the cause before assuming the hedge needs fertiliser.
Can Privet be trimmed in winter?
Avoid routine surface trimming during winter. Dead or dangerous branches can be removed where necessary. Major renovation may begin in late winter or early spring during mild conditions, but postpone work during hard frost and always check for active bird nests.
Can I prune Privet when birds are nesting?
Do not prune any section containing an active nest. Wild bird nests are protected while they are being built or used. Delay the work until the young birds have fledged and the nest is no longer active.
How can I reduce the height of an overgrown Privet hedge?
A moderate height reduction can be made by cutting below the intended final level and allowing fresh growth to rebuild the surface. Where the hedge also needs a major width reduction, renovate the sides first and reduce the height in a later season.
Should Golden Privet be pruned differently?
Golden Privet is usually slower-growing and may need fewer trims than Common Privet. Remove completely green reverted shoots at their point of origin so they do not outgrow the golden-variegated parts.
Should Wild Privet be clipped every year?
Wild Privet can be clipped annually when a formal boundary is required. For better flowers, berries and wildlife value, prune less frequently or manage different sections in alternate years.
Choose from a wide range of Privet Hedge Plants
Choosing the right varieties of privet hedging is important, as the privet family of plants have different characteristics and growth rates.
Our most popular species of privet hedges are Common Privet Hedge and Golden Privet Hedge.
Frequently asked questions about privet hedging
To learn more about privet hedging, take a look at our helpful Hedging Guides & FAQ’s
Privet Hedge Problems, Pests and Diseases
How to Fertilise a Hedge – Essential Tips for Healthy Growth
How to Plant a Hedge – Growing and Caring for Hedging Plants