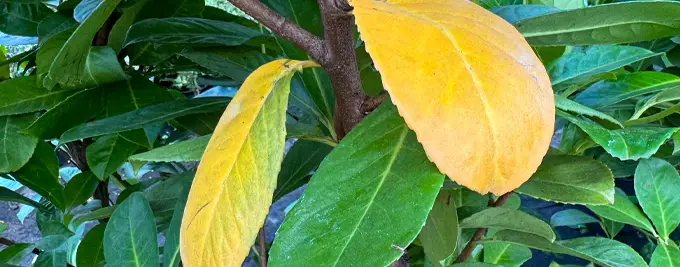
Hedging care & growing guide

Laurel Hedging Care Guide: Planting, Spacing and Pruning

Laurel hedging establishes best when you choose the right type for the site, plant it at the same depth it was growing before, water the full root area during dry weather and trim it at the correct time. Cherry Laurel, Portuguese Laurel, Upright Laurel, Compact Laurel and Sweet Bay are all evergreen, but they do not have identical growth rates, hardiness or soil preferences. This guide explains how to choose, plant and care for them in UK gardens and landscaping projects. You can also explore our complete range of Laurel hedging plants.

Good establishment depends more on correct planting depth, drainage and consistent watering than on forcing rapid top growth. A newly planted hedge may make limited visible growth while its roots establish, particularly after planting larger pot-grown or root-balled specimens. Keep the planting strip weed-free, check moisture below the surface and avoid feeding heavily into dry or waterlogged soil.

Reviewed by Gwynne Bodsworth, Founder and GrowerLast reviewed 15 August 2026
Gwynne Bodsworth

Expert nursery advice

Gwynne's Grower's Tip

“Laurel is popular because it establishes into a dependable evergreen hedge, but it is important to choose the right variety. Some Laurels are best for fast privacy, while others are better suited to narrow spaces, formal gardens or lower boundaries.”

From our nursery

Visit our Laurel hedges

Cherry Laurel (Prunus laurocerasus)
LaurelHedging plant

Cherry Laurel Hedge

“Cherry Laurel is usually my first suggestion when a customer wants a dense evergreen screen that will establish relatively quickly. Its large glossy leaves create strong coverage, and it responds well to regular trimming. Give it enough space, prepare the soil properly and keep it well watered during establishment.”

View our Cherry Laurel Hedge plants

Portuguese Laurel hedging plants
LaurelHedging plant

Portuguese Laurel Hedge

“Portuguese Laurel has a finer and more elegant appearance than Cherry Laurel. Its smaller dark green leaves and reddish young stems make it especially suitable for formal hedging. It is a good choice where customers want evergreen privacy without the heavier, broader foliage of Cherry Laurel.”

View our Portuguese Laurel Hedge plants

Upright Laurel hedging plants
LaurelHedging plant

Upright Laurel Hedge

“Upright Laurel is useful where space is more restricted because its naturally upright habit can create height without spreading as widely as traditional Cherry Laurel. It still needs pruning to maintain a neat hedge, but it can be a practical option beside driveways, paths and narrower boundaries.”

View our Upright Laurel Hedge plants

Compact Laurel hedging plants
LaurelHedging plant

Compact Laurel Hedge

“Compact Laurel is better suited to lower hedges, smaller gardens and places where a full-sized Cherry Laurel would eventually become too large. Its naturally compact growth makes it easier to manage, although good planting preparation and consistent watering are still essential while the plants establish.”

View our Compact Laurel Hedge plants

Sweet Bay Laurel hedging plants
LaurelHedging plant

Sweet Bay Laurel Hedge

“Sweet Bay is quite different from Cherry and Portuguese Laurel. It has aromatic leaves and a more refined Mediterranean character, making it attractive as an informal hedge, specimen or screen in a sheltered position. In colder or exposed gardens, it benefits from protection from harsh winds and severe frost.”

View our Sweet Bay Laurel Hedge plants

Not sure which Laurel hedge to choose?

Compare the available plants, formats and starting sizes in the complete range.

Explore our complete Laurel hedging range

Laurel hedge quick-care summary

Botanical nameMost plants in this guide are Prunus; Sweet Bay is Laurus nobilis.
Plant typeBroadleaved evergreen hedging shrubs.
Evergreen or deciduousEvergreen
Typical growth rateAbout 10–20cm a year for Compact Laurel, around 10–30cm for Sweet Bay, 20–40cm for Portuguese Laurel and 30–60cm for Cherry or Upright Laurel in favourable conditions.
Preferred positionSun or partial shade. Cherry and Portuguese Laurel also tolerate considerable shade. Sweet Bay performs best in a warm, sheltered position.
SoilMoist but well-drained soil. Portuguese Laurel is particularly useful on chalk. No Laurel thrives in persistently waterlogged ground.
WateringWater thoroughly after planting and during dry spells through the first two growing seasons. Adjust the frequency according to the weather, soil and plant size.
Pruning periodPrune Prunus laurels mainly in late spring or early summer, with a light late-summer trim if required. Trim Sweet Bay in spring or summer.
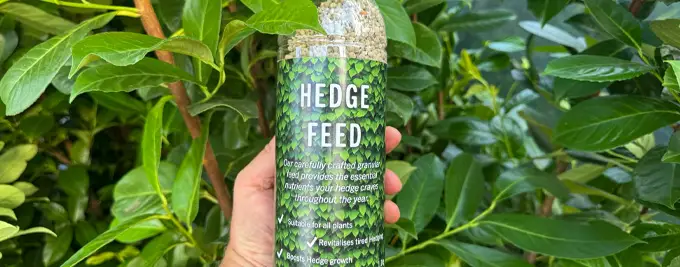
FeedingApply a balanced hedge feed as a spring top dressing where growth is weak or plants are young. Do not place concentrated fertiliser directly against the roots.
HardinessCherry, Portuguese, Upright and Compact Laurel are generally hardy in UK gardens. Sweet Bay needs more protection from severe frost and cold, drying winds.
Typical hedge heightUsually 1–3m, depending on the variety and pruning. Compact Laurel is best suited to low hedges, while Cherry and Upright Laurel can be maintained at much greater heights.
Planting seasonPot-grown plants can be planted whenever the soil is workable, although autumn to spring is usually easiest. Bare root and root-balled plants are supplied during the dormant season.
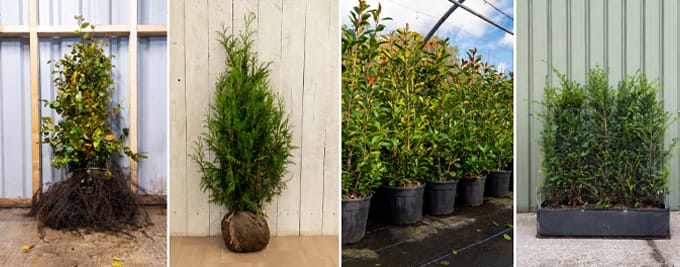
Root types commonly availableAvailability varies by variety. Cherry and Portuguese Laurel are supplied in the widest choice of formats, while Sweet Bay and Compact Laurel are normally pot-grown.
How to store bare root cherry Laurel

About Laurel hedging

The name “laurel” is used for several evergreen plants. The common hedging laurels are not all the same species, and Sweet Bay is not even in the same botanical family as Cherry or Portuguese Laurel. This distinction matters because the plants differ in growth habit, hardiness, pests, pruning response and whether their leaves are edible.

Cherry Laurel and its cultivars

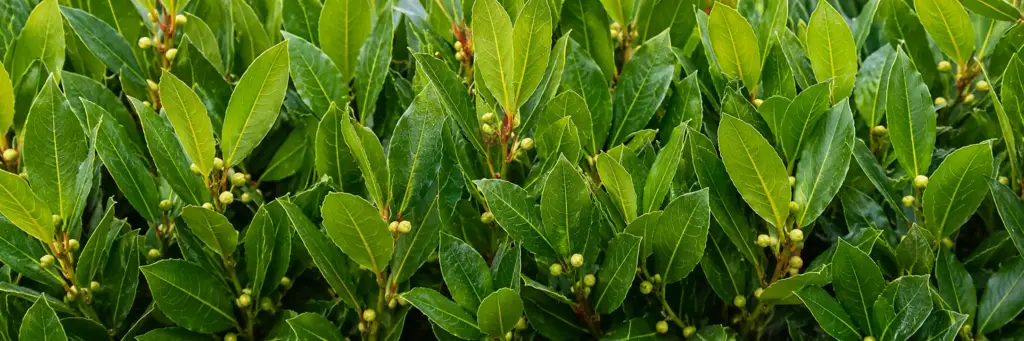
Cherry Laurel, Prunus laurocerasus ‘Rotundifolia’, has large, glossy, bright-green leaves and vigorous growth. It is widely chosen for fast privacy, broad boundaries, shaded sites and substantial screening. Its large leaves create a bold, informal appearance and are usually tidier when selectively cut with secateurs rather than repeatedly sliced through with a hedge trimmer.Upright Laurel, Prunus laurocerasus ‘Caucasica’, is a narrower, more upright cultivar. It offers the vigorous evergreen character of Cherry Laurel while using less width, making it useful where a tall screen is required but the planting bed is relatively narrow.Compact Laurel, Prunus laurocerasus ‘Otto Luyken’, is slower and lower, with a spreading habit and narrower leaves. It is suited to low boundaries, front gardens and mass planting rather than rapid, tall privacy screening.

Portuguese Laurel

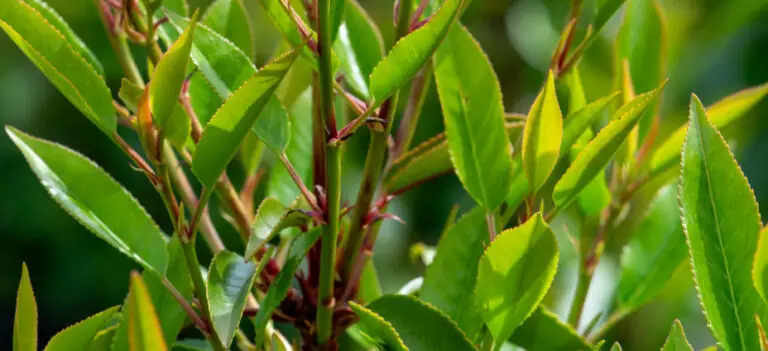
Portuguese Laurel, Prunus lusitanica, has smaller, darker leaves carried on attractive red or maroon stems. It makes a refined formal hedge, tolerates clipping well and is particularly useful on chalky or shallow alkaline soils where some Cherry Laurels may become chlorotic. It normally grows more steadily than Cherry Laurel.

Sweet Bay Laurel

Sweet Bay Laurel, Laurus nobilis, has aromatic leaves and a naturally elegant, upright habit. It is a genuine culinary bay when correctly identified, unlike the Prunus laurels, which are harmful if eaten. Bay is slower and benefits from a sheltered, well-drained site, especially in colder inland areas.

Choosing the right Laurel hedge

The best Laurel is the one that matches the required height, available width, soil and exposure. Do not choose purely by headline growth rate. A fast-growing plant in a waterlogged, exposed or poorly prepared position can establish more slowly than a better-suited species.
TypeBest suited toTypical annual growthSite notesCommon formats
Cherry LaurelRapid privacy, broad screens, shade, large gardensAbout 30-60cm in favourable conditionsAdaptable, including shade and many exposed sites, but avoid waterloggingPot grown, bare root, root ball and instant
Portuguese LaurelFormal hedges, driveways, chalky soils, refined finishAbout 20-40cmSun or shade; handles poor, shallow chalk well if drainage is adequatePot grown, bare root, root ball and instant
Upright LaurelTall screening where width is restrictedAbout 30-60cmUseful for a narrower hedge; keep roots evenly moist during establishmentPot grown and root ball
Compact LaurelLow hedges, front gardens, underplanting, smaller spacesAbout 10-20cmLow and spreading rather than tall; may yellow on poor, shallow chalkPot grown
Sweet Bay LaurelAromatic formal hedges, sheltered gardens, mild coastal areasOften around 10-30cmNeeds good drainage and shelter from severe frost or cold drying windsPot grown

Best Laurel for privacy

Cherry Laurel is usually the first choice where fast, dense privacy is the priority. Upright Laurel is useful when a tall screen is needed without allowing a very broad hedge. Larger pot-grown, root-balled or instant plants give greater coverage on planting, but they still need careful watering and can spend their first season establishing roots rather than making maximum shoot growth.

Best Laurel for a formal hedge

Portuguese Laurel has smaller leaves and naturally neat growth, so it clips into a refined formal hedge. Sweet Bay also makes an attractive formal hedge in a warm, sheltered position. Compact Laurel is useful for a lower clipped boundary.

Best Laurel for shade

Cherry Laurel and Portuguese Laurel are both reliable choices for partial shade and can tolerate considerable shade once established. Deep shade beneath established trees is more difficult because the hedge must compete with existing roots and may sit in a rain shadow. In these positions, improve the whole planting strip, water deeply and monitor moisture beneath the surface rather than assuming rainfall has reached the roots.

Best Laurel for chalk or difficult soil

Portuguese Laurel is the strongest choice for poor, shallow or chalky soils, provided the ground drains. Cherry Laurel can grow in clay and many other soil types, but persistent waterlogging causes root stress. Compact Laurel may become chlorotic on poor shallow chalk. Sweet Bay needs freely draining soil and should not be placed in a cold wet hollow.

Best Laurel for coastal or exposed gardens

Cherry Laurel and Portuguese Laurel are widely used in coastal and windy locations, although new plants still need protection from severe salt-laden winds until rooted. Upright Laurel is also suitable for many exposed sites. Sweet Bay can perform well in mild coastal districts but is a less reliable choice for an exposed, frost-prone inland site.

Best Laurel for wildlife

A dense evergreen hedge provides year-round shelter and potential nesting cover. Where flowers and fruits are allowed to develop, Cherry and Portuguese Laurel can offer additional seasonal resources. Frequent clipping reduces flowering, so an informal hedge or a single annual trim after flowering may provide more value. Always check carefully for active nests before cutting.

When to plant Laurel hedging

Pot-grown Laurel

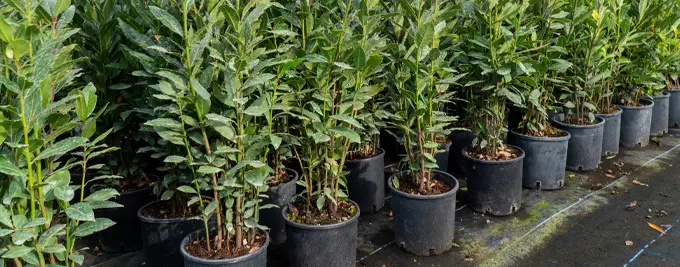
Pot-grown Laurel can be planted throughout the year whenever the soil is workable and adequate water is available. Autumn, winter and early spring are usually easiest because soil moisture is more reliable and the plants face less heat stress. Summer planting is possible, but it creates a much greater watering commitment, particularly for large plants, dry sandy soil and windy sites.

Bare root Laurel

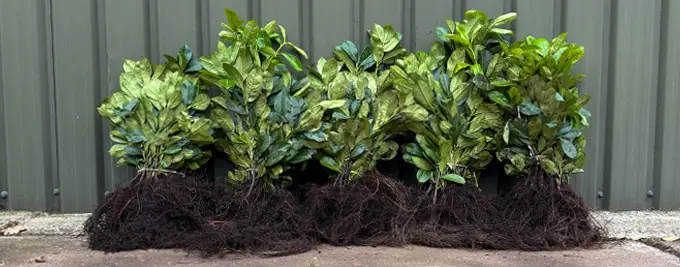
Bare root Cherry and Portuguese Laurel are seasonal. They are normally lifted and supplied while dormant, broadly from late autumn to early spring, with the exact period governed by weather and field conditions. Plant promptly after delivery. Keep roots cool, covered and moist if there is any delay, and never leave them exposed to sun or drying wind.

Root-balled Laurel

Root-balled Cherry, Portuguese and Upright Laurel are also lifted during the dormant season. Plant as soon as practical after delivery and keep the root ball moist. Large root-balled plants can create immediate structure, but the root ball must remain intact during handling and the surrounding soil must be watered thoroughly so new roots can grow beyond it.

Instant Laurel hedging

Instant hedging may be trough-grown or supplied in another established format. Follow the current product instructions because season and handling vary by system. Even where planting is possible throughout the year, avoid frozen soil, waterlogged ground, drought and extreme heat. Instant units have a substantial leaf area and need reliable irrigation during establishment.

Weather conditions that should delay planting

  • Frozen ground: roots cannot make good contact with frozen soil.
  • Waterlogged ground: planting into saturated soil compacts it and deprives roots of oxygen.
  • Extreme heat or drought: newly disturbed roots cannot replace water lost from evergreen foliage quickly enough.
  • Strong drying wind: bare roots and evergreen leaves lose moisture rapidly.
  • Snow-covered ground: wait until you can assess soil condition and planting depth properly.

Where to plant Laurel hedging

Light

Most Laurel hedging grows in full sun or partial shade. Cherry and Portuguese Laurel are among the better evergreen hedges for shade, although growth is usually slower and less dense in very low light. Compact Laurel also tolerates partial shade. Sweet Bay performs best with sun or light shade in a sheltered position.

Soil and drainage

Laurel needs soil that can hold some moisture while allowing excess water to drain. Heavy clay is not automatically unsuitable, but compacted or continuously saturated clay should be improved across a broad area before planting. Do not rely on a layer of gravel at the bottom of a planting hole, which can create a sump. On very wet sites, address drainage, raise the planting line or choose another hedge.Portuguese Laurel is particularly tolerant of chalk and alkaline soil. Cherry Laurel is adaptable but may show yellowing where high pH limits nutrient availability. Sweet Bay prefers well-drained ground and is less forgiving of cold, wet conditions.

Walls, fences and boundaries

Set the planting line far enough inside the boundary for the planned hedge width and future maintenance access. In many domestic gardens, a centre line around 45-60cm inside a fence is a practical starting point, but a broad Cherry Laurel hedge may need more space and a narrow Upright Laurel hedge may need less. Keep the finished face and routine cutting work within your own property where possible.There is no automatic rule requiring every domestic hedge to be kept below 2m. However, a line of two or more evergreen or semi-evergreen plants over 2m can fall within the high-hedge complaint process if it seriously affects a neighbour’s enjoyment of their home or garden. Discuss tall boundary screening early, protect sight lines and access, and check planning conditions, title restrictions or local requirements where relevant.

Foundations, drains and hard surfaces

Laurel roots are not uniquely aggressive, but any large woody plant needs appropriate space. Do not plant directly over drains or tight against foundations. Roots can exploit existing damaged drains and dry soil can contribute to movement on shrinkable clay. Seek professional advice for planting close to buildings, retaining walls, services or known subsidence risks.
Bay Laurel Pot Grown Hedging

How to prepare the planting area

  1. Mark the line. Use a taut string so the hedge remains straight and the planned centre line stays inside the boundary.
  2. Remove weeds thoroughly. Clear grass, perennial weeds and woody roots from a strip around 60-90cm wide. Weeds compete strongly for water while the hedge establishes.
  3. Check drainage. Investigate ground that remains wet for long periods. Relieve compaction across the planting area rather than digging isolated deep holes.
  4. Improve poor soil across the strip. Work suitable organic matter through a broad area. peat-free Hedge Planting Compost can help improve soil structure and moisture retention when mixed sensibly with the existing soil. Do not replace all native soil with rich compost.
  5. Water plants before planting. Water pots thoroughly. Soak bare roots for about 20-30 minutes, unless the supplied instructions state otherwise. Moisten root balls without breaking them apart.
  6. Prepare roots. Keep bare roots covered until each plant is ready. Loosen tightly circling roots on pot-grown plants. Do not pull apart a root ball lifted from the field.
  7. Prepare mycorrhizal fungi. Where suitable, apply Rootgrow mycorrhizal fungi according to the label so it contacts the roots directly.
  8. Do not add concentrated fertiliser to the hole. Fertiliser against roots can cause damage and does not correct poor drainage, compaction or inadequate watering.

How to plant a Laurel hedge

  1. Set out every plant before digging. Use the size-specific planting density shown on the relevant product page and measure equal centres along the string line.
  2. Dig a trench or individual holes. A trench is useful for close spacing and uneven soil. Dig no deeper than the root system or root ball, but make the soil wide enough for roots to spread without bending.
  3. Check the planting depth. The root collar, or the point where the stem meets the roots, should finish level with the surrounding soil. Planting too deeply is a common cause of slow growth and decline.
  4. Apply Rootgrow if used. Dust or spread it where it will touch the roots, following the current product instructions.
  5. Position the plant. Spread bare roots naturally. Remove the pot from container-grown plants and loosen congested outer roots. Keep field-lifted root balls intact.
  6. Deal with root-ball wrapping correctly. Never leave plastic or other synthetic wrapping around the roots. Once the root ball is secure in the hole, loosen or cut back hessian and wire from the top and sides where this can be done without breaking the ball. Follow any plant-specific instructions supplied with large specimens.
  7. Backfill gradually. Return the excavated soil, mixed with a moderate amount of soil improver where needed. Work it around the roots and firm gently by hand or heel, avoiding heavy compaction.
  8. Water the full root zone. Water slowly and thoroughly so soil settles around the roots. Add more soil if settlement exposes the root collar.
  9. Stake only where required. Large specimens, instant units and plants in exposed positions may need temporary support. Secure the root area while allowing the stem to move slightly, and check ties regularly.
  10. Mulch the planting strip. Apply a 5-8cm layer of Hedge Bio Mulch over moist, weed-free soil. Leave a small gap around each stem so mulch does not sit against the bark.
  11. Add protection where browsing is likely. Use appropriate plant protection. spiral rabbit guards are particularly useful for smaller bare-root plants and may also help protect the lower stems of larger plants where browsing pressure is severe.

Planting pot-grown Laurel

Water the pot before planting and slide the root ball out without lifting the plant by its stem. Tease out a few circling roots and plant with the top of the compost level with the surrounding soil. Pot-grown plants can have a dense, dry core, so direct some water onto the original root ball during the first season rather than only wetting the loose soil around it.

Planting bare root Laurel

Keep roots moist and shaded. Spread them without forcing them into a narrow hole, and trim only damaged root ends with clean secateurs. Firm the soil carefully to remove air pockets, then water well even if the ground appears damp. Small bare-root plants may benefit from light formative pruning if advised with the order, but do not apply the same reduction automatically to every size or variety.

Planting root-balled Laurel

Handle the plant by the root ball rather than the stem. Support large plants mechanically and avoid dropping them. Place the intact ball at the correct depth before loosening the top wrapping. Water the root ball itself and the surrounding soil. A wet surface can conceal a dry core, so check moisture beside and within the ball during the establishment period.

Planting larger specimens and instant hedging

Large plants need enough space for safe handling, a level base and reliable irrigation. Confirm access before delivery and prepare the full trench in advance. Larger foliage creates higher water demand, so consider installing hedge irrigation at planting rather than waiting for drought stress to appear.

Laurel hedge spacing and plants per metre

Laurel spacing depends on the species, plant height, root type and the density required. Small bare-root plants are placed much closer than large root-balled or instant plants. Use the “plants per metre” figure shown for the exact size being purchased, not a universal rule copied from another Laurel variety.The table below summarises current Hedging Plants Direct examples. It is a planning guide, not a substitute for the recommendation attached to the chosen product size.
Laurel type and example sizeRoot typePlants per metreApproximate centres
Cherry Laurel 20-30cmBare root5 per metre20cm
Cherry Laurel 40-60cmPot grown4 per metre25cm
Cherry Laurel 60-120cmPot grown3 per metreAbout 33cm
Cherry Laurel 100-175cm, selected pot sizesPot grown2 per metre50cm
Portuguese Laurel 30-40cmBare root5 per metre20cm
Portuguese Laurel 40-60cmPot grown4 per metre25cm
Portuguese Laurel 60-100cmPot grown3 per metreAbout 33cm
Portuguese Laurel 100-150cmPot grown2 per metre50cm
Portuguese Laurel instant hedgeInstant unit1 per metre1m
Portuguese Laurel 60-125cmRoot ball3 per metreAbout 33cm
Portuguese Laurel 150-225cmRoot ball2 per metre50cm
Portuguese Laurel 225-250cmRoot ball1.5 per metreAbout 67cm
Portuguese Laurel 250-275cmRoot ball1.25 per metre80cm
Upright Laurel 80-125cmRoot ball3 per metreAbout 33cm
Upright Laurel 125-200cmRoot ball2 per metre50cm
Sweet Bay Laurel 70-120cmPot grown3 per metreAbout 33cm
Compact LaurelPot grownCheck the current product recommendationDo not apply Cherry Laurel spacing automatically

Single row or staggered double row?

A single row creates a narrower hedge and is normally suitable for established pot-grown, root-balled and instant plants. A staggered double row can create a wider, denser base from small plants, but it uses more plants and more garden width. Do not simply double a single-row quantity without checking the product recommendation. For a large landscape or commercial scheme, ask for a project-specific planting plan based on the chosen size and required finish.

How to convert plants per metre into spacing

  • 5 plants per metre = 20cm centres or 40cm in a double staggered row
  • 4 plants per metre = 25cm centres or 50cm in a double staggered row
  • 3 plants per metre = about 33cm centres in a single row
  • 2 plants per metre = 50cm centres in a single row
  • 1.5 plants per metre = about 67cm centres in a single row
  • 1.25 plants per metre = 80cm centres in a single row
  • 1 plant per metre = 1m centres in a single row

Watering and establishment

Newly planted Laurel hedging needs thorough, consistent watering until its roots have established in the surrounding soil. Water deeply enough to moisten the full root area, then check the soil before watering again. The correct frequency will depend on the weather, soil type, plant size, root format and level of exposure, so avoid relying on a fixed daily or weekly schedule.Laurel is evergreen and continues to lose moisture through its leaves throughout the year. This means newly planted Cherry Laurel, Portuguese Laurel, Upright Laurel, Compact Laurel and Sweet Bay can become dry during mild or windy winter weather as well as during summer. Large-leaved Cherry and Upright Laurel can be particularly vulnerable because their foliage creates a substantial surface area from which water is lost.

Watering immediately after planting

Water every Laurel thoroughly immediately after planting, even if the soil already feels damp or rain is forecast. This first watering helps settle loose soil around the roots, removes large air pockets and ensures that the original root system is in close contact with the surrounding ground.Apply the water slowly around the complete root area rather than pouring it against the stem in one place. Continue until moisture has reached the full depth of the roots or root ball. If water begins running across the surface, pause and allow it to soak in before applying more.After watering, check whether the soil has settled and exposed the upper roots. Add a little more soil if necessary, but keep the root collar, where the stem meets the roots, level with the surrounding ground. Avoid building a mound of soil or mulch against the stems.

Watering during the first growing season

The first growing season is the most important establishment period. Newly planted Laurel initially depends on the roots contained within its original pot, bare-root system or root ball. Until new roots grow into the surrounding soil, the plant cannot make full use of moisture elsewhere in the planting strip.Check the soil regularly from spring through autumn, particularly during dry, sunny or windy weather. Push a finger or hand trowel below the surface beside the root system. If the soil at root depth is beginning to feel dry, water slowly and thoroughly. If it is still moist, wait and check again rather than adding more water automatically.Deep watering is generally more beneficial than frequent light sprinkling. A small quantity applied only to the surface encourages shallow rooting and may never reach the lower part of the root ball. Water should penetrate through the main root zone and slightly beyond it, encouraging new roots to grow into the surrounding soil.Keep the planting strip clear of grass and weeds, which compete strongly with young hedging for moisture. A 5-8cm layer of Hedge Bio Mulch can help reduce evaporation and suppress weeds. Apply mulch over damp soil and leave a clear gap around each stem.

Watering during the second growing season

Continue monitoring the hedge throughout its second growing season. The plants should now have more roots growing into the surrounding soil, but they may still need additional water during prolonged dry weather.Water less frequently than during the initial establishment period where conditions allow, but continue to soak the full root zone when watering is needed. Large plants, exposed sites and free-draining soils may require close attention for longer than smaller plants in sheltered, moisture-retentive ground.Do not assume that a hedge is fully established simply because it has produced new leaves. Strong top growth can increase water demand before the roots have spread far enough to support the plant independently during drought.

Check the original root ball below the surface

One of the most common causes of failure in newly planted pot-grown and root-balled Laurel is a dry original root ball surrounded by apparently moist soil. Water can follow the looser soil around the roots without penetrating a dense or dry root ball.Check moisture within or directly beside the original root system, not only on the surface between the plants. Use a narrow trowel to investigate carefully without causing unnecessary root damage. The soil should feel evenly moist but not saturated or sticky.Pot-grown plants can be especially difficult to rehydrate if the compost was allowed to become very dry before planting. Water the plants thoroughly while they are still in their pots and make sure irrigation reaches the original pot-shaped root ball after planting.With root-balled plants, check both the retained soil ball and the surrounding backfill. The root ball may remain dry while the surrounding soil is wet, or it may remain saturated after the surrounding ground has begun to drain.

Watering Laurel in sandy soil

Sandy and gravelly soils drain quickly and hold relatively little moisture. Laurel planted in these soils normally needs more frequent checks and may require watering more often during warm, dry or windy periods.Improve very free-draining ground across the wider planting strip with suitable organic matter such as peat-free Hedge Planting Compost. Do not create an isolated pocket of compost because this can discourage roots from spreading into the surrounding soil.Apply water slowly so that it penetrates rather than running away. Mulching is particularly valuable in sandy soil because it reduces evaporation and helps moderate soil temperature.

Watering Laurel in clay soil

Clay soil can hold moisture for much longer, so Laurel planted in heavy ground may need watering less frequently. However, clay can also become compacted and waterlogged, particularly where machinery, foot traffic or poor drainage has damaged the soil structure.Always check below the surface before watering. The top few centimetres may appear dry while the ground around the roots remains wet. Adding more water under these conditions can exclude air from the soil and increase the risk of root damage.If water remains around the roots for prolonged periods, correct the drainage problem rather than reducing watering alone. Relieving compaction across the wider planting area, improving the soil structure or raising the planting line may be necessary on difficult sites.

Watering during hot, dry or windy weather

Hot sunshine, low rainfall and strong wind can increase water loss rapidly. Wind is particularly important because it removes moisture from the leaf surface even when temperatures are not exceptionally high.Check newly planted Laurel more frequently during these conditions and water before the plants become severely wilted. Early morning or evening is usually the most efficient time because evaporation is lower than during the hottest part of the day.Apply water directly to the soil around the roots. Avoid relying on overhead sprinklers, which can wet the foliage while leaving the deeper roots dry. Repeatedly wetting the leaves may also encourage some leaf diseases where air circulation is poor.A temporary watering basin formed around the outside of the root area can help retain water on sloping or very dry ground. Do not create a deep hollow directly around the stem, as this may collect excessive water and bury the root collar.

Winter watering for newly planted evergreen Laurel

Newly planted evergreen hedging can still lose moisture during winter, particularly in mild, dry or windy weather. The leaves continue to transpire while cold soil limits the ability of the roots to replace the lost moisture.Check plants during prolonged dry periods and water on a frost-free day if the soil at root depth is dry. Pay particular attention to hedges planted beside walls, fences, mature trees or existing hedges, where the roots may sit within a rain shadow.Do not water frozen soil or ground that is already saturated. Watering immediately before a severe freeze is also unnecessary where the root zone is adequately moist. Sweet Bay Laurel may need particular attention in exposed positions because cold drying winds can scorch its foliage.

Signs of drought stress

Common signs that a Laurel hedge may not be receiving enough water include:
  • Leaves becoming dull, soft, drooping or curled
  • Brown leaf tips or dry brown margins
  • Premature yellowing and leaf drop
  • New shoots wilting during the day and failing to recover overnight
  • Dry, crumbly soil within the original pot or root ball
  • Limited new growth after the initial establishment period
  • Dieback beginning at shoot tips during prolonged dry weather
These symptoms can also have other causes, so check the soil before watering. A wilted plant in dry soil is likely to need water. A wilted plant in wet soil may be suffering from damaged, waterlogged or diseased roots.

Signs of waterlogging or overwatering

Too much water can be as damaging as too little. Laurel roots need oxygen as well as moisture, and continuously saturated soil prevents healthy root growth.Possible signs of waterlogging or excessive watering include:
  • Yellow leaves while the surrounding soil remains wet
  • Wilting despite damp or saturated ground
  • Soft, dark or unpleasant-smelling roots
  • Progressive shoot dieback
  • Standing water around the planting line
  • Algae or moss developing on persistently wet soil
  • Repeated decline in the lowest or wettest section of the hedge
Stop automatic watering and investigate the drainage if these symptoms appear. Do not apply additional feed to a waterlogged or root-damaged plant. Fertiliser will not correct poor drainage and may place the already stressed roots under further pressure.

Positioning an irrigation pipe

A correctly installed hedge irrigation system can provide consistent watering along long hedges, large landscaping projects and rows of substantial plants.Position the irrigation pipe along the planting line so that water is delivered over the active root area of every plant. For a newly planted single row, the pipe should normally run close to the centre of the root balls rather than against the stems or at the outside edge of the planting strip.Where the root balls are especially wide, or where a staggered double row has been planted, two irrigation lines may provide more even coverage than one central pipe. The aim is to wet the complete root zone rather than creating a permanently wet narrow channel.Secure the pipe so it does not move during watering and check that every outlet is working. The end of a long irrigation run may receive less water if pressure is inadequate, while damaged or blocked sections can leave individual plants dry.Irrigation should be placed beneath the mulch but above the soil where practical. This reduces evaporation while allowing the pipe to be inspected, repaired or repositioned. Do not bury it deeply among the roots.Automatic irrigation should still be checked manually. Adjust its use according to rainfall, temperature and soil moisture rather than allowing it to run on the same schedule throughout the year.

Watering large root-balled and instant Laurel hedging

Large root-balled and instant Laurel hedging creates immediate coverage, but the substantial amount of foliage also creates a high water demand. These plants have not yet developed a root system that extends as widely as their tops, so they can dry out quickly after planting.Water the root ball itself as well as the surrounding soil. A light application around the outside may leave the dense central root ball dry. Apply water slowly in several stages where necessary, allowing each application to soak in before adding more.Check several points along an instant hedge rather than inspecting only one unit. Joins between sections, the ends of the hedge and areas close to walls or established trees may dry at different rates.Large plants in exposed positions may also move in the wind, breaking newly developing roots and creating gaps around the root ball through which water can run without soaking in. Check stakes, anchors and ties regularly and firm any soil that has loosened without burying the root collar.Continue close moisture monitoring for at least the first two growing seasons. Larger specimens can take longer to establish than smaller plants and should not be considered self-sufficient simply because they provide an immediate visual screen.

How and when to feed Laurel hedging

Healthy Laurel in reasonable soil does not need constant feeding. Water, drainage, soil structure and weed control have a greater effect on establishment than repeated fertiliser applications. Feed where plants are young, weak, recently renovated or growing in poor soil, and always correct moisture problems first.

Feeding after planting

Do not place concentrated fertiliser in direct contact with roots. If planting in autumn or winter, wait until spring growth begins before applying feed. Where label instructions allow, Hedge Feed can be applied as a top dressing to moist soil after planting, then watered in. Keep granules away from stems and use only the stated rate.

Spring feeding

Early spring is the main feeding period. Apply a balanced general hedge fertiliser to weed-free, moist soil and water it in if rain is not expected. Do not feed a severely droughted plant until it has been rehydrated, and do not feed waterlogged or visibly root-rotted plants.

Late-season feeding

Avoid heavy, high-nitrogen feeding late in summer or autumn. It can encourage soft growth that does not harden before cold weather, particularly on Sweet Bay and newly planted hedges.

Mulch and organic matter

Mulch improves moisture retention, suppresses weeds and gradually contributes organic matter. Apply it over moist soil, maintain a gap around stems and top it up as it decomposes. Mulch does not replace watering, and a thick dry mulch layer can sometimes shed light rain away from the roots.
Pruning Laurel Hedging

How and when to prune a Laurel hedge

The main pruning period for Cherry, Portuguese, Upright and Compact Laurel is late spring or early summer, after the risk of hard frost has passed. A second light trim can be carried out in late summer where a formal finish is required. Sweet Bay is best trimmed in spring or summer. Always inspect the hedge for active bird nests before cutting.

Formative pruning for a young hedge

Lightly shorten side shoots to encourage branching and a dense base. Keep the top growing until the hedge approaches the required height, then begin trimming it to form a level top. Do not allow the upper part to become wider than the base, because it will shade lower growth and create a sparse, top-heavy hedge.

Maintaining the correct shape

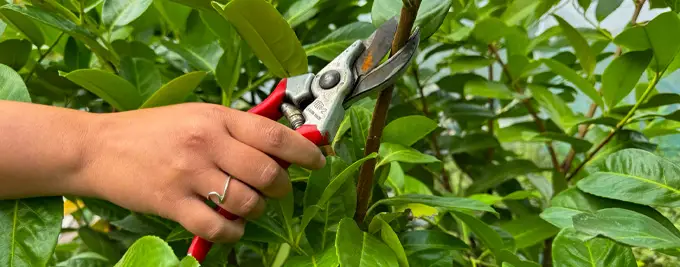
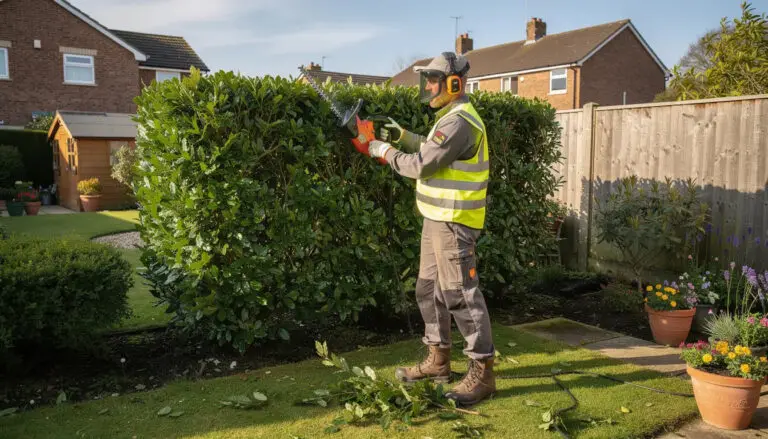
Cut the sides with a slight outward taper so the base is wider than the top. Use a string line for a level finish. Remove dead, damaged and crossing stems with clean secateurs. Clear clippings from the top and interior of the hedge.

Cherry Laurel pruning

Cherry Laurel has large leaves. A powered hedge trimmer is quick, but it slices through leaves and can leave temporary brown edges. Secateurs or hand shears used around the leaf blades create the neatest result, especially on a prominent formal hedge. One main cut in late spring or early summer and a light late-summer tidy is normally sufficient.

Portuguese Laurel pruning

Portuguese Laurel’s smaller leaves respond well to hand shears or a hedge trimmer. Trim once a year for an informal hedge or twice where a precise formal outline is required. Avoid cutting hard in late autumn because new growth and fresh cuts are more exposed to winter damage.

Upright Laurel pruning

Upright Laurel naturally grows more vertically. Trim side growth to maintain the desired narrow profile, but do not repeatedly remove the leading shoots before the hedge reaches its intended height. Once height is achieved, cut the top to encourage lateral thickening.

Compact Laurel pruning

Compact Laurel is naturally low and spreading. Use light selective pruning after flowering or in early summer to keep it within bounds. Repeated severe cutting is unnecessary and can remove its flowers and natural shape.

Sweet Bay pruning

Trim Bay in spring or summer, cutting shoots back to a leaf or outward-facing bud. Remove frost-damaged tips in late spring after the extent of damage is clear. Mature Bay can respond to hard pruning, but it regrows more slowly than Cherry Laurel, so reduce an overgrown hedge over two or three seasons where possible.

Renovating an overgrown Laurel hedge

Cherry and Portuguese Laurel usually regenerate from older wood, but a staged renovation is safer for an old, stressed or very large hedge. Reduce one side or part of the height in the first year, feed and mulch in spring, maintain watering during dry weather and complete the work after strong new growth appears. Check for nesting birds and assess whether the hedge is structurally safe before using ladders or machinery.

Laurel hedge growth rate and eventual size

Growth-rate figures describe reasonable annual shoot growth after establishment, not a guarantee. Soil preparation, plant size, root disturbance, water, temperature, light, wind exposure, competition and pruning all affect the result. A large root-balled hedge may look substantial on day one but make modest extension growth in its first year while new roots develop.
Laurel typeTypical annual growth after establishmentPractical maintained heightNatural habit if not controlled
Cherry Laurel ‘Rotundifolia’About 30-60cmCommonly 1.5-4mLarge, broad and capable of becoming a substantial shrub or small tree
Portuguese LaurelAbout 20-40cmCommonly 1.2-3mLarge evergreen shrub or small tree with a neater outline
Upright Laurel ‘Caucasica’About 30-60cmCommonly 1.5-4mTall and comparatively narrow
Compact Laurel ‘Otto Luyken’About 10-20cmCommonly 0.6-1.2mLow and spreading, usually around 1m tall in normal hedge use
Sweet Bay LaurelOften around 10-30cmCommonly 1-2.5mCan become a large shrub or tree in a mild, favourable site

How long does a Laurel hedge take to establish?

Most newly planted Laurels begin producing useful new growth in their first growing season, but a full root system normally takes longer. Allow at least two growing seasons for reliable establishment, and longer for very large specimens, dry sites or competitive positions. Do not judge survival solely by a short pause in shoot growth after planting.

How to encourage a dense hedge

  • Choose the correct density for the exact plant size.
  • Plant at the original soil level and firm without compaction.
  • Water the whole root zone deeply during dry weather.
  • Keep a weed-free, mulched strip.
  • Trim the sides lightly from a young age.
  • Keep the base wider than the top.
  • Correct drainage, pH or root problems before adding more fertiliser.
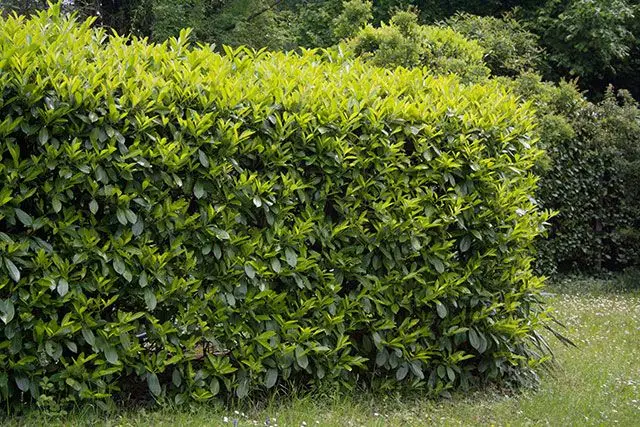
Mature Sweet Bay Laurel hedge in a sheltered garden

Seasonal Laurel hedge care calendar

MonthMain Laurel hedge care
JanuaryPlant bare root and root-balled Laurel when soil is neither frozen nor waterlogged. Check newly planted evergreens after dry, windy weather. Protect Sweet Bay from severe frost.
FebruaryContinue dormant-season planting. Firm plants lifted by frost or wind. Check guards, stakes and ties. Avoid routine hard clipping in freezing weather.
MarchFinish much bare-root planting as the season allows. Remove weeds, renew mulch and apply a balanced spring feed where needed. Begin regular moisture checks.
AprilPlant pot-grown hedging while conditions remain cool. Water new hedges during dry spells. Wait until frost damage on Bay is clear before cutting it out.
MayMonitor new growth, drought stress, vine-weevil notching, powdery mildew and leaf spots. Check carefully for active nests before any pruning.
JuneMain trimming period for established Cherry, Portuguese, Upright and Compact Laurel, subject to nesting birds. Water deeply in dry weather and maintain mulch.
JulyPrioritise watering and weed control. Inspect irrigation coverage, especially on long rows and large root balls. Avoid feeding drought-stressed plants.
AugustCarry out a light late-summer trim if required, after checking for nests. Avoid hard pruning and heavy high-nitrogen feeding late in the month.
SeptemberPrepare ground for autumn planting. Improve drainage, clear perennial weeds and plan delivery access. Plant pot-grown Laurel as temperatures ease.
OctoberA good month for pot-grown evergreen planting. Root-balled availability may begin as plants become dormant. Mulch after planting and protect young stems where browsing is likely.
NovemberPlant bare root and root-balled stock as supplied. Keep roots covered during handling. Water after planting and secure larger specimens against wind rock.
DecemberContinue planting in workable weather. Do not plant into frozen or saturated soil. Check Sweet Bay and recently planted large-leaved Laurels after cold drying winds.

Laurel hedge pests, diseases and common problems

Yellow, brown or dropping leaves are symptoms rather than diagnoses. Check soil moisture, drainage, planting depth, root condition and recent weather before assuming the hedge needs fertiliser or pesticide. Several different problems can produce similar foliage damage.
SymptomLikely causesWhat to check and do
Yellow leavesWaterlogging, drought, establishment stress, high-pH chlorosis, root damage or nutrient shortageCheck moisture at root depth. Improve drainage or watering as required. Inspect planting depth and new roots. Feed only after moisture and root problems are corrected.
Brown tips or marginsDrought, cold drying wind, frost, salt exposure or leaves cut by machineryCheck the root ball for dryness. Water deeply, shelter young plants where practical and wait until late spring before removing frost damage.
Whole leaves browning after plantingDry root ball, severe transplant stress, damaged roots, planting too deep or waterloggingCheck several plants and compare soil conditions. Correct irrigation and depth promptly. Seek nursery advice if decline is rapid or widespread.
Leaves droppingNormal replacement of older leaves, drought, waterlogging, sudden exposure change or root stressA small seasonal loss can be normal. Investigate if shoots become bare, new leaves also fall or stems die back.
Round or irregular holes with brown corky edgesLaurel leaf diseases, including powdery mildew damage, fungal leaf spot or bacterial shotholeLook for white coating, spots and distorted new leaves. Remove badly affected material, clear debris, improve airflow and water at soil level. Avoid unnecessary chemical treatment.
White powder on leavesPowdery mildew, often encouraged by dry roots and crowded growthWater the root zone during drought, improve air movement and remove heavily affected shoots. Avoid wetting foliage repeatedly late in the day.
Notched leaf edgesAdult vine weevil, especially on pot-grown plantsInspect at night and check roots for cream larvae in containers or recently planted root balls. Use current biological or cultural controls where appropriate.
Curled, thickened yellow margins on Sweet BayBay suckerLook for pale curled edges and waxy grey-white nymphs. Remove badly affected shoot tips and encourage natural predators. Long-term plant health is usually not seriously affected.
Sticky leaves with black coatingScale insects or other sap feeders followed by sooty mouldInspect stems and leaf undersides for scale. Wipe small infestations away, prune crowded growth and use only current UK-approved controls if intervention is justified.
Wilting in wet soil, sparse foliage or progressive diebackRoot rot such as Phytophthora, severe compaction or oxygen-starved rootsStop automatic watering, assess drainage and roots, and obtain a reliable diagnosis before replacing plants. Improve the site rather than replanting into the same saturated soil.
Honey-coloured fungus or white fungal sheets beneath barkPossible honey fungusSeek confirmation before removing a hedge. There is no simple chemical cure, and management depends on the extent of infection and affected woody hosts.
Sparse growth at the baseTop wider than base, deep shade, missed formative pruning, weed competition or droughtTaper the sides, clear the base, water and mulch. Renovate gradually if the hedge is old and top-heavy.
No new growthNormal establishment pause, cold spring, drought, root damage, deep planting or unsuitable soilCheck buds, scratch a tiny section of stem for green tissue and review root-zone conditions. Allow time until late spring before declaring a dormant-looking plant dead.
Chewed stems or low foliageRabbit or deer browsingInstall suitable guards or fencing and protect replacement growth. No plant is completely browse-proof when food is scarce.

Why are Laurel leaves turning yellow?

The most common causes are too much or too little water, root disturbance after planting and poor nutrient availability in alkaline soil. Yellow leaves on saturated ground suggest drainage or root trouble; yellowing in a dry root ball suggests drought. Check below the surface before adding feed. Older internal leaves may also yellow and fall naturally as the evergreen canopy renews itself.

Why are Laurel leaves turning brown?

Brown edges often follow drought, cold wind, frost or salt exposure. Newly planted large specimens can brown because the original root ball has dried even when surrounding soil looks damp. Brown cut edges after trimming are cosmetic and usually disappear behind new growth. Progressive browning with wet soil and dying stems requires a root-health check.

Why does my Laurel have holes in the leaves?

Holes may come from vine-weevil feeding or from Laurel leaf diseases. Disease-related holes often have brown, corky margins and may be accompanied by spots, distortion or powdery growth. Identify the pattern before treating. Improve air movement, remove heavily affected material, water at the base and avoid routine pesticide or fungicide use without a confirmed need and a current legal label.

Can a damaged Laurel hedge recover?

Yes, many Laurels recover after drought, frost, poor planting or pruning once the cause is corrected. Cherry and Portuguese Laurel can often regenerate from old wood. Recovery is less likely where roots have died in waterlogged soil, stems are girdled by animals or a serious root disease is established. Do not remove all damaged growth immediately after frost; wait until new growth shows the live framework.

When to seek professional or official advice

Ask for expert diagnosis where dieback spreads rapidly, several unrelated plants decline, unusual insects or symptoms appear, or a replacement hedge repeatedly fails in the same place. If a regulated or notifiable plant pest is suspected, follow current APHA and UK Government reporting guidance. Avoid moving suspect plant material to another site.

Wildlife and environmental value

A well-managed Laurel hedge provides dense evergreen shelter, nesting cover and a wind-buffered microclimate. Cherry and Portuguese Laurel produce spring flowers and dark fruits when they are not clipped before flowering, although a formal hedge trimmed frequently will offer fewer flowers and berries. Bay also flowers and can support insects in a sheltered garden.

Check the entire hedge for active nests before pruning. Wild birds, their eggs and active nests are protected by law. The agricultural hedgerow cutting restriction from 1 March to 31 August applies to hedgerows covered by those rules and is not a universal domestic-garden pruning ban, but active nests must be protected wherever they occur.

Cherry Laurel, Portuguese Laurel and their cultivars are harmful if eaten, including their ornamental fruit. Keep cuttings and berries away from children, pets and grazing livestock. Sweet Bay is different: correctly identified, untreated Laurus nobilis leaves are used for cooking. Never assume that another plant called “laurel” is edible.

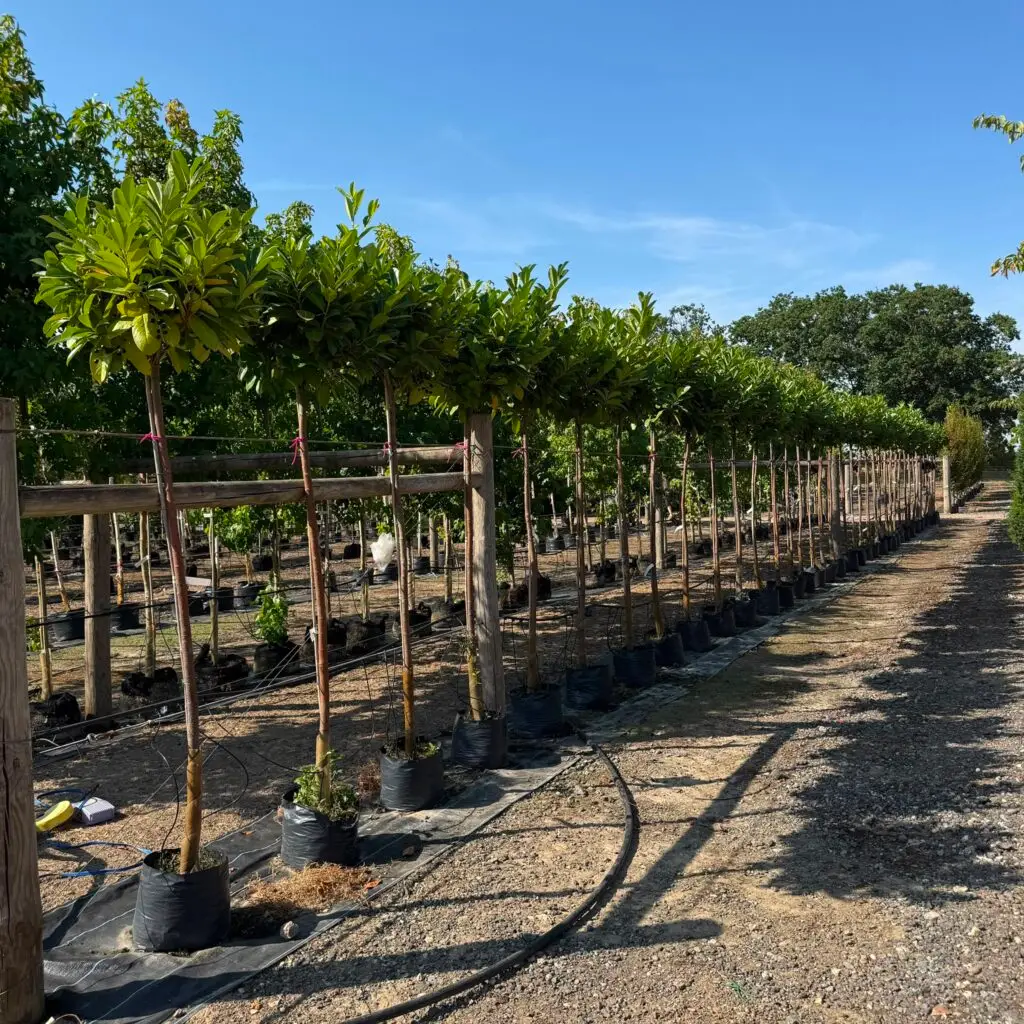
Cherry Laurel - 10-12cm girth - Standard - Container Grown

Laurel care by root type

Root typeAt plantingFirst-season priorityCommon mistake to avoid
Bare rootPlant promptly while dormant, keep roots moist, spread them naturally and firm carefullyPrevent drying and keep weeds away from small plantsLeaving roots exposed or planting them bent into a narrow hole
Pot grownWater the pot, loosen circling roots and keep the compost surface level with the soilWater the original pot root ball as well as surrounding soilAssuming rain has penetrated a dry, peat-free or congested root ball
Root ballKeep the ball intact, plant at the correct depth and remove or loosen unsuitable wrappingMaintain even moisture within and around the ball, and prevent wind rockHandling by the stem, breaking the ball or wetting only the surface
Instant hedgingPrepare a level trench, plan machinery and access, and install irrigation where usefulProvide even watering across the complete unit and check joins between unitsTreating an instant visual screen as an already established root system

Frequently asked questions about Laurel hedging

How far apart should Laurel hedging be planted?

Plant spacing depends on the exact species, plant height and root type. Current examples range from 5 small bare-root plants per metre at 20cm centres to 1 large instant unit per metre. Larger pot-grown and root-balled plants are normally spaced farther apart. Use the plants-per-metre figure for the selected product size rather than a universal 60-90cm rule.

How many Laurel plants do I need per metre?

Small bare-root Cherry or Portuguese Laurel may require 5 plants per metre, smaller pots may require 3-4, and larger specimens may require 1.25-2. The exact quantity is shown against each size. Multiply the hedge length by that figure and round up where necessary, while allowing for corners, gates and the desired end positions.

What is the best time to plant a Laurel hedge?

Early autumn to early spring is usually the easiest period because soil moisture is more reliable and plants face less heat stress. Bare root and root-balled Laurel must be planted in the dormant season. Pot-grown Laurel can be planted throughout the year if the soil is workable and you can water it thoroughly during dry weather.

How quickly does Laurel hedging grow?

Cherry and Upright Laurel can grow about 30-60cm a year after establishment in favourable conditions. Portuguese Laurel commonly grows around 20-40cm, Sweet Bay often around 10-30cm and Compact Laurel about 10-20cm. These are planning ranges, not guarantees. Root establishment, soil, light, water, exposure and pruning all affect annual growth.

When should I prune a Laurel hedge?

Prune Cherry, Portuguese, Upright and Compact Laurel mainly in late spring or early summer, after severe frost risk has passed. A light late-summer trim can maintain a formal outline. Trim Sweet Bay in spring or summer and remove frost damage in late spring. Check for active bird nests before every cut.

Can Laurel be cut back hard?

Cherry and Portuguese Laurel usually regrow from old wood and can often be renovated successfully. Reduce an old hedge in stages if it is weak, very large or under stress, then water, mulch and feed appropriately. Sweet Bay also tolerates hard pruning but recovers slowly, so spread major reduction over two or three seasons.

How often should I water a newly planted Laurel hedge?

Check the soil below the surface and water thoroughly whenever the root zone is beginning to dry. Newly planted Laurel normally needs the closest attention during its first growing season and during hot, dry or windy weather. Avoid watering automatically when the soil is already wet.

What is the best feed for Laurel hedging?

A balanced general hedge fertiliser applied as a spring top dressing is suitable for young, weak or recently pruned Laurel. Follow the label, apply it to moist weed-free soil and keep it away from stems. Do not use feed to mask drought, waterlogging or deep planting, and avoid heavy high-nitrogen feeding late in summer.

Will Laurel grow in shade?

Cherry Laurel and Portuguese Laurel both tolerate partial shade and can grow in considerable shade, although the hedge may be slower and less dense. Competition from established trees and dry “rain shadow” soil is often a bigger problem than light alone. Water deeply, clear weeds and choose a sensible density for the plant size.

Can Laurel grow in clay or chalky soil?

Cherry Laurel grows in clay if the soil is not compacted or waterlogged. Portuguese Laurel is particularly useful on chalk and shallow alkaline ground. Compact Laurel may yellow on poor shallow chalk. No Laurel should be planted into permanently saturated soil, and Sweet Bay needs especially good drainage.

Why are my newly planted Laurel leaves yellow?

New Laurel often yellows because its roots are too wet, too dry or disturbed after planting. Check the original root ball and surrounding soil at depth. If both are suitably moist, review planting depth and drainage before adding fertiliser. Some older leaves may yellow and drop naturally as the plant adjusts and produces new growth.

Why are my Laurel leaves brown after winter?

Brown leaves after winter usually indicate frost, cold drying wind or a dry root zone rather than a lack of feed. Wait until late spring to see where new buds break, then cut back to healthy growth. Sweet Bay is particularly vulnerable. Continue watering recently planted evergreens during dry frost-free spells.

What causes holes in Laurel leaves?

Holes can be caused by vine-weevil feeding or Laurel leaf diseases such as powdery mildew damage, fungal leaf spot and bacterial shothole. Disease holes often have brown corky edges and may accompany spots or distorted leaves. Confirm the pattern, improve growing conditions and use cultural controls before considering any current UK-approved treatment.

How tall will a Laurel hedge grow?

Cherry, Portuguese and Upright Laurel can become large shrubs or small trees if left unpruned, but they are commonly maintained between about 1.5m and 4m. Compact Laurel is best as a low hedge around 0.6-1.2m. Sweet Bay can grow large in a mild site but is often clipped between 1m and 2.5m.

Which Laurel is best for a small garden?

Compact Laurel is the best low-growing choice. Upright Laurel is useful where height is needed but width is limited. Portuguese Laurel can be clipped into a neat formal hedge, while Sweet Bay suits a sheltered smaller garden if slower growth is acceptable. Vigorous Cherry Laurel needs enough width and regular pruning.

Is Laurel hedging poisonous?

Cherry Laurel, Portuguese Laurel and their cultivars are harmful if eaten, including the fruit. Keep plant material away from children, pets and livestock. Sweet Bay is botanically different: correctly identified Laurus nobilis is the culinary bay used in cooking. Do not use leaves from any other plant sold under the name “laurel”.

Do Laurel roots damage foundations or drains?

Laurel is not uniquely destructive, but a mature hedge is a large woody plant. Avoid planting directly over drains or close to vulnerable structures. Roots may enter already damaged drains, and large vegetation can affect shrinkable clay. Use the planned mature width, maintenance access and site conditions to choose a sensible distance, and seek professional advice near buildings.

Choosing and buying Laurel hedge plants

Hedging Plants Direct supplies Laurel hedging for domestic gardens, landscaping, trade and commercial projects across the UK. The range includes vigorous Cherry Laurel, refined Portuguese Laurel, narrow Upright Laurel, low-growing Compact Laurel and aromatic Sweet Bay Laurel.

Compare current sizes, root types, seasonal availability and plants-per-metre recommendations on the Laurel hedging category page. Mixed-format orders may be dispatched together once all plants are available. For a long boundary, difficult site or commercial scheme, use the exact product density and seek project-specific advice before ordering.