
Hedging care & growing guide
Osmanthus Hedge Care Guide: Planting, Spacing & Pruning
Osmanthus × burkwoodii is a slow-growing evergreen hedge that is straightforward to look after when planted in well-drained soil and kept reliably watered while it establishes. Our Osmanthus hedging plants suit sunny or partially shaded positions and are particularly valued for their dense dark-green foliage and highly scented white spring flowers.
This guide explains how to plant an Osmanthus hedge, how far apart to space the different sizes we supply, and how to manage watering, feeding and pruning. It also covers growth rate, seasonal care and common causes of yellow leaves, brown foliage, poor growth and establishment problems.
The Osmanthus hedging we currently supply is pot-grown Osmanthus × burkwoodii, so the planting and spacing advice below is based specifically on that plant rather than being generalised across the wider Osmanthus genus.
Expert nursery advice
Gwynne's Grower's Tip
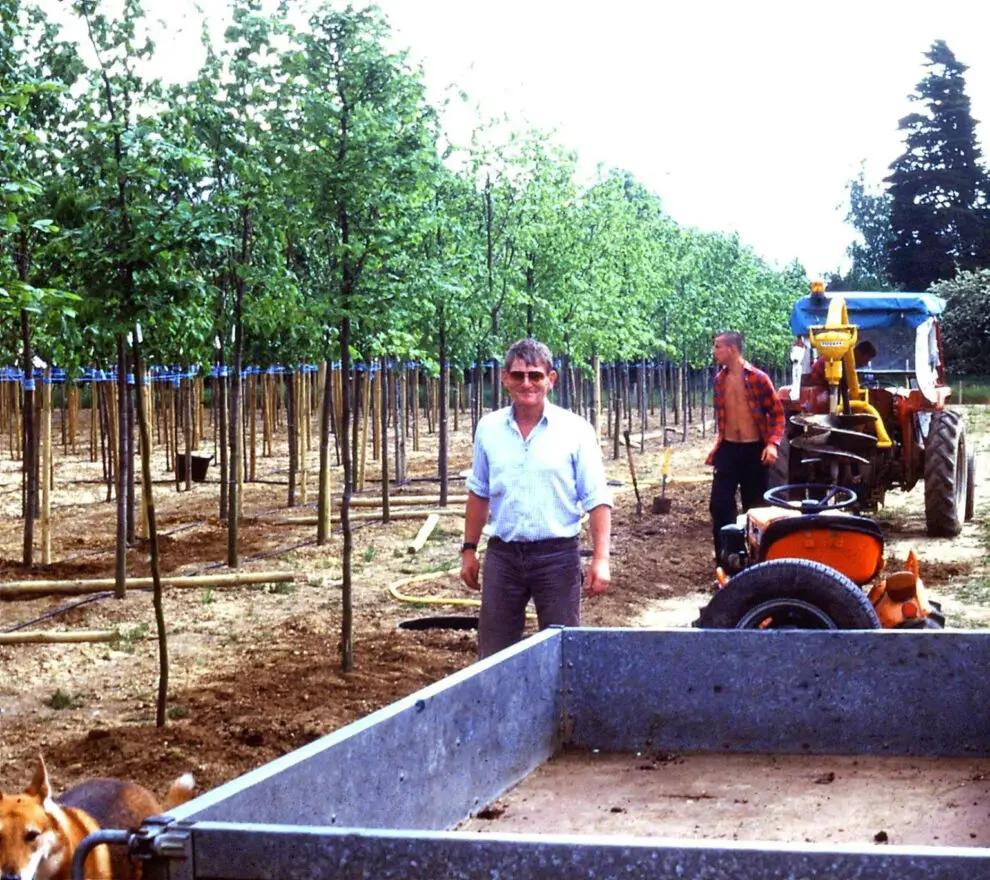
With Osmanthus, I would concentrate on getting the planting conditions right rather than trying to force fast growth with fertiliser. It is naturally a slower hedge, so good drainage, an evenly moist root zone and keeping weeds away from young plants will do far more for establishment. Once it is growing strongly, a light trim after the spring flowers have finished will encourage a neat, dense shape. Avoid planting it into ground that stays waterlogged, and give newly planted hedges particular attention during their first couple of dry summers.
From our nursery
Visit our Osmanthus hedges

Osmanthus Hedge
Osmanthus × burkwoodii is a good choice when you want a dense evergreen hedge with fragrant spring flowers and do not need very rapid growth. Give it well-drained soil and, particularly when young, some shelter from drying winds. The smaller 40–60cm plants are currently planted more densely at four per metre, while the taller sizes are spaced at three per metre.
Not sure which Osmanthus hedge to choose?
Compare the available plants, formats and starting sizes in the complete range.
Explore our complete Osmanthus hedging rangeOsmanthus hedge quick-care summary
| Botanical name | Osmanthus × burkwoodii |
|---|---|
| Plant type | Evergreen flowering shrub / hedge |
| Evergreen or deciduous | Evergreen |
| Typical growth rate | Slow, around 10–20cm per year once established |
| Preferred position | Full sun or partial shade; preferably sheltered |
| Soil | Well-drained; acid, neutral or alkaline |
| Watering | Water deeply after planting and during dry spells while establishing |
| Pruning period | Immediately after spring flowering |
| Feeding | Balanced feed in spring if needed |
| Hardiness | RHS H5 |
| Typical hedge height | Commonly maintained around 1–2m; natural shrub around 3m |
| Planting season | Pot-grown year-round; autumn to early spring preferred |
| Root types commonly available | Pot grown |
About Osmanthus hedging
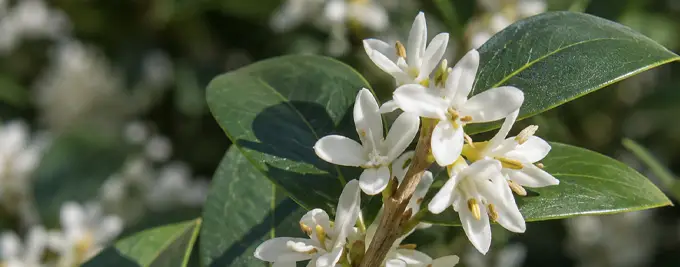
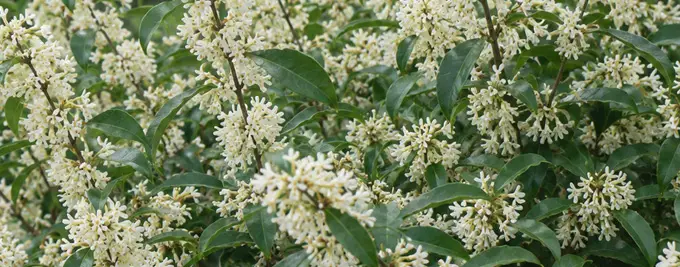
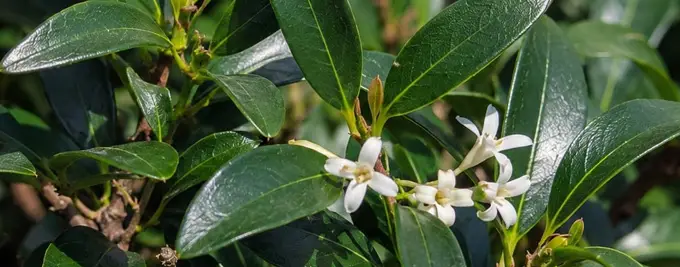
Osmanthus × burkwoodii is a dense, slow-growing evergreen shrub with glossy dark-green leaves and strongly scented white flowers in spring. It makes an attractive low-maintenance hedge where year-round foliage, fragrance and a manageable growth rate are more important than creating a very fast screen.
The Osmanthus hedging currently supplied by Hedging Plants Direct is Osmanthus × burkwoodii, commonly called Burkwood osmanthus. It belongs to the olive family, Oleaceae, and forms a naturally dense, bushy evergreen shrub.
The foliage is dark green throughout the year and provides a useful permanent structure in a garden. In spring the plants produce clusters of small white flowers with a strong sweet fragrance. A small number of dark fruits may occasionally follow later in the year.
What is Osmanthus best used for?
Its naturally compact habit makes Osmanthus useful for ornamental boundaries, evergreen garden divisions, low to medium privacy hedges and more formal clipped hedging. It is particularly useful where a slower-growing hedge is an advantage because the amount of routine trimming is relatively modest.
It is not normally the first hedge I would choose when the priority is creating a tall screen as quickly as possible. Osmanthus rewards patience rather than producing the rapid annual extension growth of species such as laurel or Leylandii.
Our current Osmanthus × burkwoodii hedge plants are pot grown and available in several height grades, allowing the starting size and planting density to be matched to the project.
Choosing the right Osmanthus hedge
Choose Osmanthus × burkwoodii when you want evergreen structure, fragrant spring flowers and a hedge that stays manageable without frequent cutting. It works in sun or partial shade and is suitable for formal or informal hedging, but its slow growth means it is less suitable where very rapid screening is the priority.
Osmanthus is most useful when year-round foliage, fragrance and relatively low maintenance matter more than rapid growth. It can be clipped into a neat formal shape or allowed to develop a softer informal outline.
| Requirement | Osmanthus suitability |
|---|---|
| Evergreen privacy | Good once the hedge has filled out, but establishment is gradual |
| Fast screening | Not its strongest use because growth is naturally slow |
| Formal hedge | Good; responds well to regular light shaping |
| Informal hedge | Very good; naturally dense and rounded |
| Small gardens | Good when maintained at a sensible height and width |
| Full sun | Good, with reliable moisture during establishment |
| Partial shade | Good, although flowering may be strongest in brighter positions |
| Waterlogged soil | Poor choice; good drainage is important |
| Very exposed sites | Prefer a more sheltered position, especially while young |
Which size should I choose?
Smaller plants generally cost less and can establish efficiently, while a taller starting size gives more immediate visual impact. Whichever size you select, the long-term result depends much more on correct planting, watering and aftercare than simply starting with the tallest plant.
When to plant Osmanthus hedging
Pot-grown Osmanthus can be planted throughout the year whenever the soil is workable, but autumn and early spring usually offer the easiest establishment conditions. Avoid planting into frozen or waterlogged ground and take extra care with watering if planting during warm, dry weather.
All Osmanthus hedge plants in our current range are pot grown. Unlike bare-root plants, this means they are not restricted to a short dormant planting season.
Best planting periods
Autumn and early spring are generally the easiest periods because the soil is normally moist and temperatures are moderate. The roots can begin establishing without the plant being exposed immediately to prolonged summer heat and drought.
Pot-grown plants can also be planted in late spring or summer, but only if you can provide dependable watering. Do not plant simply because the plants are available if the ground is exceptionally dry and hard.
- Delay planting if the soil is frozen.
- Delay planting if the site is saturated or waterlogged.
- Avoid planting during extreme heat or drought where possible.
- If plants must wait before planting, keep the pots watered and prevent the root balls from drying out.
Where to plant Osmanthus
Plant Osmanthus × burkwoodii in well-drained soil in full sun or partial shade. It tolerates a broad range of soil textures and pH levels provided excess water can drain away. A reasonably sheltered position is preferable for hedge planting, particularly where cold drying winds are common.
Sun and shade
Osmanthus × burkwoodii grows in full sun or partial shade. A brighter position normally gives the best opportunity for a strong display of scented spring flowers, while partial shade is useful where the site becomes very hot or dry.
Soil and drainage
The plant is adaptable to chalk, clay, loam and sandy soils and can grow in acid, neutral or alkaline conditions. Drainage is more important than having one particular soil type. Heavy clay is not automatically unsuitable, but soil that remains saturated around the roots for prolonged periods should be improved or avoided.
Shelter and boundaries
Our Osmanthus product is listed for a sheltered position. Established plants are hardy, but cold drying winds can damage evergreen foliage, especially where root systems are still establishing or the soil is frozen or waterlogged.
When planting beside a fence or wall, allow sufficient room to maintain both the hedge and the boundary. Remember that an unclipped Osmanthus can become a broad shrub, so plan for the finished hedge width rather than planting directly against a solid obstruction.
How to prepare the planting area
Prepare the full hedge line before planting by removing perennial weeds, checking drainage and loosening compacted soil. For a row of plants, a continuous planting trench often makes it easier to achieve consistent depth and spacing. Water dry pots thoroughly before removing the plants from their containers.
- Remove weeds first. Clear grass, perennial weeds and other competing vegetation along the whole hedge line rather than only around each planting hole.
- Check drainage. If water sits in test holes for long periods after rain, deal with the drainage problem before planting.
- Loosen compacted ground. Break up the sides and base of the planting area without creating a smooth-sided sump.
- Improve poor soil where necessary. On very sandy, compacted or difficult soils, mix suitable organic matter or Hedge Planting Compost through the excavated soil rather than replacing all the native soil with compost.
- Water the containers. The root ball should be evenly moist before planting.
Using mycorrhizal fungi
If using Rootgrow Mycorrhizal Fungi, apply it at planting so the product makes direct contact with the root system, following the pack instructions.
Avoid placing concentrated fertiliser directly around the roots in the planting hole. Good soil preparation, the correct planting depth and reliable watering are more important to early establishment than attempting to force new growth with extra fertiliser.
How to plant an Osmanthus hedge
Plant pot-grown Osmanthus at the same depth it was growing in the container, firm the surrounding soil gently and water thoroughly. Keep the root ball intact but correct tightly circling outer roots if necessary. Finish with mulch over the root zone without piling it against the stems.
- Mark the hedge line. Use a string line so the finished row remains straight and measure the correct spacing for the size being planted.
- Dig the planting trench or holes. Make them wide enough for the root balls and loosen the surrounding soil.
- Water the plants while still in their pots. Do not plant a dry root ball and expect surface watering to re-wet it quickly.
- Remove each container carefully. Keep the root ball together. If roots are tightly circling the outside, gently loosen the outermost roots rather than leaving them wound around the pot shape.
- Apply mycorrhizal fungi if required. Place it in direct contact with the roots according to the product directions.
- Set the planting depth. Position the top of the root ball level with the surrounding finished soil. Avoid burying the stems more deeply than they were growing in the pot.
- Backfill and firm gently. Work soil around the root ball so there are no large air spaces, but do not compact wet soil heavily.
- Water thoroughly. Give the whole root zone a deep watering immediately after planting.
- Mulch the hedge line. Apply organic mulch over the root area while keeping it clear of the main stems.
- Check stability. Most smaller pot-grown hedge plants do not need permanent staking, but larger plants on a windy site may need temporary support while new roots develop.
Osmanthus hedge spacing and plants per metre
Use the planting density specified for the actual Osmanthus size purchased. Hedging Plants Direct currently recommends four plants per metre for 40–60cm 3-litre plants and three plants per metre for the 60–80cm and 80–100cm sizes. These equate to centres of approximately 25cm and 33cm respectively.
There is no single spacing figure that should be applied to every Osmanthus plant size. Our current planting densities are based on the particular height grades we supply.
| Current Osmanthus size | Plants per metre | Approximate centre spacing |
|---|---|---|
| Pot grown 40–60cm, 3 litre | 4 per metre | 25cm |
| Pot grown 60–80cm | 3 per metre | About 33cm |
| Pot grown 80–100cm | 3 per metre | About 33cm |
How to mark the spacing
Measure along the centre line of the hedge rather than estimating by eye. A 25cm centre spacing means measuring from the centre of one stem to the centre of the next. At three plants per metre the practical centre-to-centre distance is approximately 33cm.
These figures are intended for a conventional single-row Osmanthus hedge. Increasing the quantity unnecessarily will not automatically produce a better mature hedge and can increase competition for water while the plants establish.
Always recheck the current product variation before calculating a large order because planting densities can change if the size specifications or production format change.
Watering and establishment
Water a newly planted Osmanthus hedge thoroughly and continue checking the root zone during dry weather for at least its first two growing seasons. Aim for deep, thorough watering rather than frequent superficial splashes. Equally, do not keep poorly drained soil permanently wet because saturated roots can cause yellowing, weak growth and dieback.
Immediately after planting
Water every plant thoroughly so moisture reaches through the original root ball and into the surrounding soil. This also helps settle soil around the roots.
The establishment period
New hedges need much closer attention than established ones. Check soil moisture during dry periods throughout spring, summer and early autumn for the first couple of years. Plants close to walls, fences, mature trees or other rain-shadow areas may dry more quickly than expected.
Water slowly enough for moisture to penetrate deeply. A light sprinkle that wets only the surface encourages no useful deep rehydration of the root zone.
For long hedge runs, a properly installed hedge irrigation system can make consistent establishment watering easier, but it should still be adjusted to rainfall and soil conditions rather than operated on an inflexible timetable.
Signs of too little water
- Loss of leaf lustre
- Drooping or curling foliage
- Dry, crisp leaf margins
- Reduced new growth
- Premature leaf drop during severe stress
Signs the soil may be too wet
- Persistent yellowing despite damp soil
- Weak or stalled growth
- Soft or declining roots
- Water remaining around the planting area long after rain
Because Osmanthus is evergreen, its foliage continues to lose moisture during winter. Newly planted hedges may occasionally need water during prolonged dry winter weather, but only when the ground is unfrozen and genuinely becoming dry.
How and when to feed Osmanthus
Osmanthus does not need heavy feeding in ordinary fertile garden soil. Where growth is weak because soil fertility is low, apply a balanced general-purpose hedge fertiliser in spring and follow the product rate. Do not use fertiliser as a substitute for correcting drought, waterlogging, compaction or poor establishment.
A healthy Osmanthus hedge growing in reasonable garden soil should not need repeated heavy applications of fertiliser. Feeding is most useful where soil is known to be poor, where an established hedge has become tired, or after pruning when conditions are otherwise good.
Spring feeding
If feeding is needed, apply a balanced fertiliser such as Hedge Feed in spring at the stated product rate. Apply to moist soil over the rooting area rather than concentrating it against the stems, then water if conditions are dry.
When not to feed
Do not automatically feed a hedge simply because the leaves are yellow or growth has stopped. First check soil moisture, drainage, weeds and the condition of the root zone. Fertiliser will not repair roots suffering from prolonged waterlogging or drought.
Avoid pushing soft, nitrogen-rich growth late in the season. New shoots produced too late may not harden sufficiently before colder weather.
Mulch as part of long-term soil care
An organic mulch helps suppress competing weeds, moderates soil moisture and gradually contributes organic material to the surface soil. Keep mulch away from direct contact with the stems.
How and when to prune Osmanthus
The best time for the main Osmanthus × burkwoodii trim is immediately after its spring flowers have finished. Because the hedge grows slowly, one careful annual trim is often enough. Lightly shorten new growth to encourage branching and maintain a hedge that is slightly narrower at the top than at the base.
Best time to prune Osmanthus
Osmanthus × burkwoodii is a spring-flowering evergreen and falls within RHS Pruning Group 8. Where shaping is needed, carry out the main trim immediately after flowering. This retains the spring display and gives subsequent growth time to mature before winter.
Pruning a young Osmanthus hedge
Young plants benefit from light formative trimming rather than being allowed to make a few long shoots. Shortening the tips of vigorous shoots after flowering encourages more side branching and gradually builds a denser framework.
Pruning an established hedge
- Remove dead, damaged or obviously unhealthy growth.
- Shorten the current outer growth enough to restore the required outline.
- Keep the top slightly narrower than the base so daylight can reach the lower foliage.
- Avoid removing more growth than is necessary simply because you are trimming.
Can an overgrown Osmanthus be cut back hard?
Be more cautious with major renovation than you would be with species well known for regenerating from severe pruning. For a large, neglected Osmanthus, gradual reduction over several seasons is generally safer than cutting the whole hedge back to bare old stems in one operation.
Avoid major pruning in late autumn and winter, when cuts and newly exposed foliage have less opportunity to recover. Before any hedge cutting, check carefully for active bird nests and postpone work around any nest that is in use.
Osmanthus growth rate and eventual size
Osmanthus × burkwoodii is a slow-growing hedge. Our current product specification gives a typical growth rate of around 10–20cm per year, although actual extension depends on establishment, light, soil, moisture and pruning. An untrimmed shrub can eventually reach around 3m and may become similarly broad.
Do not choose Osmanthus on the assumption that it will create a tall screen in only a few seasons. Slow growth is part of its character and one reason an established hedge is relatively easy to maintain.
Typical annual growth
Our current Osmanthus product is classed as slow growing at approximately 10–20cm per year. This should be treated as a useful guide rather than a guarantee. Newly planted plants may make comparatively little visible top growth while roots are establishing.
What affects growth?
- How well the roots established after planting
- Available light
- Water supply during dry weather
- Drainage and soil aeration
- Competition from grass, weeds and neighbouring plants
- Severity and frequency of pruning
How tall does Osmanthus burkwoodii grow?
RHS information describes an ultimate height and spread in the region of 2.5–4m over 10–20 years, with a naturally rounded habit. As a hedge it can be maintained considerably smaller, and around 1–2m is a practical range for many domestic applications.
If quick screening is essential, it is better to choose a naturally faster hedge rather than attempting to force Osmanthus with excessive fertiliser.
Seasonal care for Osmanthus hedges
Osmanthus needs relatively little routine work once established. Most attention falls into three periods: planting and soil care during cooler months, feeding and flowering in spring, and establishment watering during dry weather. Carry out the principal shaping trim after the spring flowers have finished.
| Season | Main Osmanthus care |
|---|---|
| Winter | Plant pot-grown hedges if the ground is workable. Check young evergreens after severe frost or drying winds. Avoid unnecessary hard pruning. |
| Early spring | Complete planting, renew mulch if required and apply a balanced feed where genuinely needed. Check for winter scorch before removing damaged growth. |
| Spring flowering | Enjoy the scented white flowers and avoid unnecessary clipping while they are at their best. |
| Late spring / early summer | Carry out the main shaping trim after flowering. Continue establishment watering according to rainfall and soil moisture. |
| Summer | Monitor new hedges closely in hot or dry weather. Maintain a weed-free root zone and check irrigation is actually wetting the root balls. |
| Autumn | A good period for new planting. Replenish mulch where necessary and avoid late heavy nitrogen feeding or unnecessary hard pruning. |
Osmanthus pests, diseases and common problems
Osmanthus × burkwoodii is generally regarded as pest-free, so yellow leaves, brown foliage and poor growth are often more likely to be linked to establishment, soil moisture or weather than a serious pest outbreak. Check the growing conditions first and diagnose the pattern of damage before treating the plant.
Osmanthus leaves turning yellow
Check soil moisture before reaching for fertiliser. Persistent yellowing where the soil is wet can indicate poor drainage, root stress or prolonged waterlogging. Where the ground is dry, yellowing may instead accompany drought and establishment stress.
Dig carefully beside the root zone and assess the soil rather than judging moisture from the surface alone. Correct the underlying drainage or watering problem before applying additional feed.
Brown or scorched leaves
Brown, dry leaf margins are often associated with moisture stress or cold drying winds. Winter wind scorch is usually most obvious on the exposed or windward side of an evergreen hedge.
Keep young plants adequately watered, maintain a mulch over the root zone and improve shelter where practical. Wait until spring growth begins before deciding how much frost- or wind-damaged material is genuinely dead and needs removing.
Leaves dropping after planting
Some foliage loss can follow transplanting if the original root ball has dried, if the plant was exposed to severe weather or if roots are sitting in saturated soil. Check that the root ball itself is moist and that water can drain from the planting area.
My Osmanthus hedge is not growing
A newly planted hedge may spend significant time developing roots before producing strong extension growth. Osmanthus is naturally slow, so first rule out drought, waterlogging, heavy weed competition, deep planting and severe shade. Do not try to solve every establishment problem with extra fertiliser.
Sparse growth at the base
Allowing the top of a hedge to become wider than the base shades the lower branches. Keep the finished hedge slightly tapered, with a narrower top, and lightly tip-prune young plants to encourage branching. Very old bare wood may be slow to refill, so prevention is preferable to drastic renovation.
Honey fungus
The RHS lists Osmanthus × burkwoodii as potentially susceptible to honey fungus. Warning signs can include progressive dieback together with white fungal growth beneath bark near the base, dark root-like fungal strands or clusters of honey-coloured mushrooms.
Do not diagnose honey fungus from yellow leaves alone. If several woody plants are declining or characteristic fungal signs are present, obtain a reliable diagnosis before taking major action.
Do I need to spray Osmanthus?
Routine pesticide or fungicide treatment is not appropriate for a healthy Osmanthus hedge. Identify the cause of the problem first and favour improvements to drainage, watering, pruning, hygiene and growing conditions wherever these address the cause.
Wildlife and environmental value
Osmanthus adds evergreen shelter and spring flowers to the garden. Its fragrant white blooms can provide a floral resource for visiting insects, while the dense branching of an established hedge offers useful cover. Occasional dark fruits may also develop, although Osmanthus should not be selected specifically for a heavy berry crop.
A well-established Osmanthus hedge provides permanent leafy structure throughout winter as well as the scented spring flowers for which the plant is best known.
- Flowers: the spring bloom adds a nectar and pollen source for visiting insects.
- Cover: dense evergreen foliage provides shelter and potential nesting cover for garden birds.
- Fruit: a small number of dark fruits may occasionally form after flowering.
- Year-round structure: the evergreen canopy provides shelter when deciduous hedges are bare.
Osmanthus × burkwoodii is not native to Britain or Ireland, so where maximum native biodiversity is the primary aim, a mixed native hedge may offer a broader range of food plants and ecological relationships. Osmanthus can nevertheless contribute useful flowers and shelter within a mixed garden planting.
Always check a hedge carefully for nests currently in use before pruning. If an active nest is present, leave the surrounding vegetation undisturbed until it is no longer being used.
Osmanthus care by root type
The Osmanthus hedge range currently consists of pot-grown plants, so there is no need to add bare-root, root-balled or instant-hedging instructions to this guide. Pot-grown plants can be planted over a broad season, but the root ball must be kept moist before planting and monitored closely while new roots establish into the surrounding soil.
Pot-grown Osmanthus
Keep the container watered before planting so the composted root ball does not become dry. Remove the pot immediately before planting and inspect the outer roots. Where roots have begun circling tightly, gently loosen the outermost layer to help them grow into the surrounding ground.
Set the plant at its existing growing depth, water thoroughly and monitor the original root ball carefully during dry weather. In the first months after planting, the surrounding soil can appear moist while the pot-shaped root ball itself has become dry.
Pot-grown Osmanthus can be planted throughout much of the year whenever ground conditions and aftercare are suitable. Autumn and early spring generally require less intensive watering than hot summer planting.
Other root types
Hedging Plants Direct does not currently list bare-root, root-balled or instant Osmanthus in this category. These formats should not be presented as current purchasing options unless the live range changes.
Frequently asked questions about Osmanthus hedging
How far apart should I plant Osmanthus hedge plants?
Our current spacing depends on plant size. Plant pot-grown Osmanthus 40–60cm 3-litre plants at four per metre, approximately 25cm apart. The current 60–80cm and 80–100cm plants are recommended at three per metre, approximately 33cm apart. Measure from the centre of one plant to the centre of the next.
When is the best time to plant an Osmanthus hedge?
Pot-grown Osmanthus can be planted whenever the soil is workable and suitable aftercare is available, but autumn and early spring are usually the easiest periods. Avoid frozen or waterlogged ground and, if planting during warm weather, make sure you can water the new hedge thoroughly throughout dry spells.
How fast does Osmanthus burkwoodii grow?
Osmanthus × burkwoodii is slow growing. Our current product specification gives a typical rate of around 10–20cm per year, although growth varies with establishment, soil, light, moisture and pruning. Newly planted hedges may make less visible top growth while their root systems are establishing.
When should I prune Osmanthus burkwoodii?
Prune Osmanthus × burkwoodii immediately after its spring flowers have finished. It is a slow-growing evergreen, so one light annual shaping trim is often sufficient. Avoid unnecessary hard pruning in late autumn or winter, and always check for active bird nests before hedge cutting.
Can Osmanthus burkwoodii be kept small?
Yes. Although an untrimmed Osmanthus × burkwoodii can eventually become a shrub around 3m tall and wide, it can be maintained considerably smaller with regular light pruning. Trim after flowering and start shaping while the hedge is young rather than waiting until it has become heavily overgrown.
When does Osmanthus burkwoodii flower?
Osmanthus × burkwoodii produces clusters of small, strongly scented white flowers in spring. If you want to retain the best flower display, wait until flowering has finished before carrying out the main hedge trim.
Does Osmanthus prefer sun or shade?
Osmanthus × burkwoodii grows in full sun or partial shade. A bright position generally supports the strongest flowering, but partial shade is also suitable. For hedge planting, good drainage and shelter from severe drying winds are often more important than receiving full sun all day.
What is the best soil for an Osmanthus hedge?
Osmanthus × burkwoodii prefers well-drained soil and is adaptable to chalk, clay, loam and sandy conditions as well as acid, neutral or alkaline soil. The main condition to avoid is prolonged waterlogging around the roots.
Why are my Osmanthus leaves turning yellow?
Start by checking the root-zone moisture. Yellow leaves on Osmanthus can accompany waterlogging, drought or establishment stress, so do not assume the plant needs fertiliser. Check whether the soil is persistently saturated or unusually dry and correct the underlying watering or drainage problem first.
Why are my Osmanthus leaves turning brown?
Brown, crisp Osmanthus leaves are commonly associated with moisture stress, frost or cold drying winds. Wind scorch is often most severe on the exposed side of an evergreen hedge. Keep young plants properly watered, improve shelter where practical and wait for spring growth before removing damaged foliage.
Why is my new Osmanthus hedge not growing?
Osmanthus is naturally slow and a newly planted hedge may concentrate on root establishment before making much visible top growth. Check watering, drainage, planting depth, weed competition and available light. If the plant otherwise looks healthy, slow first-season growth is not necessarily a sign of failure.
How often should I water a new Osmanthus hedge?
There is no useful fixed daily schedule because soil, rainfall and weather vary. Water thoroughly after planting, then check the root zone during dry spells through the first two growing seasons. Water deeply enough to wet the original root ball and surrounding soil, but avoid keeping poorly drained ground permanently saturated.
Does Osmanthus need feeding?
Osmanthus usually needs only modest feeding. In reasonable garden soil, an annual heavy feed is unnecessary. Where fertility is poor or an established hedge lacks vigour, apply a balanced fertiliser in spring at the stated rate. Correct drought, waterlogging or other root problems before using fertiliser.
Is Osmanthus a good privacy hedge?
Osmanthus makes a dense evergreen privacy hedge once established, but it is not a fast-screening species. Choose it when year-round foliage, scented spring flowers and relatively low pruning requirements matter more than reaching maximum height as quickly as possible.
Is Osmanthus good for wildlife?
Osmanthus can contribute scented spring flowers for visiting insects and dense evergreen shelter for garden wildlife. Occasional dark fruits may also form. It is not a native British species, so a native mixed hedge will usually provide a broader range of wildlife relationships where biodiversity is the main objective.